Managing banners |

|

|

|

|
|
Managing banners |

|

|

|

|
|
|
||
This topic will show you how to create and edit banner categories and the difference between global and site-bound categories. You will also learn about the various types of banners and how to create and edit them.
Banners and their categories can be managed in CMS Desk -> Tools -> Banner management
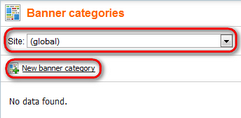
First, you need to choose whether the new category will be site-based or global by selecting an option from the Site drop-down list.

Then, click ![]() New banner category and enter the following values:
New banner category and enter the following values:
•Display name - the name of the banner category displayed in the user interface.
•Code name - the name of the banner category used in code.
•Enabled - indicates if banners from this category will be allowed to be displayed on the live site.
After filling in the required fields, click OK to save the category.
To edit a banner category, first select a site, then click the Edit (![]() ) icon in the list of categories. The category properties can be edited on the General tab.
) icon in the list of categories. The category properties can be edited on the General tab.
To create a new banner, edit a category and on the Banners tab, click ![]() New banner. You will be presented with a form offering a set of banner properties. The following properties are common for all types of banners:
New banner. You will be presented with a form offering a set of banner properties. The following properties are common for all types of banners:
Display name |
The name of the banner displayed to users. |
Code name |
The name of the banner used in code. |
Enabled |
Indicates if the banner will be allowed to be displayed on the live site. |
Valid from |
Time from which the banner will be allowed to be displayed on the live site. |
Valid to |
Time after which the banner will stop being displayed on the live site. |
URL |
URL of the resource you want the banner to link to. |
Open in new window |
Indicates if the banner link will be opened in a new window. |
Weight |
Decimal number that indicates how often the banner will be selected to be displayed on the live site. See the Example for more information. |
You can choose from three banner types via the Banner type drop-down list:
•Plain - the banner will consist of only plain text.
•HTML - you will be able to edit this type of banner using the built-in WYSIWYG editor.
•Image - the banner will have the form of an image which you'll be able to select using the standard Select image dialog.
Additional configuration options are available depending on the selected type of banner:
Banner type |
Configuration options |
Plain |
•Banner content - plain text, which will represent the banner. You can also enter HTML tags. |
HTML |
•Banner content - any HTML content, which can be edited using the WYSIWYG editor. |
Image |
•Banner image - allows you to select an image from the Content tree, a media library, or enter a URL of any image on the web. •Image title - text which will be rendered into the title attribute of the image tag. •Alternative text - text which will be rendered into the alt attribute of the image tag. •Image CSS class - CSS class of the image tag. •Image CSS style - in-line CSS style that will be rendered for the image tag. |
To save the new banner, click OK.
A banner can be edited by clicking the Edit (![]() ) icon in the list of banners under a selected banner category. Besides the properties described in the preceding section, you can view and adjust the following two attributes:
) icon in the list of banners under a selected banner category. Besides the properties described in the preceding section, you can view and adjust the following two attributes:
•Hits left - determines how many times the banner will be displayed on the live site until it is excluded from the list of banners the displaying web part chooses from. You can specify a number and click Add hits to save it, or you can click Unlimited to set the value to infinity.
•Clicks left - determines how many times the banner will be clicked until it is excluded from the list of banners the displaying web part chooses from. You can specify a number and click Add clicks to save it, or you can click Unlimited to set the value to infinity.
For more information about the way banners are displayed and how these attributes influence whether a banner is shown, refer to the Displaying banners section.