|
|

Placing banners on a page |

|

|

|

|
|
Placing banners on a page |
|
|

|
|
|
|
Placing banners on a page |
|
|
|
|
|
Placing banners on a page |
|
|
|
|
|
|
||
In this chapter, you will learn how to display banners on your website. We will show you a complete example how to use the Banner management module and its associated web part to show your visitors the most relevant and up-to-date ads.
The Banner rotator displays banners from a specified category. When placed on a page, it renders the value stored in the Banner content property of the banner, encapsulated in an <a>(anchor) element. You can configure the way the banner is displayed by adjusting the web part's properties:
•Category - allows you to select the category, from which you want to display banners.
•Width - defines the width of the banner. The value will be rendered as an in-line style of the encapsulating anchor.
•Height - defines the height of the banner. The value will be rendered as an in-line style of the encapsulating anchor.
•Anchor CSS class - specifies the CSS class of the anchor element.
•Use friendly link - determines whether the href attribute of the anchor will point to the actual banner URL instead of the default redirection handler.
When a user requests a page that contains the Banner rotator web part, the web part selects a banner from the specified category and displays it.
The following factors are taken into account when selecting a banner:
•The Enabled property of a banner must be true in order for the banner to be selected.
•Current time must be between the Valid from and Valid to properties' values.
•The Hits left attribute must have a value greater that zero.
•The Clicks left attribute must have a value greater than zero.
The most important parameter that plays part in the process of selecting banners is the Weight property. The higher the weight of a banner, the more often that particular banner is selected. The number is decimal, which means you won't have to re-number any banners if you wish to set a banner weight in the middle of two other banner's weights.
This example will show you the whole process of banner management, from creating a banner category and filling it with banners, through displaying the banners on a site, up to decommissioning banners that you don't need any more. The example will use the sample Corporate site.
1. Log in to CMS Desk, switch to the Tools tab and select Banner management.
2. In the Site drop-down list, select Corporate site and click ![]() New banner category.
New banner category.
3. Set the banner category properties as follows:
•Display name: Header banners
•Code name: headerBanners
•Enabled: True
4. Click ![]() New banner.
New banner.
5. Set the new banner's properties as follows:
•Display name: Banner 1
•Code name: banner1
•Enabled: True
•URL: http://www.kentico.com
•Open in new window: True
•Weight: 1
•Banner type: Plain
•Banner content: Any text you like
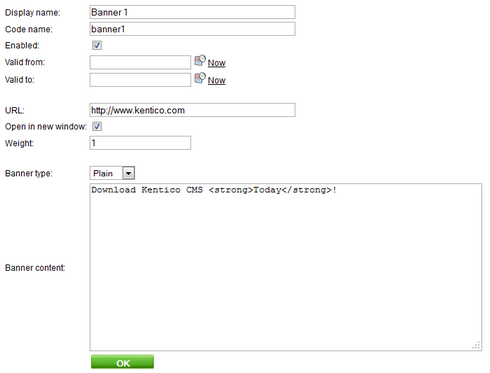
6. Click OK.
7. Return to the list of banners, click ![]() New banner again and set its properties as follows:
New banner again and set its properties as follows:
•Display name: Banner 2
•Code name: banner2
•Enabled: True
•URL: http://devnet.kentico.com
•Open in new window: True
•Weight: 4
•Banner type: HTML
•Banner content: Any HTML content you like
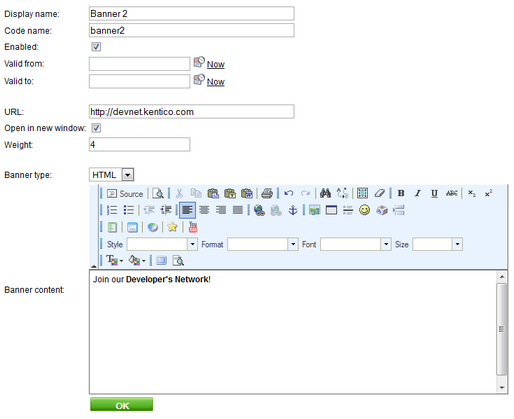
8. Click OK.
9. Return to the list of banners, click ![]() New banner one last time and set its properties as follows:
New banner one last time and set its properties as follows:
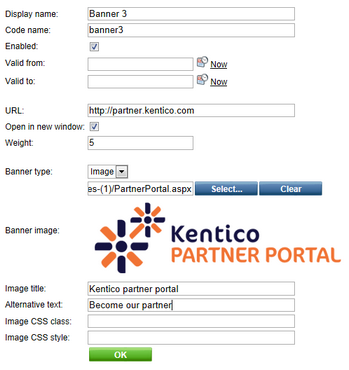
•Display name: Banner 3
•Code name: banner3
•Enabled: True
•URL: http://partner.kentico.com
•Open in new window: False
•Weight: 5
•Banner type: Image
10. Click Select... next to the Banner image property. This will open the Select image dialog.
11. Upload a file of your choice into the Images folder and click Select.
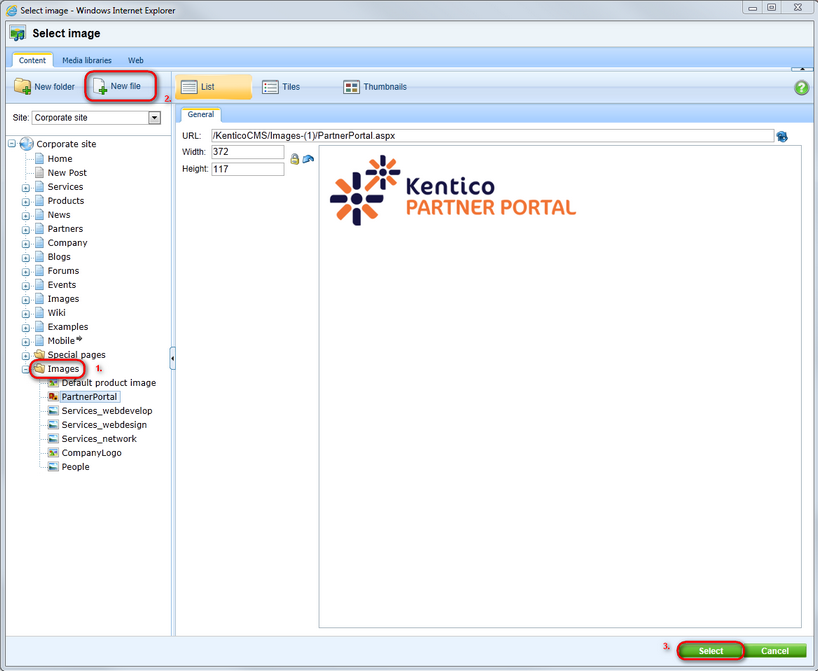
12. Fill in the Image title and Alternative text fields as shown in the screenshot below.
You have created a set of banners that will rotate in the header of the Corporate site. In order to set that up, you will need to place the Banner rotator web part on the Corporate site's master page by adhering to the following steps:
1. Switch to the Content tab.
2. Select the root of the Corporate site and switch to Design tab.
3. Click Add web part (![]() ) in one of the header web part zones.
) in one of the header web part zones.
4. In the Select web part dialog, choose the Banner management -> Banner rotator web part.

5. In the Web part properties dialog, select Corporate site, then the Header banners category created earlier.