CSS for page components |

|

|

|

|
|
CSS for page components |

|

|

|

|
|
|
||
In addition to the main stylesheet objects that can be assigned to sites or individual pages, it is possible to specify CSS styles directly for various types of components that make up the content of pages. This includes the following types of Kentico CMS objects:
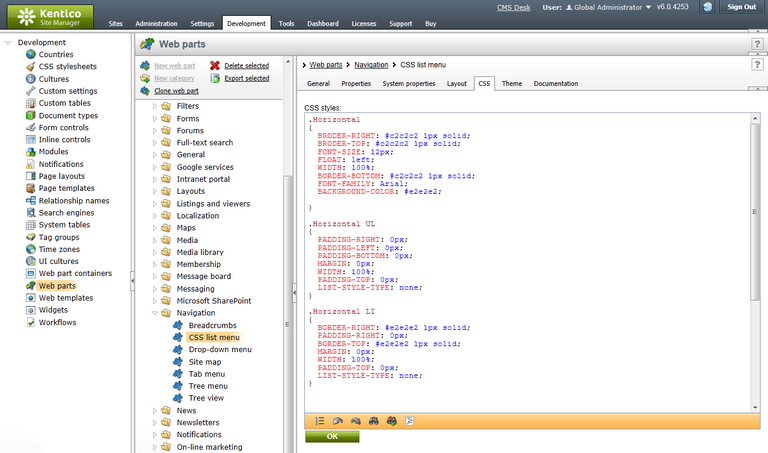
•Web parts - CSS styles can be added to a Web part by editing it in Site Manager -> Development -> Web parts on its CSS tab. These styles will then be requested on pages containing the given web part.

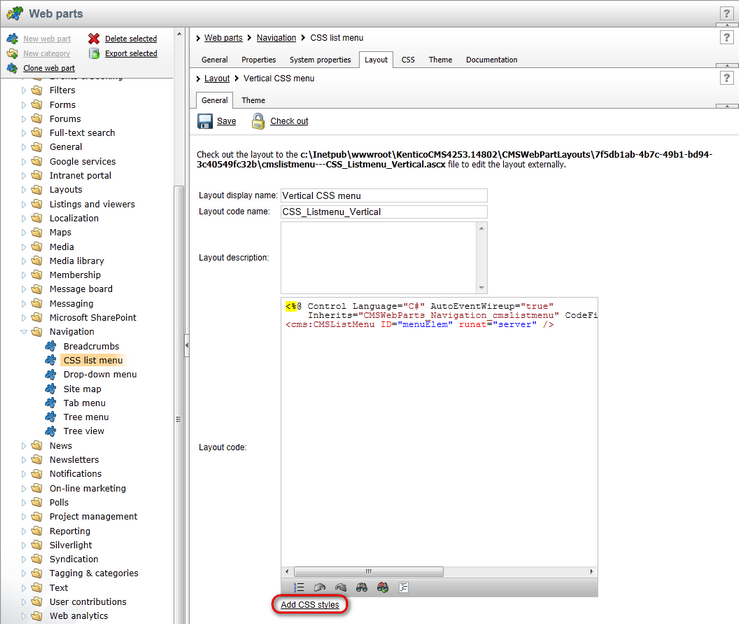
•Web part layouts - to define styles for a specific Web part layout, navigate to the Layout tab of the given web part's configuration interface, edit (![]() ) the layout and click the Add CSS styles link below the layout code editor.
) the layout and click the Add CSS styles link below the layout code editor.

The CSS styles field will be displayed, where you can add any required CSS classes. The styles entered here will only be requested on pages that contain a web part using the specific layout.
•Web part containers - to manage the styles of Web part containers, go to Site Manager -> Development -> Web part containers, edit the given container and click the Add CSS styles link. The entered styles will be loaded by pages where the container is used.
•Transformations - when editing the Transformation of a document type or custom table, you can define its CSS styles by clicking the Add CSS styles link below the transformation code editor. These styles will be requested on pages where the given transformation is used to display data (e.g. through a viewer web part).
•Shared (pre‑defined) page layouts - CSS styles can be added to Page layouts in Site Manager -> Development -> Page layouts, where the Add CSS styles link is available when editing a specific layout. Once the shared layout is assigned to a Page template, the specified styles will be loaded on all pages that use the given template.
•Custom page layouts for specific page templates - in many cases, page templates use a custom page layout that is unique for the given template. To add CSS styles to this type of template, edit it in Site Manager -> Development -> Page templates, switch to its Layout tab and click the Add CSS styles link below the code of the custom layout.
When a page is displayed in a user's browser, the system loads the assigned stylesheet (as described in the Overview topic) and then requests any styles defined for the components used on the given page. The final stylesheet available for the page is a combination of the main stylesheet and all component styles. If any of the components contain an alternative definition for a CSS class that already exists in the main stylesheet, then the component style has a greater priority and overrides the original class.
By defining styles directly for components, you can reduce the size of your site (or page) stylesheets and organize them into more manageable sections. It also means that pages need to load less total CSS data, since each page only has to request styles for those components that are actually used on it. Additionally, the styles of components are automatically exported and imported along with the corresponding objects, which makes it easier to deploy them to websites that use a different stylesheet. The disadvantage of this approach is that at least one additional resource request must be added to pages containing styled components to ensure that all required CSS code is loaded.
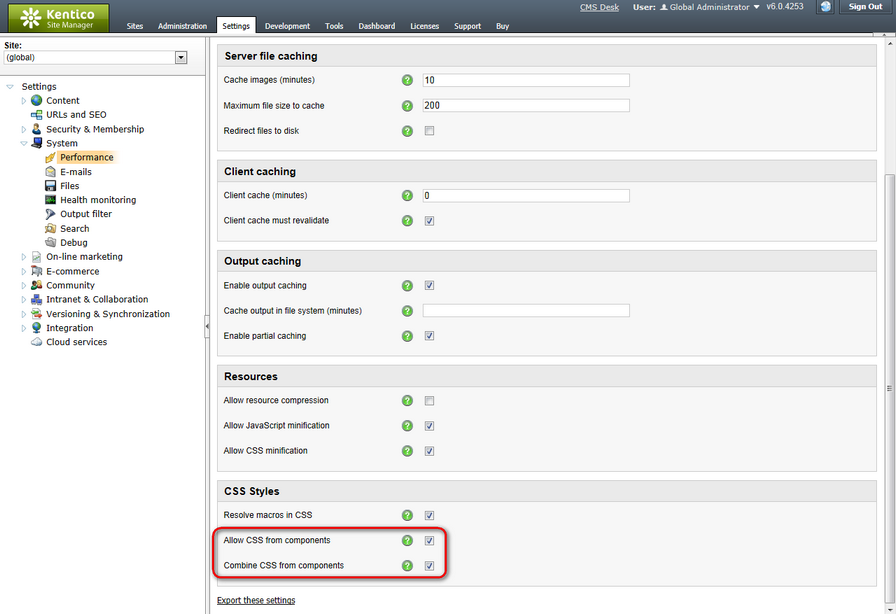
There are two global settings that affect the behaviour of component CSS on all sites in the system. These can be configured in Site Manager -> Settings -> System -> Performance (only available if the (global) option is selected from the Site drop‑down list).

The Allow CSS from components setting indicates if the styles of components should automatically be requested by the pages where they are placed. This is enabled by default. If disabled, it is necessary to either have all styles defined directly in the main stylesheet, or to link the styles of the required components into the stylesheet via CSS macros. Component styles may be linked into other stylesheets using the following expressions, depending on their type:
•{%CSS.WebParts["<web part code name>"]%}
•{%CSS.WebPartLayouts["<web part code name>.<layout code name>"]%}
•{%CSS.Containers["<container code name>"]%}
•{%CSS.Transformations["<full transformation name>"]%} - the transformation name must include the class name of the parent document type or custom table, for example: CMS.News.Preview
•{%CSS.Layouts["<page layout code name>"]%}
•{%CSS.Templates["<page template code name>"]%}
These macros are dynamically resolved into the CSS content defined for the specified component. The Resolve macros in CSS setting must be enabled if you wish to link styles using macros.
|
Style priority
Please note that component styles do not automatically take priority when linked through macros. The styles that are processed last (i.e. those which are "lower" in the code) are applied to the page.
As a result, it is recommended to place the linking macros below all other code in the given stylesheet if you want your components to override the definitions of existing CSS classes. |
If Combine CSS from components is enabled, pages will load the CSS styles of all contained components via a single request. Otherwise, different types of components will each generate a separate request. The styles of multiple components of the same type (e.g. several web parts) are always retrieved by one request. Combining CSS requests may improve the load time of individual pages and is recommended in most cases.