|
|

Creating a dynamic newsletter |

|

|

|

|
|
Creating a dynamic newsletter |
|
|

|
|
|
|
Creating a dynamic newsletter |
|
|
|
|
|
Creating a dynamic newsletter |
|
|
|
|
|
|
||
Dynamic newsletters contain the content of a specified page and they are sent out automatically on a regular basis, using the built-in scheduling system. When the mail‑out of a dynamic newsletter is scheduled, a new scheduled task called Send dynamic newsletter: <newsletter name> is created for the current site, which reads the content of the given page and ensures that the issues are sent out according to the set time interval.
The following steps will guide you through the creation of a dynamic newsletter:
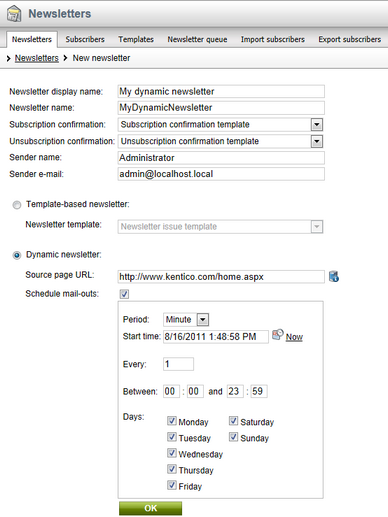
1. Go to CMS Desk -> Tools -> Newsletters and click ![]() New newsletter. Enter the following details:
New newsletter. Enter the following details:
•Newsletter display name: My dynamic newsletter
•Newsletter name: MyDynamicNewsletter
•Subscription confirmation: Subscription confirmation template
•Unsubscription confirmation: Unsubscription confirmation template
•Sender name: Enter your full name
•Sender e-mail: Enter your e-mail address
Choose Dynamic newsletter and enter the following details:
•Source page URL: http://www.kentico.com/home.aspx (this is the URL of the page the newsletter takes its content from)
•Schedule mail-outs: Enabled
•Period: Minute
•Start time: Use the date-time picker to select the current date and time (click ![]() Now)
Now)
•Every: 1 minute
•Between: 00:00 and 23:59
•Days: Check all days
Click OK. The newsletter will be created and you will be redirected to its Configuration tab, where the following additional options can now be set:
•Base URL - here you can specify the base URL of your website, which is used to convert relative links to absolute URLs in newsletter issues. It may be necessary to set this property in order for the unsubscription links to work properly. It's also useful if you encounter any issues with links in newsletter e-mails, e.g. if you're using a different URL for your editing environment than for the live website. Example: https://www.example.com
•Unsubscription page URL - enter ~/SpecialPages/Unsubscribe.aspx. This page on the sample Corporate site contains a Newsletter unsubscription web part, which ensures the required functionality.
•Send draft e-mails to - the addresses specified here are pre‑entered by default when sending draft newsletter issues for testing purposes. Multiple addresses must be separated by semicolons. Draft e-mails are not included in tracking statistics (e-mail opening and link clicking).
•Send issues via e-mail queue - if enabled, newsletter issues will be sent to the SMTP server through the E-mail queue. This is recommended for newsletters with a large number of recipients. If disabled, the issues will be sent directly to the SMTP server.
•On-line marketing - the properties in this section are related to tracking of the newsletter's e-mails and keeping marketing statistics. Please see the On-line marketing topic for further details.
•Subject - sets the subject of the dynamic newsletter e-mails. It can either use the page title of the content, or be entered manually by selecting Use the following subject.
•Double opt-in - the properties in this section are related to double opt-in subscription. Please refer to the Double opt-in topic for more information.
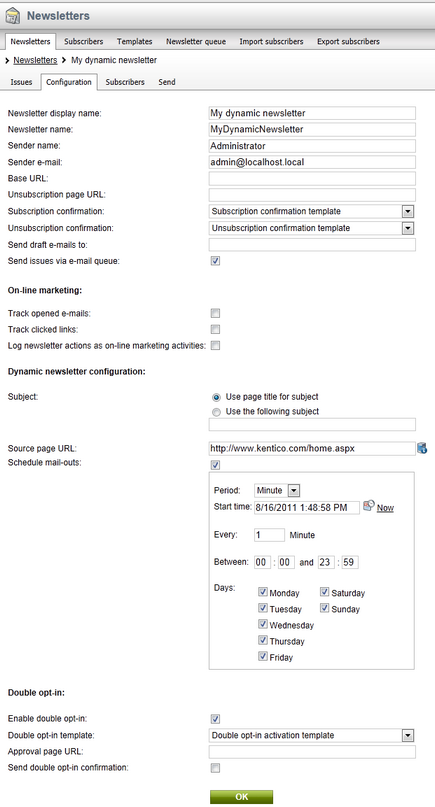
Click OK.
2. Now go to the Subscribers tab of this newsletter and add the subscriber created in the Creating a static newsletter topic to this newsletter by clicking the ![]() Add subscribers link. The following window will appear:
Add subscribers link. The following window will appear:
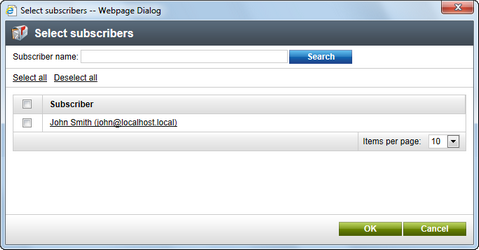
This dialog can be used to select from existing subscribers of all newsletters. Make the selection and click OK. Alternatively, the ![]() Add users,
Add users, ![]() Add roles or
Add roles or ![]() Add contact group links may be used to select from the users, roles or on‑line marketing contact groups defined for the current website.
Add contact group links may be used to select from the users, roles or on‑line marketing contact groups defined for the current website.
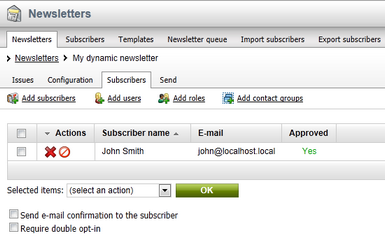
If you add a subscriber with the Send e-mail confirmation to the subscriber box checked, a notification e-mail will be sent to the selected users, informing them about the changes in their subscriptions. If you check the Require double opt-in box (only available if the newsletter has double opt-in enabled), the added subscriptions will be inactive (rejected) until the users confirm them or the Approve (![]() ) action is manually selected in the list of subscriptions.
) action is manually selected in the list of subscriptions.
3. Go to the Issues tab. Here, you will see the list of sent issues. You may need to wait up to 2 minutes until the first issue is sent out. You can refresh the page by clicking the Issues tab again.

4. Check your mail box, you should receive the content of the given page by e-mail:
In this way, you can send out any page from your website. You can create a new page only for newsletter purposes that will display e.g. new articles added to your website during the last month.
|
Dynamic newsletter unsubscription
Because the content of a dynamic newsletter is loaded from a web page, it may be difficult to include a standard unsubscription link. To allow users to easily cancel their subscription, you can instead add the Unsubscription request web part onto the newsletter's source page.
Subscribers will then be able to enter their address and receive a special e-mail with an appropriate unsubscription link. |
If you want to block the mail-out of the page (e.g. if there are no new articles), you can either disable the Schedule mail-outs property of the dynamic newsletter on its Configuration tab or you can set the title of the source page to ##DONOTSEND## and the newsletter will not be sent. The title of a page can easily be changed at CMS Desk -> Content -> Edit -> ... select a page from the content tree ... -> Properties -> Metadata -> Page title.
