|
|

Example: Creating a sample contact |

|

|

|

|
|
Example: Creating a sample contact |
|
|

|
|
|
|
Example: Creating a sample contact |
|
|
|
|
|
Example: Creating a sample contact |
|
|
|
|
|
|
||
Here you will learn how to create a new contact.
A new contact can be created automatically on the live site, e.g. if an anonymous visitor browses the website for some content or if a new user registers there, and manually in the administration interface.
When an anonymous website visitor comes to the website for the first time, a contact is created for them automatically. When the same visitor registers on the live site as a new user, the contact's data is updated according to the registration details and it is associated with the given user account. An example of creating a new contact on the live site can be found in the Activities -> Example topic in the Contact management section of this guide.
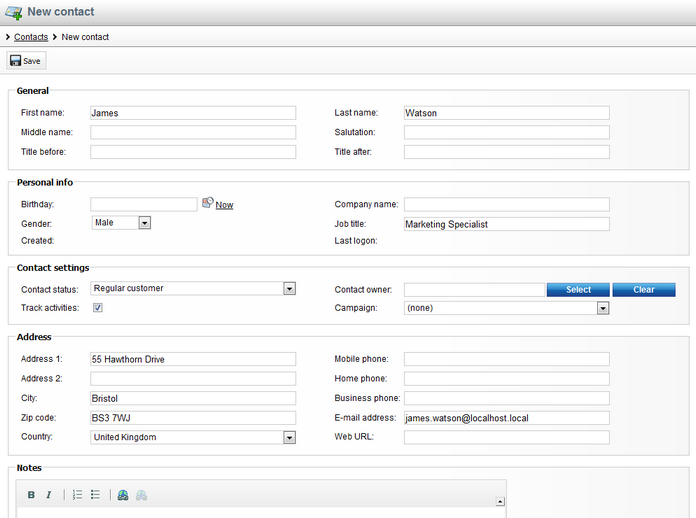
1. Sign in as an administrator, go to CMS Desk -> On-line marketing -> Contacts (alternatively, you can navigate to the Contacts tab in Site Manager -> Tools -> Contact management) and click ![]() New contact.
New contact.

2. In the New contact dialog, enter the following properties:
•First name: James
•Last name: Watson
•Contact status: select a contact status, if no statuses were defined yet, please refer here to see how to do it
•Gender: Male
•Job title: Marketing specialist
•Address 1: 55 Hawthorn Drive
•City: Bristol
•ZIP code: BS3 7WJ
•Country: United Kingdom
•E-mail: james.watson@localhost.local
Once entered, click Save (![]() ) for the contact to be created.
) for the contact to be created.
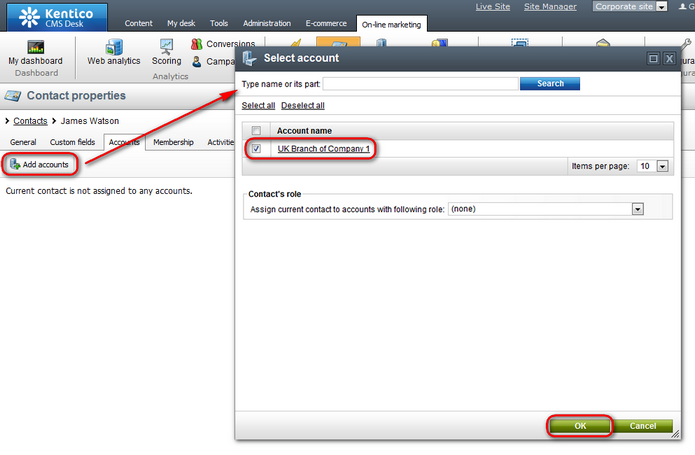
3. Optionally, switch to the Accounts tab, click on ![]() Add accounts and in the Select account dialog select accounts which should be assigned to the contact. Click OK. Please note that at least one account must be defined to be able to perform this step. If no accounts were defined yet, see this topic.
Add accounts and in the Select account dialog select accounts which should be assigned to the contact. Click OK. Please note that at least one account must be defined to be able to perform this step. If no accounts were defined yet, see this topic.
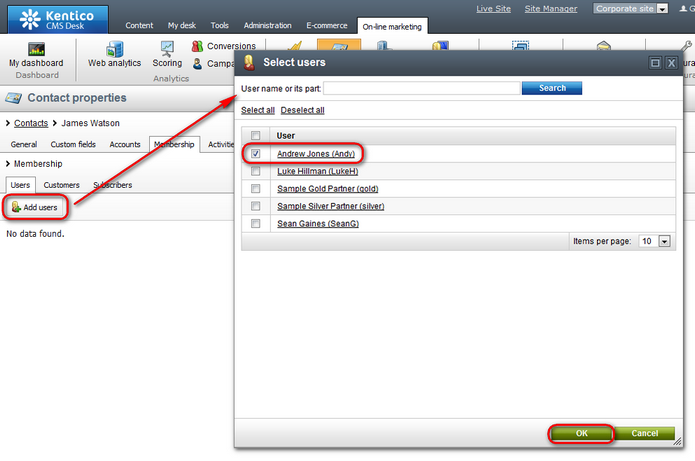
4. Optionally, switch to the Membership tab and on the respective tabs add users, customers or subscribers that should be associated with the new contact.
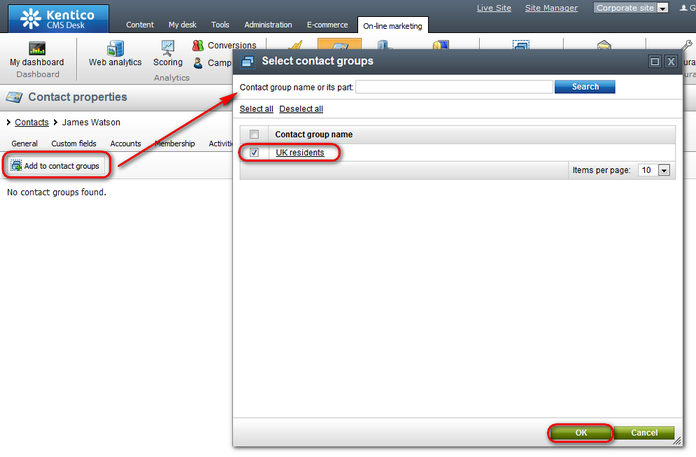
5. Optionally, switch to the Contact groups tab, click on ![]() Add to contact groups and in the Select contact groups dialog select contact groups to which the contact should be added. Click OK. Please note that at least one contact group must be defined to be able to perform this step. If no contact groups were defined yet, see this topic.
Add to contact groups and in the Select contact groups dialog select contact groups to which the contact should be added. Click OK. Please note that at least one contact group must be defined to be able to perform this step. If no contact groups were defined yet, see this topic.
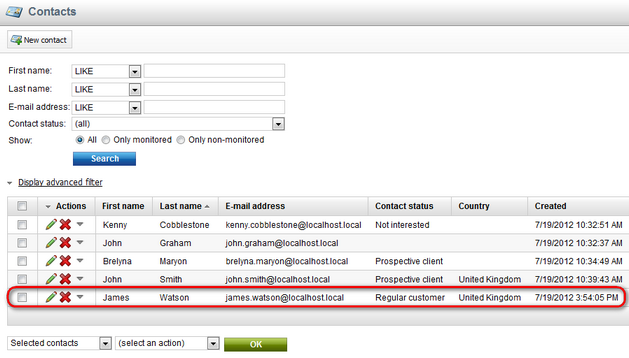
6. If you now view the list of contacts, you can see that the new contact is listed among other contacts.