|
|

Entering macro expressions |

|

|

|

|
|
Entering macro expressions |
|
|

|
|
|
|
Entering macro expressions |
|
|
|
|
|
Entering macro expressions |
|
|
|
|
|
|
||
This topic provides a summary of features that facilitate entering of macro expressions in various parts of the system. These features include:
•Edit value dialog in web part properties
Click the feature name above to get redirected to the section of this page where it is described.
Automatic completion of macro expressions is available when writing macro expressions in:
•E-mail templates
•Transformations
•Web part properties
This feature is similar to IntelliSense in Visual Studio — as you type, a box with methods or properties that begin with the letters you wrote is displayed below the cursor. Only those methods and properties that are relevant in the current context are displayed in the box. The methods and properties are listed in alphabetical order and you can navigate through them using the up and down arrows. Once you select the appropriate one, press Enter or space to insert it into the text.
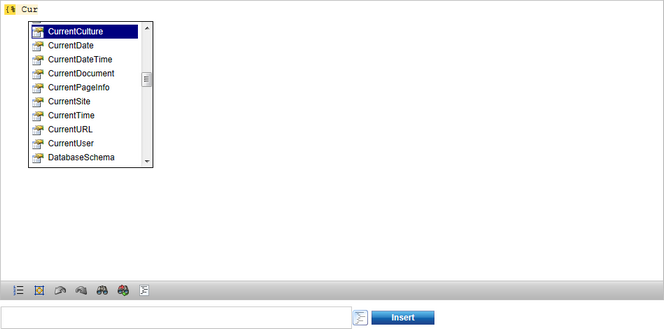
The box with available methods and properties is also displayed when creating further parts of expressions using the dot‑suffix notation.

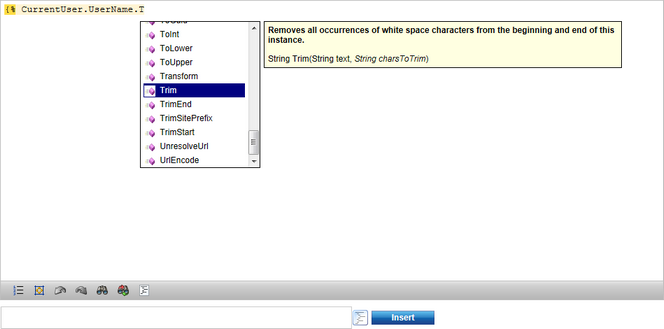
When a method is selected from the drop-down list, its description and signature (containing return type and parameter types) is displayed in a tooltip next to the drop-down list. As some methods are overloaded, i.e. they can accept different numbers of parameters, parameters present in all overloads are displayed in standard letters (as "String text" in the screenshot below), while additional parameters present only in certain overloads are displayed in italic letters (as String charsToTrim in the screenshot below).
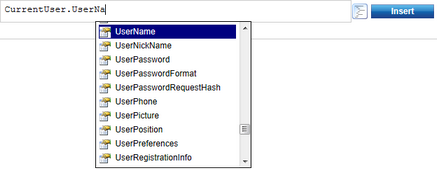
Another feature that makes entering of macro expressions easier is the macro selection control.
![]()
It is present in the following locations:
•Newsletter issues
•Newsletter templates
•E-commerce invoice templates
•E-mail templates
•Web part properties
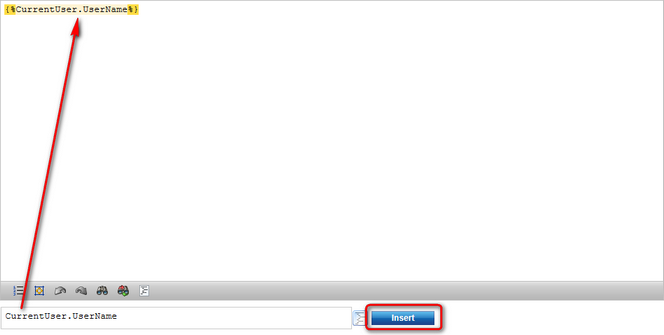
The control can be used two different ways. The first one is simply typing the macro text into the text box, while macro autocompletion is available here as well.
The other option is to select the required macro by clicking the Show/hide macro object tree (![]() ) button. After doing so, an object tree is opened above the text box, letting you select objects or their properties from the current context. By clicking an object or its property, the respective expression is entered into the text box automatically.
) button. After doing so, an object tree is opened above the text box, letting you select objects or their properties from the current context. By clicking an object or its property, the respective expression is entered into the text box automatically.
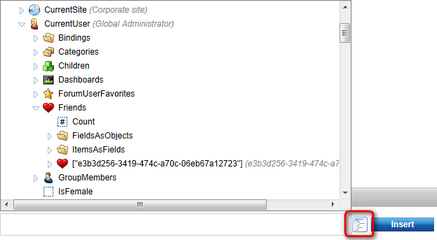
When you finally have the required expression in the text box, click the Insert button to paste it into the current position in the edited text. The expression will be pasted, enclosed within the {%%} data macro parentheses.
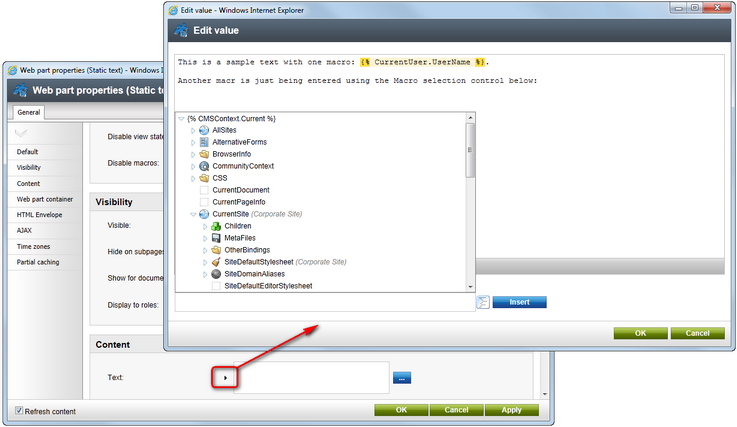
Macro expressions can be used in values of web part properties. Next to all properties, you can find the![]() button highlighted in the screenshot below. If you click it, the Edit value dialog pops up and lets you enter the property value. In the dialog, you can use both macro autocompletion and the macro selection control described above.
button highlighted in the screenshot below. If you click it, the Edit value dialog pops up and lets you enter the property value. In the dialog, you can use both macro autocompletion and the macro selection control described above.
|
SQL injection protection in web part properties
Some web part properties are secured against SQL injection attacks, which may affect how macros are resolved in specific cases. By default, this is applied to macros entered into the WhereCondition and OrderBy web part properties.
If the macro returns a string value that contains single quote characters ('), they will be escaped and replaced by two single quotes (''). This may cause an SQL syntax error if you are using the macro to dynamically insert a part of a query, such as a WHERE clause.
To disable single quote escaping for all properties of a specific web part, edit its code behind file (e.g. ~/CMSWebParts/Viewers/Documents/cmsrepeater.ascx.cs for the Repeater web part) and add the following line of code into the SetupControl() method:
[C#]
The SQLProperties property is inherited from the CMSAbstractWebPart base class by all web parts, but you can override its value to set which properties should be protected.
If you wish to enable SQL escaping for additional web part properties, you can enter their names into the value separated by semicolons, for example:
Please note that disabling SQL protection may create a security vulnerability if the macro resolves its value according to data that can be modified by the website's users, such as in the case of QueryString macros. |
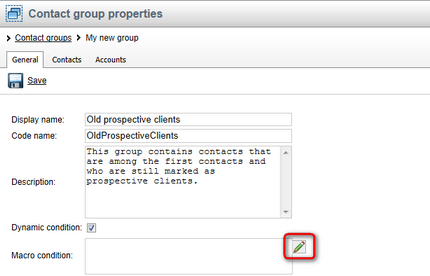
The Macro condition editor facilitates entering of dynamic conditions which depend on current values of specified macros. The control can be currently used when editing definitions of:
•Contact groups
•Web analytics campaigns
It is accessible by clicking the ![]() icon next to the respective condition field.
icon next to the respective condition field.
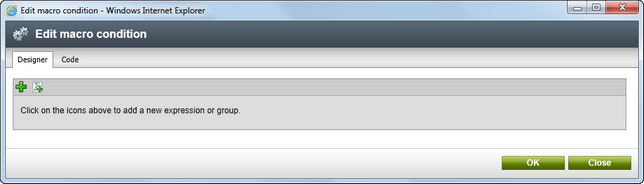
After clicking the icon, the Edit macro condition pop-up window appears. Initially, it looks as in the following screenshot — the editor contains one group where macro expressions or other sub-groups can be added, while the following actions are available in its header:
•![]() Add group - adds a new sub-group into the group.
Add group - adds a new sub-group into the group.
•![]() Add expression - adds a new macro expression into the group.
Add expression - adds a new macro expression into the group.
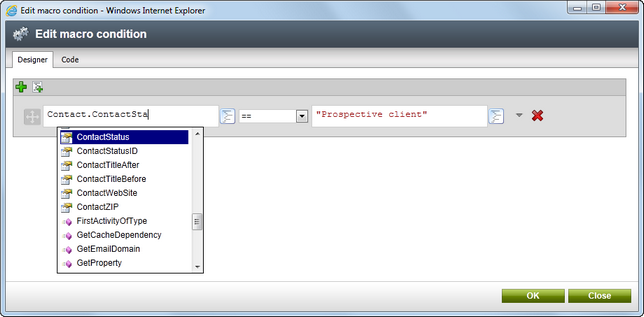
When you insert an expression, a set of two macro selection controls with a relation drop-down list in between them is displayed. Using the macro selection controls, you can either enter a macro expression, or just a simple value. Macro autocompletion and the Show/hide macro object tree (![]() ) button are available for easier macro specification. Using the relation drop-down list, you can specify the relation between the values on the left and on the right:
) button are available for easier macro specification. Using the relation drop-down list, you can specify the relation between the values on the left and on the right:
•== - the values must be equal.
•!= - the values must not be equal.
•> - the left value must be greater than the right value.
•< - the left value must be lesser than the right value.
•>= - the left value must be greater than or equal to the right value.
•<= - the left value must be lesser than or equal to the right value.
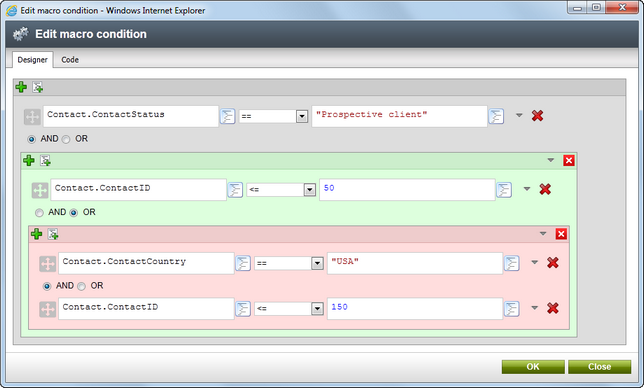
By adding groups, you can specify multiple expressions and combine them using logical conjunction (AND) or logical disjunction (OR). The same can be done with multiple expressions within one group. As a result, you can specify advanced conditions, just as the one displayed in the screenshot below.
Already defined expressions and groups can be removed using the following action icons:
•![]() Remove group - removes the whole group, including all expressions and sub-groups that it contains.
Remove group - removes the whole group, including all expressions and sub-groups that it contains.
•![]() Remove expression - removes the respective macro expression.
Remove expression - removes the respective macro expression.
Individual expressions and groups can also be re-ordered using actions in the context menus accessible by clicking the respective ![]() icons:
icons:
•![]() Move up - moves the macro expression or group up before the one above it.
Move up - moves the macro expression or group up before the one above it.
•![]() Move down - moves the macro expression or group down after the one below it.
Move down - moves the macro expression or group down after the one below it.
•![]() Move to parent - moves the macro expression or group from its current group to the parent group.
Move to parent - moves the macro expression or group from its current group to the parent group.
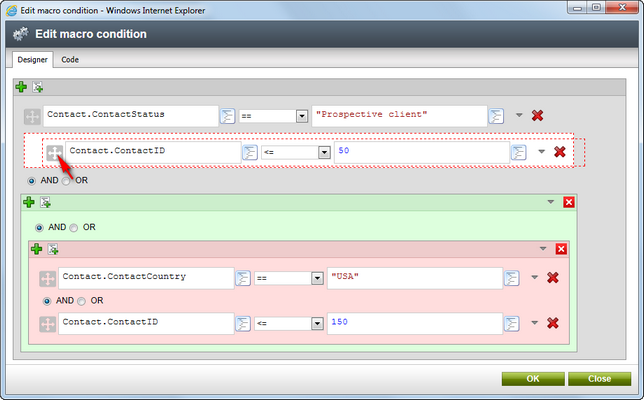
Re-ordering can alternatively be performed by dragging and dropping an expression or group into the desired location. Groups need to be dragged by their header row, expressions need to be dragged by the cross icon on the left.
After switching to the Code tab, you can view the code of the defined macro condition and edit it manually when needed.
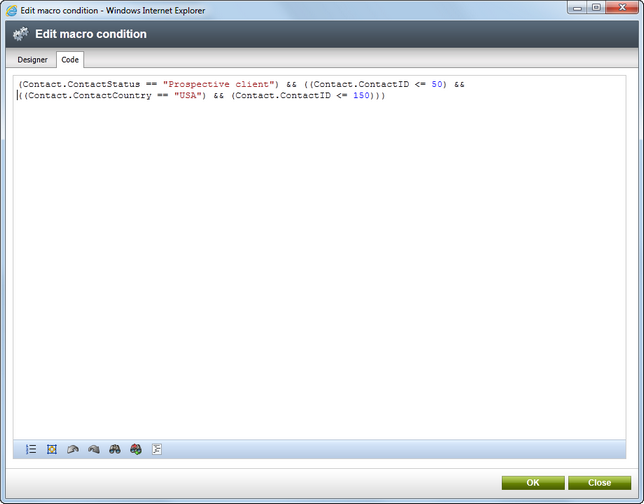
Finally, when you finish specifying the condition on either of the two tabs, click OK to insert the condition into the field.

