|
|

Configuring nested websites |

|

|

|

|
|
Configuring nested websites |
|
|

|
|
|
|
Configuring nested websites |
|
|
|
|
|
Configuring nested websites |
|
|
|
|
|
|
||
In the following example, you will learn how to set up two nested websites. It should be possible to achieve any level of nesting if the following steps are complied with.
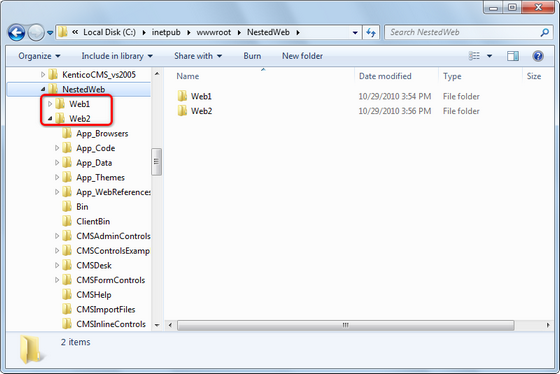
1. Install two projects into two independent, not overlapping folders. Choose folder names that won't be the same as the names in the URL to prevent later colision when seting up the IIS. The installation folders may be for example like this:
•Inetpub/wwwroot/NestedWeb/Web1 (first website from Web installer)
•Inetpub/wwwroot/NestedWeb/Web2 (second website from Web installer)
This means that you have two completely independent projects, as you can see in the screenshot below:
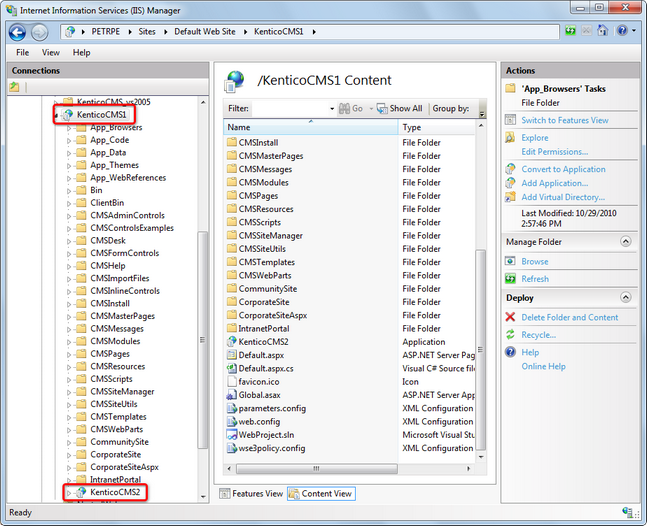
2. Open IIS management console and create two applications under the Default website:
•[Default website]/KenticoCMS1 (pointing to physical directory Web1)
•[Default website]/KenticoCMS1/KenticoCMS2 (child directory pointing to physical directory Web2)
Like this, you have two independent projects configured as nested only in the IIS.
3. The last step is to avoid duplicate module and handler definition keys in the two projects' web.config files. To achieve this, open the nested application's (Web2) web.config file and remove all module and handler definitions from the two sections highlighted in the following code extract.
In case that you needed any additional custom keys in these sections, please ensure that they are not duplicate in the two web.config files, i.e. that they are only added in one of the two files.
<system.webServer> <validation validateIntegratedModeConfiguration="false" /> <modules>
// remove or comment out all keys in this section
</modules> <handlers>
// remove or comment out all keys in this section
</handlers> </system.webServer> |
4. The websites are now accessible via nested URLs as you can see in the screenshot below. The websites can be configured independently without experiencing any issues.

Additional configuration for Staging
You may come to the point where you want to set up Staging from one of these sites to another. Staging has some sections in the web.config that collide. Config files are inherited within the IIS virtual directories structure (even when the projects are not nested on the file system), but you cannot have the same section of web.config twice in the config file.
So if we configure staging from the KenticoCMS1 site to the KenticoCMS1/KenticoCMS2 site (see details on how to configure the staging here), the inner project may have issues with the configuration. You would get an error like this:
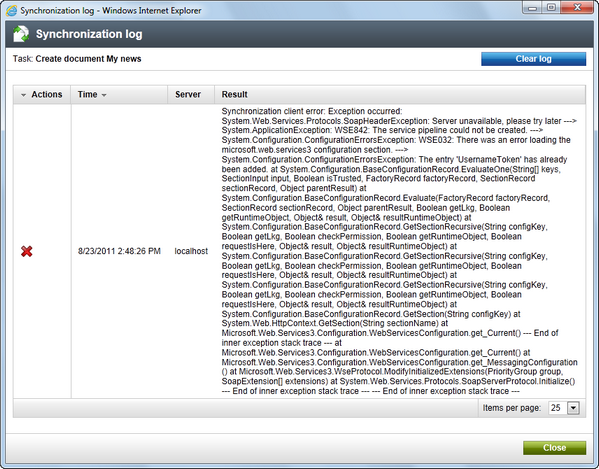
The imporant part of the error message is "The username token has already been added", that means that some of the configuration is duplicate.
User name token authentication is defined in the policy file which is referenced from the <microsoft.web.services3> section, so remove the whole <microsoft.web.services3> section from the web.config of the inner project (Web2). Do not remove it from the Web1 (outer) project since this configuration will be used for both websites. After doing this, Staging should work flawlessly between the sites.