Creating the Members page |

|

|

|

|
|
Creating the Members page |

|

|

|

|
|
|
||
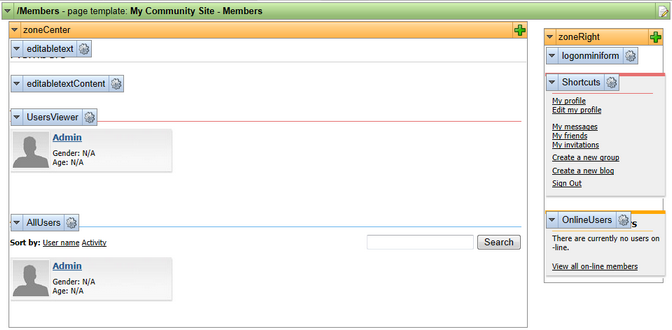
This page will be the title page of the Members section. We will base it on the _StarterTemplate page template created in this chapter. Besides the web parts from this page template, the page will contain two Users viewer web parts in the zoneCenter web part zone. The first one will be displaying the 6 most active users of the site. The second one will be displaying all site users, with the pager enabled and 9 records by page. In zoneRight, there will also be the On-line users web part showing who is currently on-line.
If you right-click a user in of of the Users viewer, you will be offered some actions by a context menu. This functionality is provided in the transformation and here, you can find a description of how exactly it is achieved.
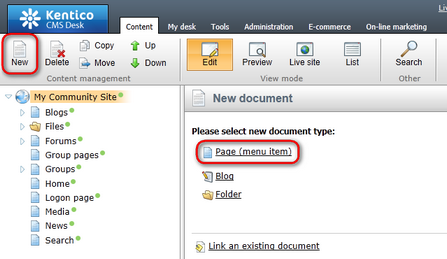
1. Select the root of the content tree and click New. Choose the Page (menu item) document type.
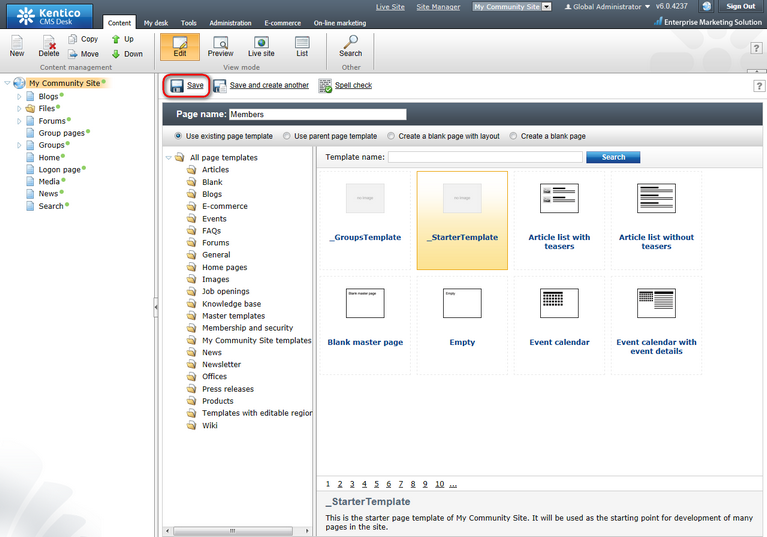
2. Select the My Community Site templates -> _StarterTemplate created in this chapter. Into the Page name field, enter Members and click Save.
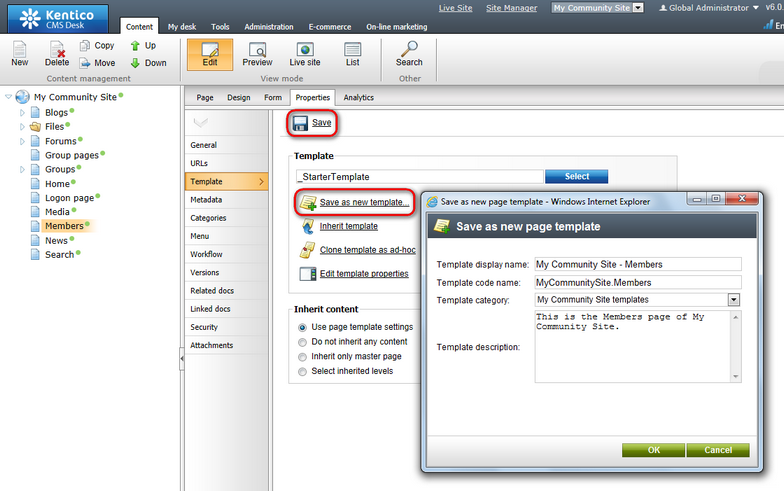
3. Switch to the Properties -> Template tab and click the Save as new template link. Enter the following details in the pop-up dialog:
•Template display name: My Community Site - Members
•Template code name: MyCommunitySite.Members
•Template category: My Community Site templates
•Template description: some text describing the page template
Click OK. Click Save.
4. Switch to the Design tab. Click the Add web part (![]() ) icon of the zoneRight web part zone and choose the Membership -> On-line users web part. Set the following properties of the web part, leave the default values for the rest of them:
) icon of the zoneRight web part zone and choose the Membership -> On-line users web part. Set the following properties of the web part, leave the default values for the rest of them:
•Transformation name: Community.Transformations.MembersOn-line
•Select top N: 20
•Additional info text: {2} member(s) on-line:<br />
•Web part container: Community Site - Orange Box
•Web part container title: On-line members
•Content after: <div><br /><a href="~/Members/On-line.aspx">View all on-line members</a></div>
Click OK.
5. In the zoneCenter web part zone, we will want an info text displayed above the Users viewers. Click the Add web part (![]() ) icon of the zoneCenter web part zone and choose the Text -> Editable text web part. Set the following properties of the web part, leave the default values for the rest of them:
) icon of the zoneCenter web part zone and choose the Text -> Editable text web part. Set the following properties of the web part, leave the default values for the rest of them:
•Web part control ID: editabletextContent
Click OK.
6. Switch to the Page tab. Enter the following texts into the Editable text web parts' text fields:
•Heading: Members
•Content: Bellow you can find list of site members. Right click the user to get available actions.
Click Save.
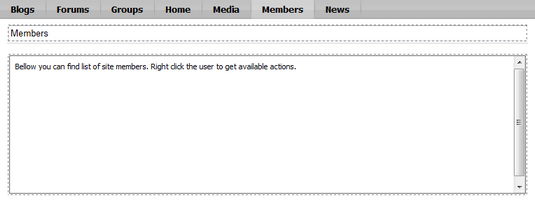
7. Now we will add the first Users viewer which will display the 6 most active users. Switch back to the Design tab. Click the Add web part (![]() ) icon of the zoneCenter web part zone and choose the Membership -> Users viewer web part. Set the following properties of the web part, leave the default values for the rest of them:
) icon of the zoneCenter web part zone and choose the Membership -> Users viewer web part. Set the following properties of the web part, leave the default values for the rest of them:
•Transformation name: Community.Transformations.MembersList
•Show filter: disabled
•ORDER BY condition: UserActivityPoints DESC
•Select Top N members: 6
•Selected columns: UserID,UserNickName,UserGender,UserDateOfBirth,UserAvatarID,UserActivityPoints,UserName,AvatarGuid
•Web part container: Community Site - Red Box Light
•Web part container title: Top members
•Content after: <div class="clear"> </div>
Click OK.
8. The second repeater will display all site members paged by 9. Click the Add web part (![]() ) icon of the zoneCenter web part zone and choose the Membership -> Users viewer web part. Set the following properties of the web part, leave the default values for the rest of them:
) icon of the zoneCenter web part zone and choose the Membership -> Users viewer web part. Set the following properties of the web part, leave the default values for the rest of them:
•Web part control ID: AllUsers
•Transformation name: Community.Transformations.MembersList
•Hide if no record found: disabled
•No record found text: No users found
•Selected columns: UserID,UserNickName,UserGender,UserDateOfBirth,UserAvatarID,UserActivityPoints,UserName,AvatarGuid
•Page size: 9
•Paging mode: PostBack
•Group size: 9
•Use default cache dependencies: enabled
•Web part container: Community Site - Blue Box Light
•Web part container title: All members
•Content after: <div class="clear"> </div>
Click OK.
9. The page is now finished. In Design tab, it should look as in the following screenshot. Obviously, because there are no users on the site yet, only the Administrator is displayed by the viewers. However, you may try creating a few users via the administration interface or registering on-site. You will see the new users listed on this page.
