Creating a sample Media library |

|

|

|

|
|
Creating a sample Media library |

|

|

|

|
|
|
||
In the following example, we will create a sample media library. This media library will be global, which means that all site users and visitors will be able to see its content on the Media page. We we will create the Media page later on in this chapter.
Detailed information about the Media libraries module can be found in Kentico CMS Developer's Guide -> Module Media libraries.
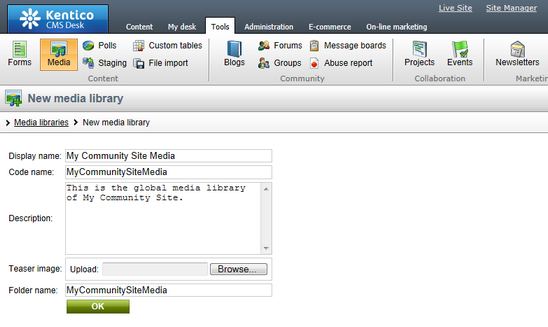
1. Go to CMS Desk -> Tools -> Media libraries and click the New media library link.

2. In the following dialog, enter the details listed below:
•Display name: My Community Site Media
•Code name: MyCommunitySiteMedia
•Description: enter some text describing the media library
•Teaser image: you can leave the field blank
•Folder name: MyCommunitySiteMedia
Click OK.

3. The media library has been created and you are redirected to the library's editing interface. We will define the folder structure first.
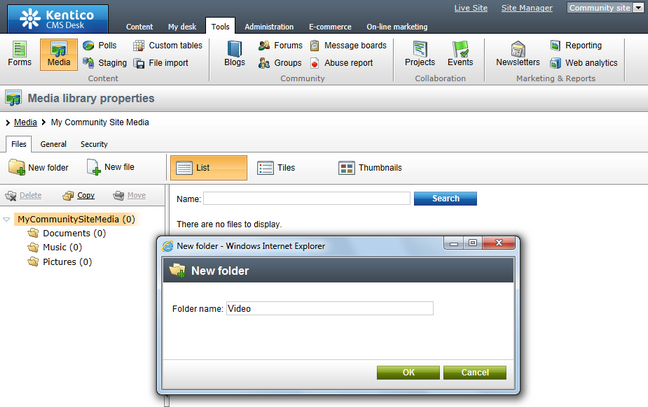
Click the New folder button while the root of the library is selected. Enter the name of the new folder into the Folder name field and click OK.
Repeat the procedure so that you have the following four folders in the root of your library:
•Documents
•Music
•Pictures
•Video

4. Now that we have the folders ready, we can start uploading some files. We will use files from the media_library_files folder inside the files package attached to this guide. The package can be found at http://www.kentico.com/Downloads/CommunityGuide/CommunitySiteGuide_files.zip. Inside the folder, you will find four sub-folders with the same names that you defined in the previous step. Each of the folders contains several files. For the purposes of this example, you don't need to upload them all. Uploading at least one file into each folder will do the job.
There are several ways how you can achieve this. You can find a detailed description of how files can be uploaded into the media libraries in Kentico CMS Developer's Guide -> Module Media libraries -> Uploading files into media libraries.
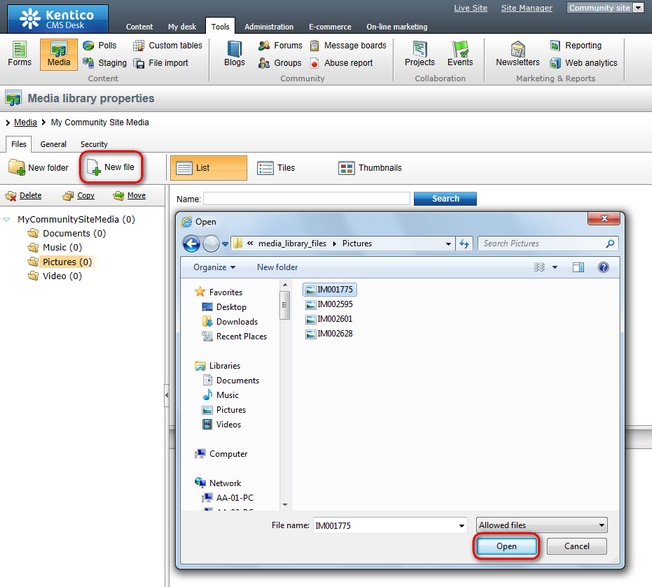
Here, we will describe how you can upload files via the administration interface:
Select the target folder from the tree on the left and click the New file icon at the top right corner of the page. In the pop-up dialog, browse to the folder where your files are stored and click Open.

Repeat the same procedure so that you have at least one file in each of the folders. Once finished, the library is ready to be published on the site.