|
Files and folders management |

|

|

|

|
To manage files stored in a media library, you need to go to CMS Desk -> Tools -> Media libraries and click the Edit (![]() ) icon next to the appropriate media library.
) icon next to the appropriate media library.
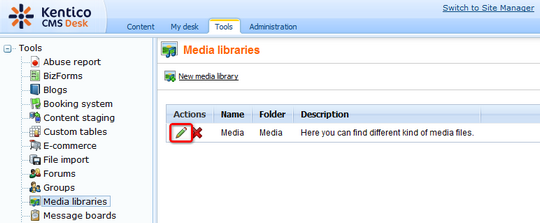
The library editing interface will be displayed on the Files tab where the files can be managed.
Folder operations
The following actions can be performed with the folders in the media library:
| • |
| • |
| • |
| • |
Single file operations
You can perform the following operations by clicking the icons next to particular files:
| • |
| • |
| • |
| • |
| • |
| • |
| • |
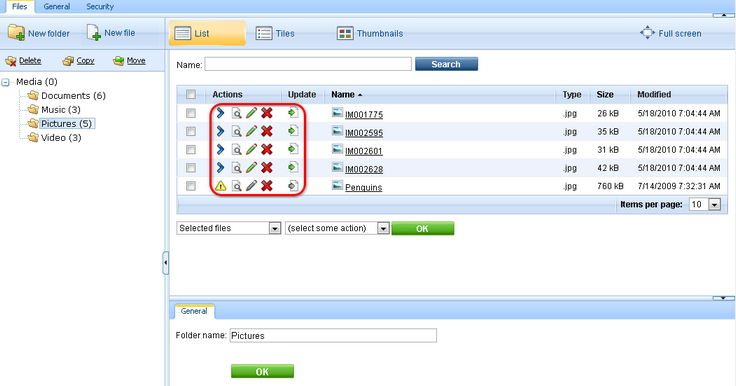
You can also perform the ![]() Copy,
Copy, ![]() Move,
Move, ![]() Delete and
Delete and ![]() Import operations for multiple files at once. To perform a batch operation, take the following steps:
Import operations for multiple files at once. To perform a batch operation, take the following steps:
1. Use the first drop-down list (1. in the screenshot) to select if you want to perform the operation for:
| • | All files - performs the operation for all files in the current folder |
| • | Selected files - performs the operation only for files selected by the check-boxes ( |
2. If you selected Selected files in the previous step, use the check-boxes (2. in the screenshot) to select the files to perform the operation with.
3. Choose the operation to perform using the second drop-down list (3. in the screenshot) and click OK.

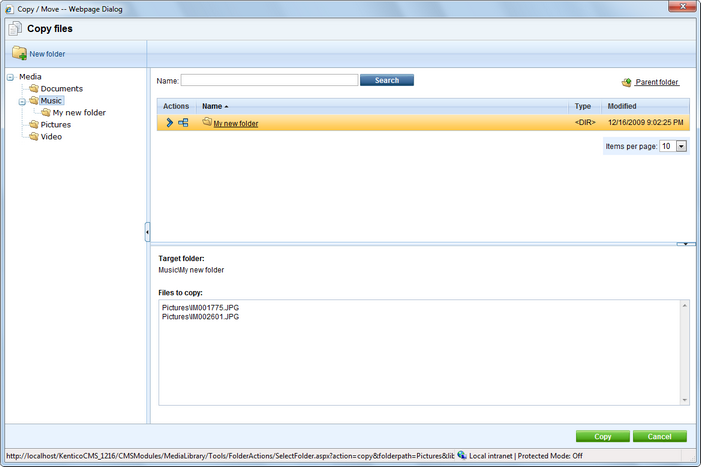
4a. If you are performing the ![]() Copy or
Copy or ![]() Move operation, the following dialog is displayed. Choose the target folder (or create a new one using the
Move operation, the following dialog is displayed. Choose the target folder (or create a new one using the ![]() New folder button if needed) and click the
New folder button if needed) and click the ![]() Copy/
Copy/ ![]() Move button.
Move button.
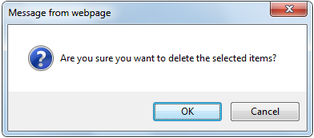
4.b If you are performing the ![]() Delete operation, you will be prompted to confirm the deletion. Click OK to delete the files.
Delete operation, you will be prompted to confirm the deletion. Click OK to delete the files.
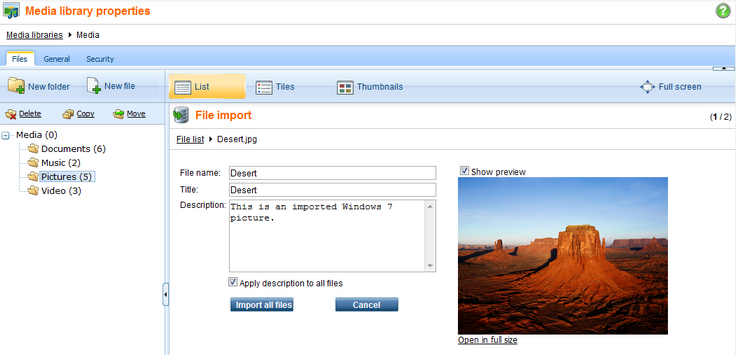
4.c If you are performing a batch ![]() Import operation, the dialog as in the following screenshot will appear for each imported file. You need to specify the following details for each imported file:
Import operation, the dialog as in the following screenshot will appear for each imported file. You need to specify the following details for each imported file:
| • | File name: name of the file displayed in the administration interface |
| • | Title: name of the file displayed on the live site |
| • | Description: text describing the image |
Click the Import file button to proceed to the following file.
You can also enable the Apply description to all files option, which imports all files in one click on the Import all files button. All files will have the entered Description and the File name and Title fields will contain the names of the physical files without extension.
|
Please note
Because of ASP.NET architecture, site restart will occur when:
Because of this, it is highly recommended to allow performing of these actions only to system administrators or to the least possible number of users. The recommended practice is for the site administrators to pre-define the folder structure of the libraries when they are created and not to allow users to further modify it.
|