|
Image editor |

|

|

|

|
|
Image editor |
|
|
|
|
The image editor can be accessed throughout the whole system, everywhere the Edit ( ) icon is available for a listed image, just like:
| • | document's Form tab |
| • | media libraries |
| • | document attachments |
| • | etc. |
The image editor looks as in the following screenshot:
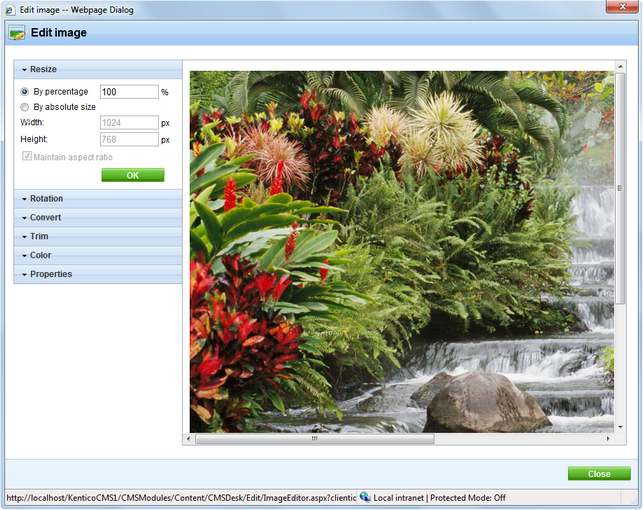
You can see the current appearance of the image on the right, while the following modifications can be done to the image on the particular tabs:
Resize
| • | By percentage - resizes the image to the entered percentage of side size |
| • | By absolute size - resizes the image to the size specified in the Width and Height fields |
| • | Maintain aspect ratio - if enabled, the other dimension is recalculated automatically when one dimension is specified above |
Rotation
| • | Rotate 90° left |
| • | Rotate 90° right |
| • | Flip horizontally |
| • | Flip vertically |
Convert
| • | From - current format of the image |
| • | To - target format of the conversion; .bmp, .gif, .jpg, .png |
| • | Quality - quality of compression; applicable only for .jpg conversion |
Trim
This action reduces the size of the image by removing the borders of the image.
| • | Width - width of the trimmed image |
| • | Height - height of the trimmed image |
Select the position of the trimming area in the original image and click the Trim button.
Color
| • | Convert to grayscale - if clicked, the image is converted from color to greyscale |
Properties
On this tab, you can rename the file using the File name field and you can also see the Extension, Size, Width and Height of the file.
Page url: http://devnet.kentico.com/docs/5_5r2/devguide/index.html?image_editor.htm

