You can display document's unsorted attachments by adding one of the following two controls directly into the transformations:
| • | ~/CMSAdminControls/Attachments/DocumentAttachments.ascx |
| • | ~/CMSAdminControls/Attachments/AttachmentLightboxGallery.ascx |
In the following example, you will learn how to use these controls in transformations. The news in the News section of the sample Corporate Site have some images attached by default. In this example, you have learned how to display these attachments using a web part. Another way of displaying the attachments is by modifying the particular transformation for the document type.
The news are displayed on the News page using a Repeater. Detail view of each news item is displayed using the CMS.News.NewsDetail transformation. We will modify this transformation so that it displays the attachments along with the news summary and text.
1. Go to CMS Desk and select the News page from the content tree. Switch to Design tab and choose to Configure (![]() ) the NewsRepeater web part.
) the NewsRepeater web part.
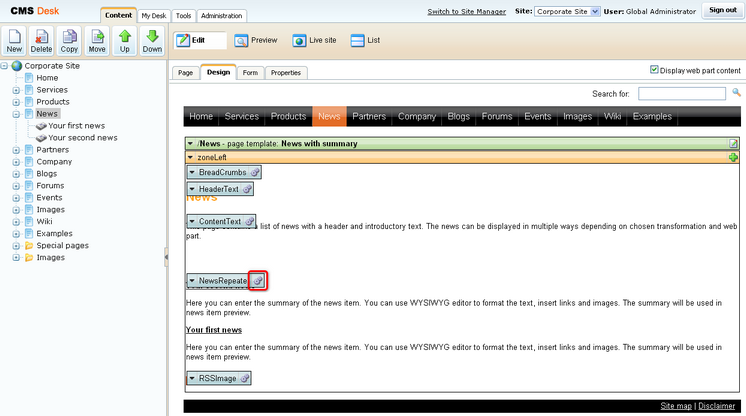
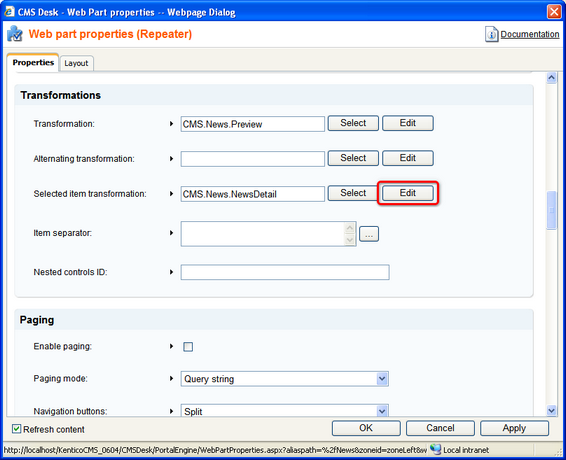
2. In the web part properties window, choose to Edit the Selected item transformation.
3. Replace the original transformation with the following code, which is the original transformation with the highlighted parts added.
<%@ Register Src="~/CMSAdminControls/Attachments/DocumentAttachments.ascx" TagName="DocumentAttachments" TagPrefix="cms" %>
<div class="newsItemDetail"> <h1><%# Eval("NewsTitle") %></h1> <div class="NewsSummary"> <%# IfEmpty(Eval("NewsTeaser"), "", GetImage("NewsTeaser")) %> <div class="NewsContent"> <div class="Date"><%# GetDateTime("NewsReleaseDate", "d") %></div> <%# Eval("NewsSummary") %> </div> <div class="Clearer"> </div> </div> <div class="NewsBody"> <%# Eval("NewsText") %> </div>
<div class="NewsBody"> <cms:DocumentAttachments ID="ucDocAttachments" runat="server" TransformationName="cms.root.attachment" Path='<%# Eval("NodeAliasPath") %>' /> </div>
</div> |
Click Save. Click OK in the web part properties window.
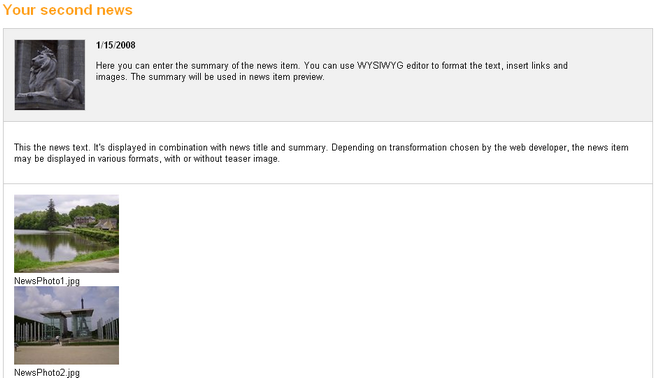
4. If you go to the live site now and view some of the news, you should see the attachments displayed below the news text, just as in the screenshot below.
5. Let's try the other control now. Choose to Configure (![]() ) the NewsRepeater again and choose to Edit its Selected item transformation. Replace the transformation with the code below. Again, it is the original transformation with the highlighted parts added.
) the NewsRepeater again and choose to Edit its Selected item transformation. Replace the transformation with the code below. Again, it is the original transformation with the highlighted parts added.
<%@ Register Src="~/CMSAdminControls/Attachments/AttachmentLightboxGallery.ascx" TagName="AttachmentLightboxGallery" TagPrefix="cms" %>
<div class="newsItemDetail"> <h1><%# Eval("NewsTitle") %></h1> <div class="NewsSummary"> <%# IfEmpty(Eval("NewsTeaser"), "", GetImage("NewsTeaser")) %> <div class="NewsContent"> <div class="Date"><%# GetDateTime("NewsReleaseDate", "d") %></div> <%# Eval("NewsSummary") %> </div> <div class="Clearer"> </div> </div> <div class="NewsBody"> <%# Eval("NewsText") %> </div>
<div class="NewsBody"> <cms:AttachmentLightboxGallery ID="ucDocAttachments" runat="server" TransformationName="cms.root.attachmentLightbox" SelectedItemTransformationName="cms.root.attachmentLightboxDetail" Path='<%# Eval("NodeAliasPath") %>' /> </div>
</div> |
Click Save. Click OK in the web part properties window.
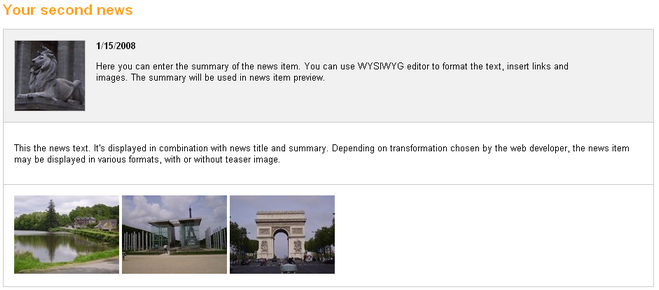
6. If you go to the live site now, you should see the result as in the screenshot below. After clicking one of the images, it will be displayed in the lightbox.
Please note: the appearance shown in this example is based on the controls' default transformations. You can fully customize the appearance by modifying the default transformations or creating your own transformations and specifying them in the TransformationName and SelectedItemTransformationName properties of the controls.