|
|

Services page |

|

|

|

|
|
Services page |
|
|

|
|
|
|
Services page |
|
|
|
|
|
Services page |
|
|
|
|
|
|
||
Now we will add a website section displaying information about services. The page template used for this section will contain a tree menu on the left and a single editable region.
1. Select the root document in the content tree (My website) and click New in the main CMS Desk menu.
2. Choose the Page (menu item) document type.
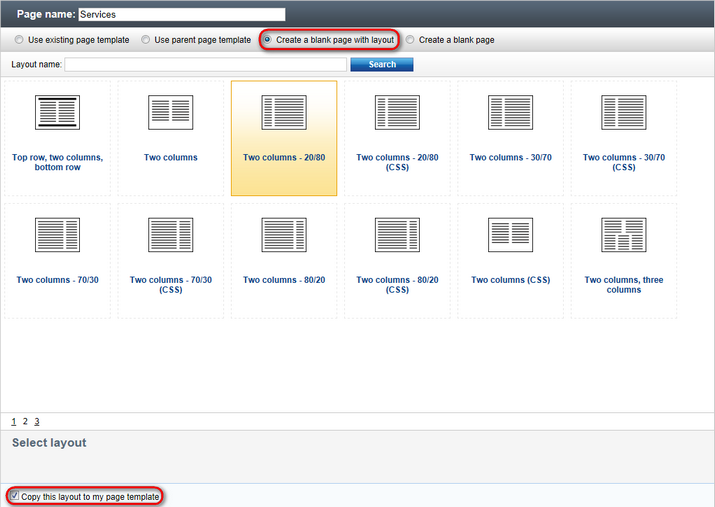
3. Type in Services as the Page name and choose the Create a blank page with layout option. Select the Two columns - 20/80 layout with the Copy this layout to my page template box checked.
4. Click ![]() Save to create the page.
Save to create the page.
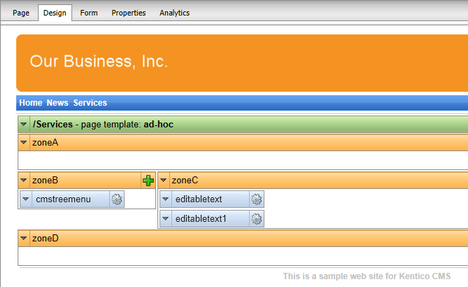
5. Open the Design tab and add the Navigation -> Tree menu web part into the zoneB zone (left zone on the middle row).
6. Set the following properties for the Tree menu web part:
Property |
Value |
Description |
Content -> Path |
/{0}/% |
Configures the tree menu to display documents starting from the second level of the currently selected path. |
Design -> Item image URL |
~/app_themes/mysite/images/bullet.gif |
Sets the path of the image that the menu displays next to items.
The ~ character represents the root of the website. This relative path ensures that the web part displays the images correctly even if the website's virtual directory name changes. |
Design -> Open item image URL |
~/app_themes/mysite/images/bullet.gif |
Specifies the image displayed next to items in the tree menu that belong on the path of the currently selected document. |
7. Add the Text & Images -> Editable text web part into the zoneC zone (right zone on the middle row) and set the following properties:
•Editable region title: Header
•Editable region type: Text box
•Editable region width: 600
•Content before: <h1>
•Content after: </h1>
8. Add another Editable text web part below the first one and set the following properties:
•Editable region title: Main text
•Editable region type: HTML Editor
•Editable region height: 300
The Design tab of the Services page should now look like this:
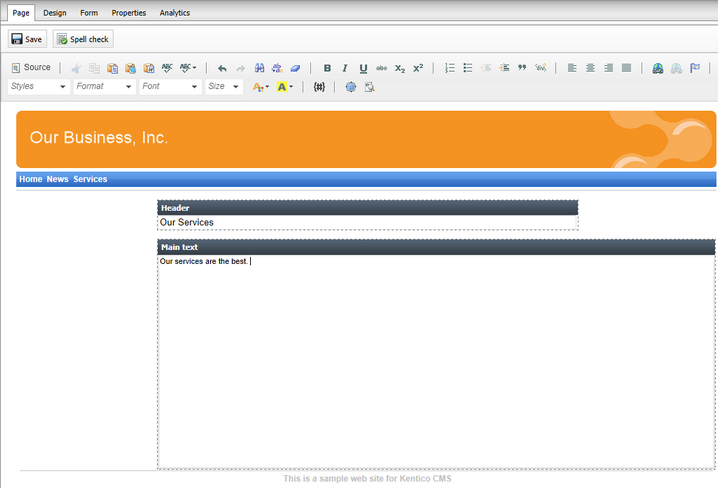
1. Switch to the Page tab of the Services page and type some text into the editable regions.
2. Click ![]() Save.
Save.
Now we will save the current state of the page as a re-usable page template.
1. Go to the Properties -> Template tab of the Services document and click ![]() Save as new page template.
Save as new page template.
2. Fill in the following values for the new template:
•Template display name: Services template
•Template category: General
•Assign to the current document: yes (checked)
3. Click OK.
You can now select the Services template directly when creating new pages.
Now use the Services template to add separate pages containing information about individual services under the Services page.
1. Select the /Services page in the content tree and click New on the main toolbar.
2. Choose the Page (menu item) document type.
3. Type in Service 1 as the Page name and choose the Use existing page template option. Select the General category and the Services template page template.
4. Click ![]() Save.
Save.
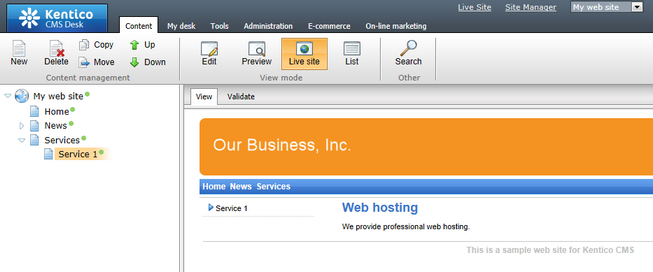
5. Type the following text into the editable regions on the Page tab:
•Header: Web hosting
•Main text: We provide professional web hosting.
6. Click ![]() Save.
Save.
To see how the Service 1 page appears to website visitors, switch to Live site mode.
The Services section demonstrates how to create a new page template from scratch and re-use it for any number of pages. The system stores the text of editable regions separately for every document, so you can enter unique content on each page.