|
|

Installation |

|

|

|

|
|
Installation |
|
|

|
|
|
|
Installation |
|
|
|
|
|
Installation |
|
|
|
|
|
|
||
To get started, you need to have Kentico CMS and the Intranet Portal sample website installed. This topic provides information on how this can be achieved. The topic is divided into two parts, depending on if you already have Kentico CMS installed or not.
Installation of Kentico CMS is fully described in Developer's Guide -> Installation and deployment. The following points sum up which steps need to be taken in order to perform the installation and provide links to the relevant topics in that chapter of the Developer's Guide:
1. Launch KenticoCMS_<version>.exe and follow the instruction in Installation procedure -> Setup (KenticoCMS.exe).
2. Once the setup finishes, launch Kentico CMS Web Installer and follow the instructions in Installation procedure -> Web installer.
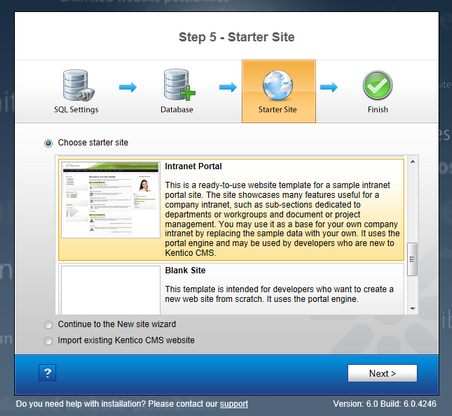
3. When the Web Installer is finished, access the URL of the new website. The first step of the Database Setup will be displayed. Follow the instructions in Installation procedure -> Database setup, until you reach the Starter Site step (the number of the step may vary). In this step, select the Choose starter site option and choose the Intranet Portal sample site. Click Next to continue.
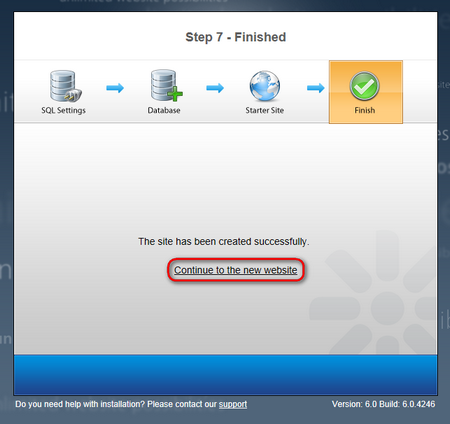
4. Wait until the Database Setup finishes importing the site. Once finished, the Finished step will be displayed. Click the Continue to the new website link highlighted in the screenshot below.
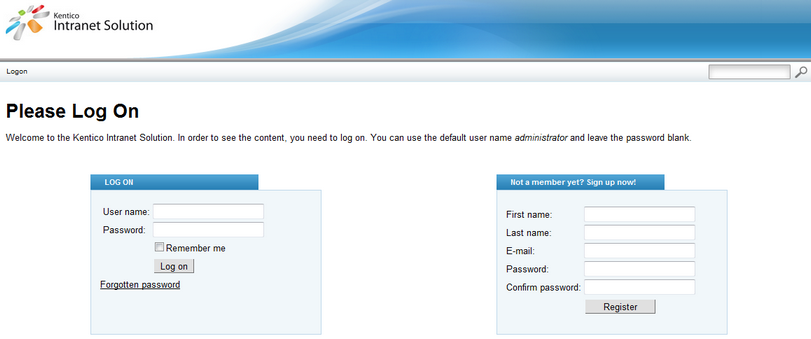
5. You will be redirected to the Logon page of the portal.
If you already have Kentico CMS installed, but without the Intranet Portal website, you can easily add it using the New site wizard.
1. Log on to Site Manager and on the Sites tab, click the ![]() New site wizard link.
New site wizard link.

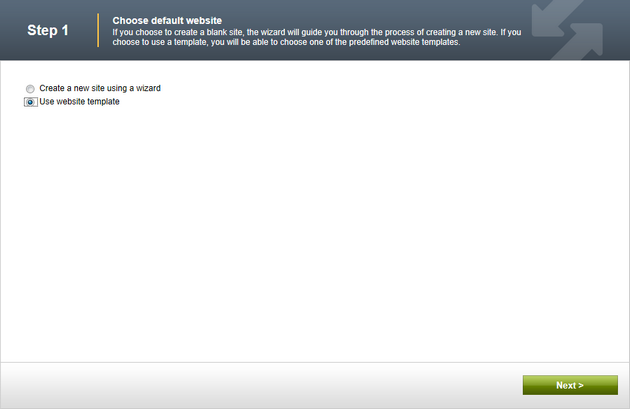
2. In the first step of the wizard, choose the Use web site template option and click Next.
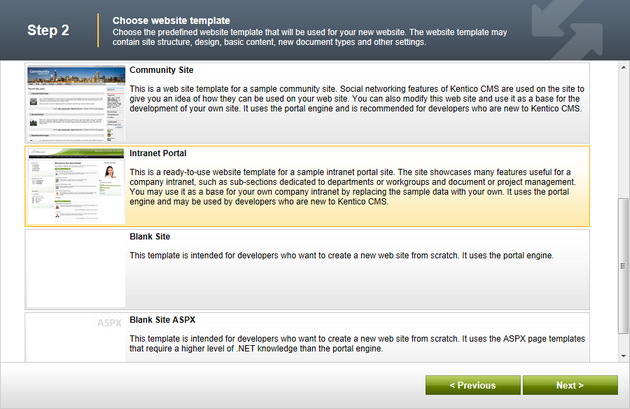
3. In Step 2, choose the Intranet Portal website from the list of available website templates and click Next.
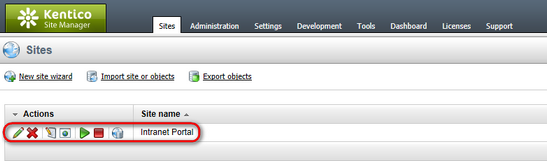
4. Go through the rest of the wizard as described in Developer's Guide -> ... -> New site wizard -> Website template. It is recommended to leave the default settings unless you really need to change them according to your specific requirements. Once the wizard finishes, you should see the website present in the list of websites in Site Manager -> Sites.
5. Sign out of the administration interface (use the Sign out button at the top right corner of the UI). You will be redirected to the Logon page of the portal.