|
|

Creating a connector class |

|

|

|

|
|
Creating a connector class |
|
|

|
|
|
|
Creating a connector class |
|
|
|
|
|
Creating a connector class |
|
|
|
|
|
|
||
A connector can be located either in separate assembly or in App_Code (or Old_App_Code if you installed the project as a web application).
If you decide to create a connector in App_Code (or Old_App_Code), please see the instructions in Enabling the sample integration connector.
If you decide to create a connector in a separate assembly, you need to go through the following steps:
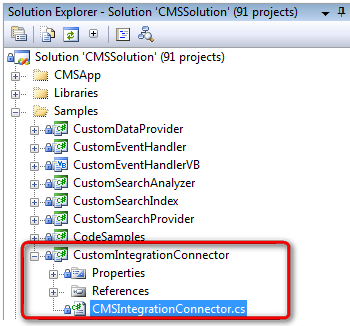
1. Open the Kentico CMS solution in Visual Studio and add new project to it (name it e.g. CustomIntegrationConnector). This will ensure the connector will have its own DLL assembly.
2. It’s necessary to add references to following namespaces:
•CMSSynchronization
•SettingsProvider
•SynchronizationEngine
•DocumentEngine
You will also probably utilize the following namespaces:
•CMSHelper
•DataEngine
•GlobalHelper
•SiteProvider
•WorkflowEngine
3. Add one new class as shown in the figure below. This class has to inherit from BaseIntegrationConnector.
4. Override the Init() method and set the ConnectorName property within this method. The value of the ConnectorName property should be equal to the connector’s code name defined in the user interface. At this point, it is also recommended to register the connector in the Kentico CMS system. Registration of an assembly with a connector class is explained in the Integration bus management UI topic.
5. Build the solution in Visual Studio.
6. Navigate to Site Manager -> Integration bus -> Connectors and verify that the connector has been loaded successfully (no warning icon (![]() ) is displayed next to it).
) is displayed next to it).