|
|

Adding and configuring steps |

|

|

|

|
|
Adding and configuring steps |
|
|

|
|
|
|
Adding and configuring steps |
|
|
|
|
|
Adding and configuring steps |
|
|
|
|
|
|
||
An advanced workflow consists of a set of interconnected steps. The steps represent state of documents under the workflow, allow you to define automatic or user-made decisions and perform scripted actions.
To design an advanced workflow process, use the workflow designer.
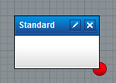
1. Click a step button on the toolbar and hold the mouse button.
2. Drag the step onto the grid.
3. Release the mouse button.
The step appears in the grid as in the following image.
1. Click a step button on the toolbar and hold the mouse button.
2. Drag the step onto an existing connection between two steps.
The connection increases in thickness once it is in the correct position under your mouse pointer.
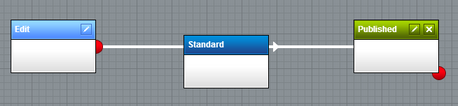
3. Release the mouse button.
The step automatically splits the connection and connects to the steps.
Note that you can only place steps directly from the toolbar to be able to split a connection.
1. Double-click the step name in the graph.
2. Type in a new name.
3. Press Enter to save the new name.
You can change how buttons that enable users to move a document to different steps look. The default text is determined by the type of step that the button sends the document to.
The following image shows the action buttons available when editing a document that is in a User choice step, that has two choices. The first choice sends the document to the Published step, the second sends the document to a standard approval step named "PR Approval".

You can change the text for all steps that require user interaction and for choices, if they are available in the particular step.
1. Edit the step where you want the button to appear differently.
2. If the step you're editing allows defining cases, edit the case that you want to appear differently.
3. Fill one or both the following fields:
•User action text
•User action tooltip
4. Click ![]() Save.
Save.