|
|

Using and configuring web parts |

|

|

|

|
|
Using and configuring web parts |
|
|

|
|
|
|
Using and configuring web parts |
|
|
|
|
|
Using and configuring web parts |
|
|
|
|
|
|
||
Web parts can be used on both portal page templates and ASPX templates. However, with ASPX page templates, you lose the friendly browser‑based interface — the web parts need to be added and configured in Visual Studio just like standard user controls.
This topic describes how you can work with instances of web parts when editing page templates through the portal engine. Please see the Development -> Web parts chapter for detailed information about the management of web part objects and instructions on how to perform various types of development tasks.
Start by opening CMS Desk on the Content tab in Edit mode. Select any page document from the content tree (for example Home) and switch to the Design tab. This tab allows you to view the structure of the page's template in design mode and modify its web part content as needed.
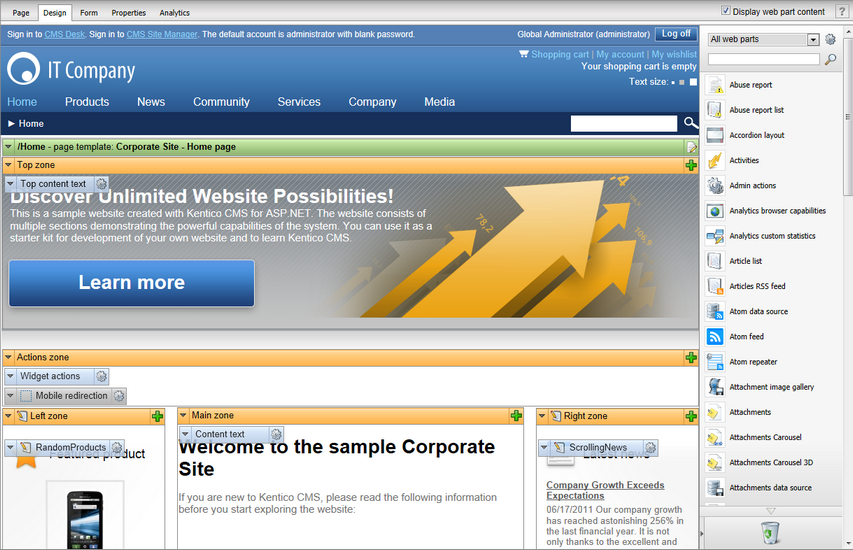
The most direct way to add a new web part to the template is provided by the web part toolbar, which is displayed on the right side of the tab by default. Because there is a large total number of web parts available, you can choose which of them should be listed in the toolbar by selecting an appropriate category from the drop-down list at the top. It is also possible to look up specific web parts by entering their name or its part into the search textbox (![]() ). Once you find the web part that you wish to add, simply drag it from the toolbar and drop it into the desired location in one of the template's web part zones.
). Once you find the web part that you wish to add, simply drag it from the toolbar and drop it into the desired location in one of the template's web part zones.
You can remove existing web part instances from the page template by dragging them into the "trash bin" area (![]() ) of the toolbar.
) of the toolbar.
|
Web part toolbar settings
Each user can configure the toolbar according to their preferences. There are four available positions (all sides of the Design tab) and it can also be completely disabled.
These settings can be accessed directly on the toolbar by clicking the Settings (
If you only need to increase the size of the Design tab workspace temporarily, you can collapse the toolbar by clicking the arrow on the border next to the trash bin area. |
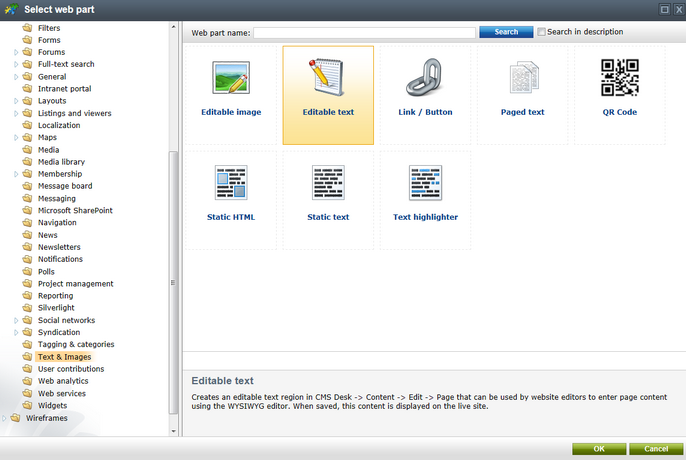
If you do not wish to use the toolbar, you can instead click on the Add web part (![]() ) icon in the top right corner of the zone where you want to insert the web part. This opens the Select web part dialog, which contains a catalog of all available web parts. You can locate a specific web part by browsing through the category tree and then confirm your selection by clicking OK.
) icon in the top right corner of the zone where you want to insert the web part. This opens the Select web part dialog, which contains a catalog of all available web parts. You can locate a specific web part by browsing through the category tree and then confirm your selection by clicking OK.
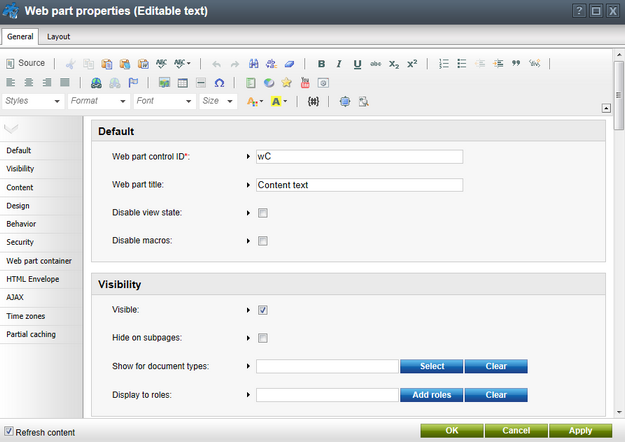
When a new web part instance is added into a zone, using either the toolbar or the zone action buttons, the Web part properties dialog will be opened (unless the given web part is configured to skip it). Here you can set up and fine tune the behavior of the web part by entering appropriate values for its properties.
The same configuration dialog can be opened for existing web part instances at any time by clicking the Configure (![]() ) button in their header on the Design tab. You can also use the drag-and-drop functionality to relocate web parts to different positions or other zones.
) button in their header on the Design tab. You can also use the drag-and-drop functionality to relocate web parts to different positions or other zones.
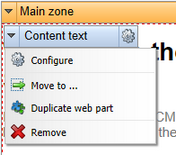
Additionally, every web part has a context menu that can be opened by right clicking on its header or using the arrow icon (![]() ). The actions in this menu provide an alternative way to perform common tasks.
). The actions in this menu provide an alternative way to perform common tasks.
A similar menu is also available for entire web part zones. This allows you to configure the zone's properties or carry out mass actions for all contained web parts.
All web part modifications are applied immediately and reflected on the live site. Page templates are not connected to workflow, but it is possible to use object versioning to keep track of the changes made to a template, including its web part content (and roll back to previous versions if necessary). Please read the Development -> Object versioning chapter to learn more.
|
Impacts of modifying page templates
When you edit a re-usable page template that is shared by several pages, the changes will affect all of the pages.
If you wish to modify the design of a single page only, you need to clone its template as an ad-hoc template or as a new page template. See the Cloning and modifying a page template topic to learn more. |
Even though On-site editing is primarily intended for modifying basic page content and managing documents, users with design permissions may also use it to configure the properties of web parts directly while browsing the website.
When in on-site editing mode, you can highlight individual web parts simply by moving the mouse over the corresponding part of the page. Highlighted web parts are enclosed in a dotted outline, with an additional box displaying their title. The configure (![]() ) action next to the web part title may be used to open the same web part properties dialog as the one on the Design tab of CMS Desk.
) action next to the web part title may be used to open the same web part properties dialog as the one on the Design tab of CMS Desk.
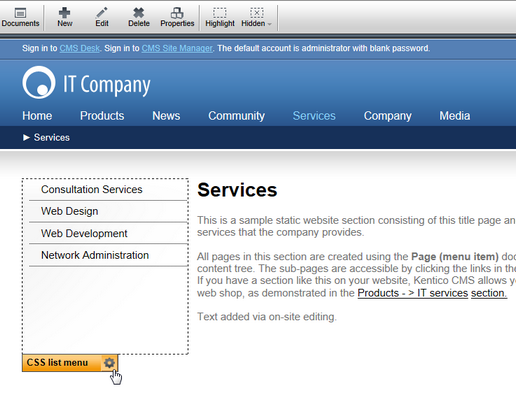
If you wish to view the entire web part structure of a page, you can enable the Highlight action on the on-site editing toolbar. This highlights all web parts placed on the given page.
Some web parts may not have any visible output in the current state of the viewed page. For example, a paging web part would only be shown if the connected listing contains a sufficiently large number of items. You will not be able to find such web parts directly on the page. However, their properties can still be accessed by clicking the Hidden button on the toolbar and configuring (![]() ) the appropriate item in the displayed drop-down.
) the appropriate item in the displayed drop-down.
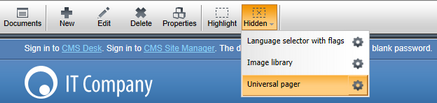
Please note that the Hidden list only includes web parts that have the potential to affect the appearance of the page. Instances of invisible web parts that only perform background functionality must be configured in CMS Desk.
|
Please note
Because of master pages and visual inheritance, the content displayed on the website may often be loaded from several different page templates that are nested into each other.
On-site editing mode does not differentiate between templates, so it is possible to configure any web parts displayed on the current page, even those that actually belong to parent documents. |
