On-line users tab |

|

|

|

|
|
On-line users tab |

|

|

|

|
|
|
||
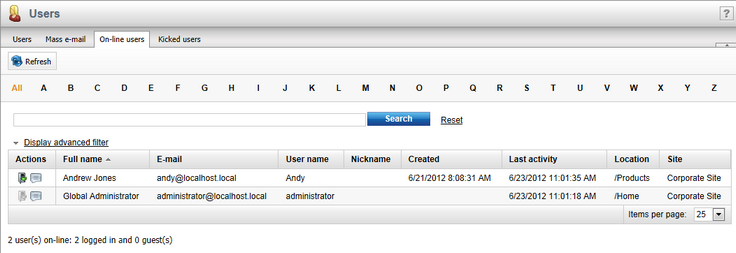
If you go to Site Manager/CMS Desk -> Administration -> Users and switch to the On-line users tab, you can see a list of all users that are currently accessing the website. By clicking one of the letters at the top of the page, you can view only those users whose user names begin with the selected letter.
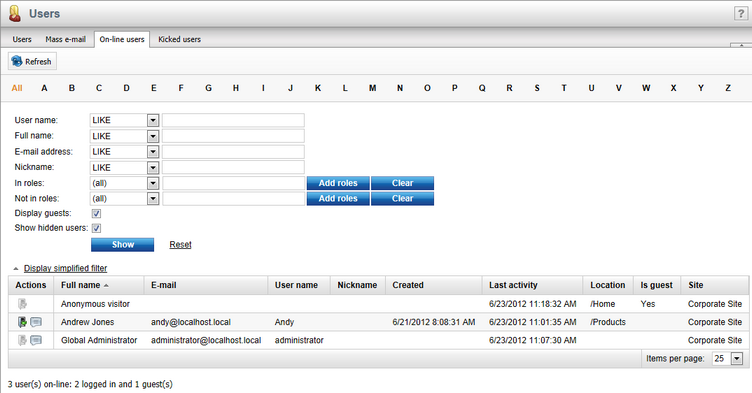
Below the letters, you can find a filter. This filter can further limit displayed users according to the specified criteria. The filter can work in two modes between which you can switch by clicking the Display advanced filter or Display simplified filter links respectively.
This option offers only one field. Enter an expression into the field to find users according to their User Name, Full Name, E-mail Address or Nickname.

The advanced filter offers searching for users based on specific User Name, Full Name, E-mail Address or Nickname values.
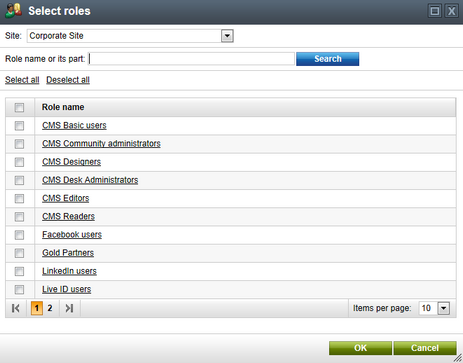
You can also filter on-line users by the roles to which they belong. To specify roles into either the In roles or Not in roles fields, use the Add roles button to open the role selection dialog. Click OK to confirm the selection.

If you have selected more than one user role, you can also select if the displayed users should (not) be members of All or Any of the selected roles.
The Display guests option indicates whether individual visitors who are not logged in should be displayed. This is only possible if the on-line user data is stored in the database. If Contact management is being used on the website, the system also provides the names and e-mail addresses of guests based on the available contact data.
The Show hidden users checkbox determines whether the list should include users who are flagged as hidden (e.g. administrators or other internal user accounts).
When you have entered all filtering data, click the Show button. Only those users that match the specified criteria are listed.

You can kick users off the website by clicking the Kick (![]() ) action next to one of the listed users. This means that the user is logged out of the website and will not be able to log back in for the duration specified in the Site Manager -> Settings -> Security & Membership -> Deny login interval setting.
) action next to one of the listed users. This means that the user is logged out of the website and will not be able to log back in for the duration specified in the Site Manager -> Settings -> Security & Membership -> Deny login interval setting.

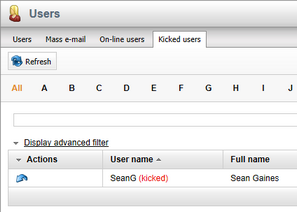
After doing so, a (kicked) label is added in red letters after the given user's name. When the on-line user data is being stored in the database, you can view all users who are currently kicked on the Kicked users tab. Otherwise the kicked users are included in the main list of on-line users.
To revoke a kick, click the Take back (![]() ) action.
) action.

If the reason for kicking a user is serious enough, you may want to consider using the Banned IPs module to permanently block the user from accessing the website.
Clicking the ![]() Initiate chat action next to an on-line user allows you to directly communicate with the given person through a chat window. To work correctly, support chat must be enabled for the website and the page that the user is currently viewing needs to contain the the Initiated chat web part. Please see the Modules -> Chat -> Support chat chapter for more information.
Initiate chat action next to an on-line user allows you to directly communicate with the given person through a chat window. To work correctly, support chat must be enabled for the website and the page that the user is currently viewing needs to contain the the Initiated chat web part. Please see the Modules -> Chat -> Support chat chapter for more information.