Adding custom settings |

|

|

|

|
|
Adding custom settings |

|

|

|

|
|
|
||
Here you will learn how to add your own settings to a website. Please note that you first need to create a category with a group within where a settings key can be put.
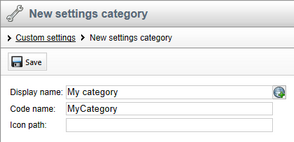
If you need to create a new category, go to Site Manager -> Development -> Custom settings, click ![]() New category, enter category properties and click
New category, enter category properties and click ![]() Save.
Save.
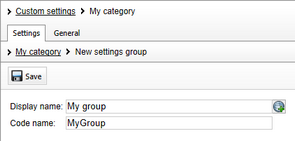
If you need to create a new group, in the Custom settings categories tree, select a category and on its Settings tab click ![]() New settings group. Enter group properties and click
New settings group. Enter group properties and click ![]() Save.
Save.
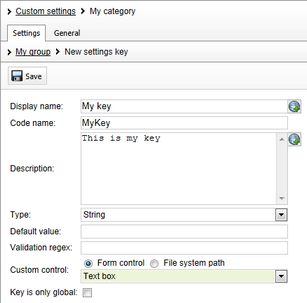
On the Settings tab of the selected category click ![]() New settings key beside the group where you would like to add the particular key. Enter key properties and click
New settings key beside the group where you would like to add the particular key. Enter key properties and click ![]() Save. For more information on these properties, please refer to the Managing custom settings topic.
Save. For more information on these properties, please refer to the Managing custom settings topic.
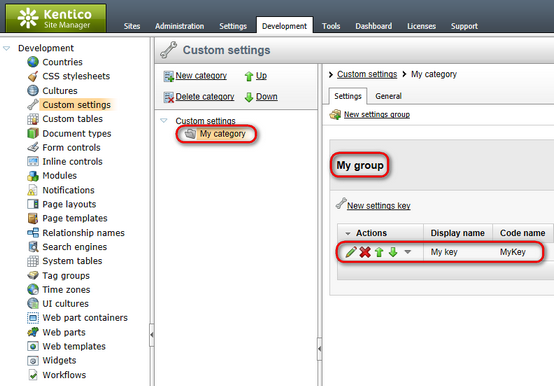
The following screenshots show the result of adding a custom category, group and key:
1. In Site Manager -> Development -> Custom settings.
If you would like to learn more about custom settings management, please refer to the Managing custom settings topic.
2. In Site Manager -> Settings.
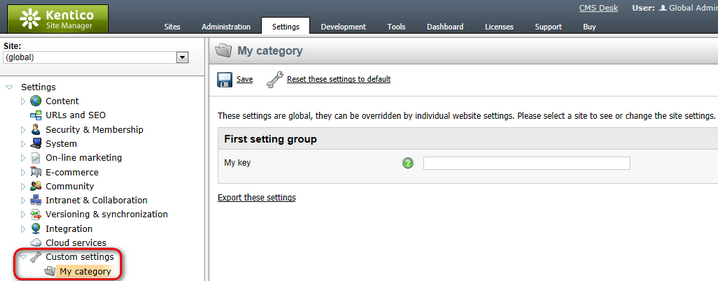
If you would like to learn how you can configure your custom settings, please refer to the Configuring settings topic.
|
Please note
All custom settings added according to the description given in this topic can be configured along with the built-in settings in Site Manager -> Settings; if you would like to learn how to do it, please refer to the Configuring settings topic. By default, there are no custom settings available after installation.
|