|
|

Creating the Invitation acceptation page |

|

|

|

|
|
Creating the Invitation acceptation page |
|
|

|
|
|
|
Creating the Invitation acceptation page |
|
|
|
|
|
Creating the Invitation acceptation page |
|
|
|
|
|
|
||
This special page is related to Kentico CMS Groups module. Members of a group can send e-mail invitations to join the group. In the e-mail, there is a link leading to this page with the invitation GUID in query string parameter. When a user clicks the link, they will be redirected to this page where the Group invitation web part handles the invitation and makes the user a member of the group.
In order to for the page to be functional, you need to set its alias path in Site Manager -> Settings -> Community -> Invitation acceptation path, as described in this chapter.
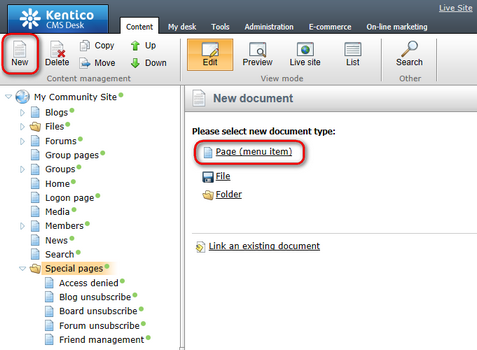
1. Select the Special pages folder in the content tree and click New. Choose the Page (menu item) document type.
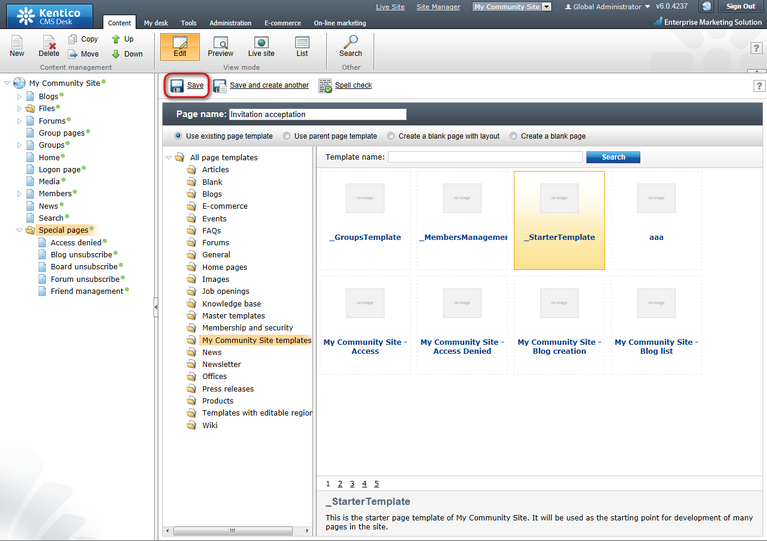
2. Select the My Community Site templates -> _StarterTemplate created in this chapter. Into the Page name field, enter Invitation acceptation and click Save.
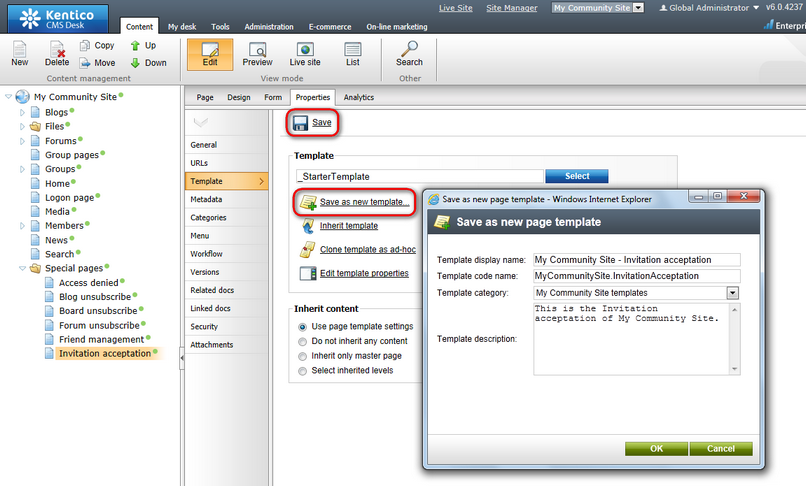
3. Switch to the Properties -> Template tab and click the Save as new template link. Enter the following details in the pop-up dialog:
•Template display name: My Community Site - Invitation acceptation
•Template code name: MyCommunitySite.InvitationAcceptation
•Template category: My Community Site templates
•Template description: some text describing the page template
Click OK. Click Save.
4. Click Edit template properties and change the Inherit content property to Select inherited levels, while only Level0 should be selected. Click Save to save the changes.

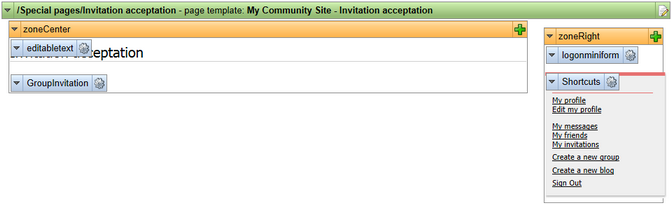
5. Switch to the Page tab and enter Invitation acceptation into the Editable text web part's text box. Click Save.

6. Switch to the Design tab. Click the Add web part (![]() ) icon of the zoneCenter web part zone and choose the Community -> Group invitation web part. Set the following properties of the web part, leave the default values for the rest of them:
) icon of the zoneCenter web part zone and choose the Community -> Group invitation web part. Set the following properties of the web part, leave the default values for the rest of them:
•Content before: <h3>
•Content after: </h3><br /><br />
Click OK. The page is now finished and ready to handle the invitations.