|
|

Database setup |

|

|

|

|
|
Database setup |
|
|

|
|
|
|
Database setup |
|
|
|
|
|
Database setup |
|
|
|
|
|
|
||
A Kentico CMS website deployed to Windows Azure can use any type of SQL database, either hosted on a standard SQL Server or in the cloud. This topic describes how the database installation can be performed on an SQL Azure server, which is the database service of the Windows Azure platform.
|
Accessing the Management Portal
This chapter describes the old version of the Windows Azure Management Portal. To access the old portal from the new portal, click your account name in the top right corner of the new portal and click Previous portal.
|
You can view and manage your SQL Azure database servers through the Windows Azure Management Portal (https://windows.azure.com/) by clicking Database in the main navigation menu. If you do not have a server yet, click the Create button in the Server section of the ribbon menu at the top of the page, then select a region for the server and set up its credentials.
Then select the server and configure its Firewall Rules. First, enable Allow other Windows Azure services to access this service, which means that the server will be accessible by your Kentico CMS application when it is deployed as a hosted service. Next, add rules for any IP ranges that include your development or administration machines, so that you can connect to the server when using the local emulator or manually (e.g. with SQL Server Management Studio).
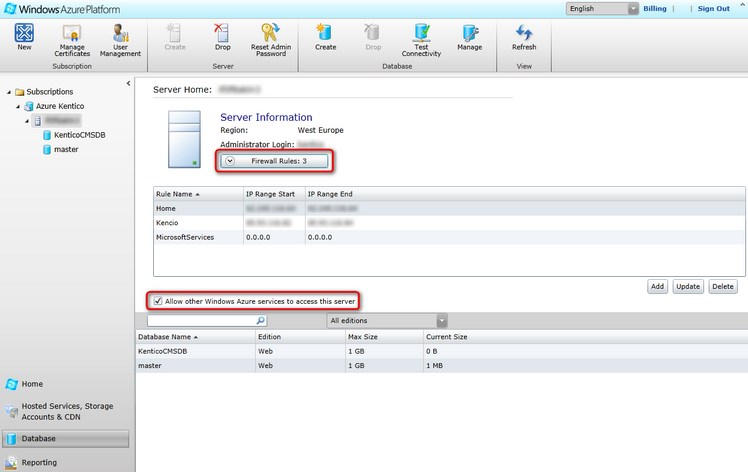
Finally, click Create in the Database section of the menu to add a database under the server that will be used for the application. Choose an appropriate edition and size, depending on the requirements of your website.
Once your application is successfully deployed to Windows Azure (or started up on the local emulator) you can open it in your browser, where the database installer will automatically begin. This process will create the database tables required by Kentico CMS on the specified SQL database. The following steps must be taken to complete the installation:
1. In the first step, you need to specify the target server and enter the credentials used to access it.
•SQL Server name or IP address - enter the fully qualified server name of your SQL Azure server. The standard format is: <server name>.database.windows.net
•Use SQL Server account - check this option and type in a valid Login name and Password for the server. The name is entered using the format Login@ServerName.
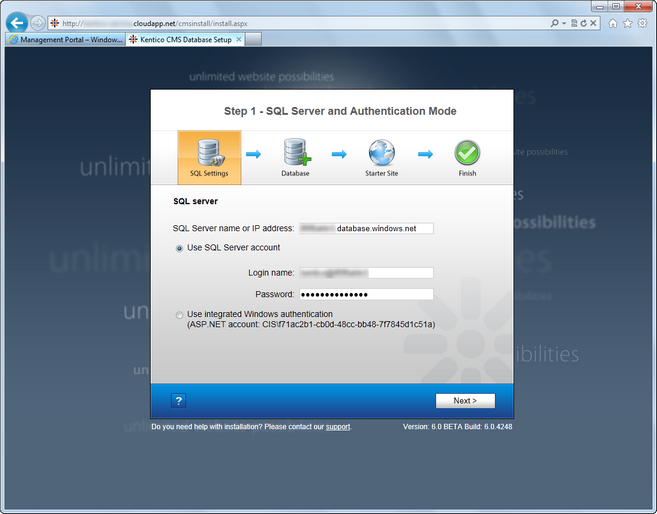
Click the Next button.
2. In the next step, enter the name of the database into the Existing database name field. Kentico CMS cannot create a new database on an SQL Azure server, so you will have to use a predefined database (you can define an empty one for a clean installation as described in the section above).
You can also choose whether you want to Create Kentico CMS database objects. If the existing database already contains Kentico CMS objects (tables, stored procedures, views), you can uncheck the box. If the database does not contain these objects, i.e. when you are installing into an empty database, you need to leave the option enabled.
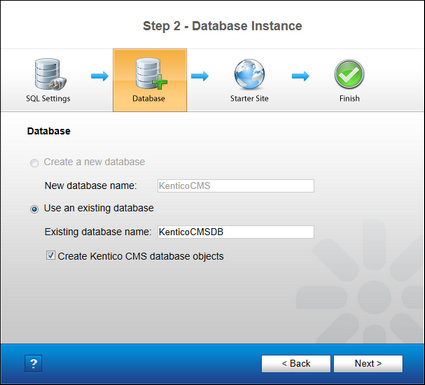
Click Next.
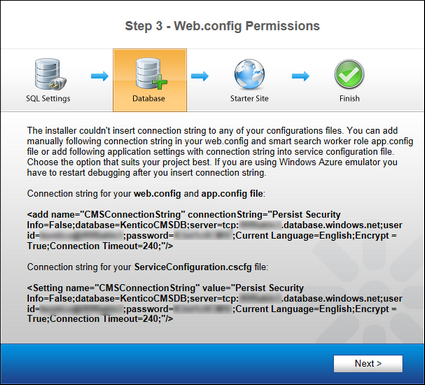
3. The installer will now generate connection strings for the specified database and server. There are two possible ways to set the connection string for the application. It may either be added as a key into the <connectionStrings> section of the web.config and app.config files of the CMSApp and SmartSearchWorker projects respectively, or it can be included as a setting in the application's service configuration file.
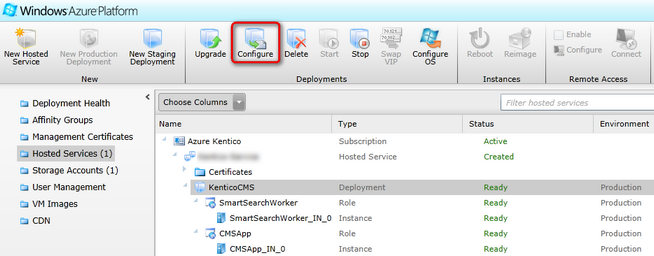
The easiest way is to copy the service configuration version of the connection string (the second one) and switch back to the Azure Management Portal. Go to Hosted Services, Storage Accounts & CDN -> Hosted Services, select your Kentico CMS deployment and click the Configure button.
Select Edit current configuration in the displayed dialog box and insert the connection string setting from the database installer instead of the default CMSConnectionString setting. Do this in the <ConfigurationSettings> section of both the CMSApp and SmartSearchWorker roles.
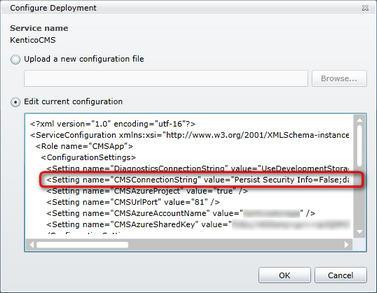
Click OK and wait until the deployment is updated.
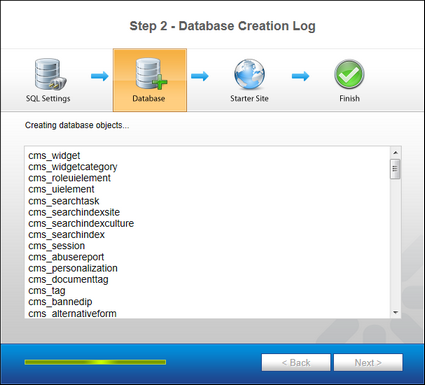
4. Close the original tab with the database installer and open the website again once it is ready (click on the link in the DNS name property of your deployment). The installer will automatically continue the previous installation. Confirm the target database by clicking Next and the installation will start. A log will be displayed, showing the progress of the database creation. After it finishes, you will be moved forward to the next step.
5. If you are installing on a production deployment, you will be asked to insert a license key for the domain. Staging deployments are automatically covered by any other valid license (including the temporary trial license), so you do not have to request a separate license for each unique deployment. The same applies to the local emulator, since it runs on the localhost (127.0.0.1) domain, which may be used with any license, including the trial.
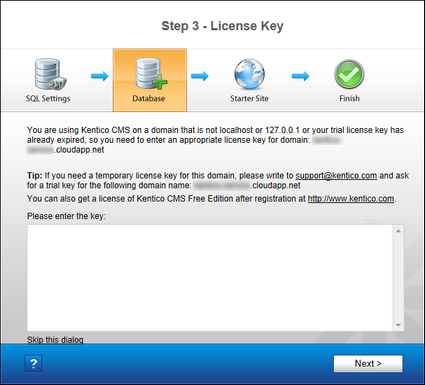
If necessary, enter a valid license key and click the Next button.
6. On the next screen, you will be offered the following options to set up an initial website:
•Choose a starter site - you can choose one of the sample sites provided with Kentico CMS to try out the features or use it as a base for the development of your own website.
•Continue to the New site wizard - this option is recommended if you wish to develop a new site from scratch.
•Import an existing Kentico CMS website - use this option if you have already created a website with Kentico CMS and need to import it into the new installation.
If you are new to Kentico CMS, it is highly recommended to start with the sample Corporate Site. Select an option and click the Next button. A log will be displayed showing the progress of the website creation.
7. Once the website is created, a confirmation will be displayed and you can follow the link to the live website. From here, you can log into the CMS Desk or Site Manage administration interface (the sample sites use the administrator user name and a blank password by default) and start working with Kentico CMS.