|
|

Example: Publishing community news |

|

|

|

|
|
Example: Publishing community news |
|
|

|
|
|
|
Example: Publishing community news |
|
|
|
|
|
Example: Publishing community news |
|
|
|
|
|
|
||
In this example, you will create a new section for publishing community news. Each registered site member can create new news items and edit/delete their previously posted news. The example assumes that you are using the Corporate Site sample website. In this topic you will learn how to:
•Create the community news section
1. Sign in to CMS Desk as the administrator, go to the Content section and click Examples in the content tree. Click ![]() New and choose to create a new
New and choose to create a new ![]() Page (menu item). Enter the name Community and choose the Create a blank page option.
Page (menu item). Enter the name Community and choose the Create a blank page option.

2. Click ![]() Save. Switch to the Design tab of the newly created page and add the Listings and Viewers/Repeater web part. Set the following properties:
Save. Switch to the Design tab of the newly created page and add the Listings and Viewers/Repeater web part. Set the following properties:
•Web part control ID: repeaterNews
•Document types: cms.news
•Transformation: CMS.News.preview
•Selected item transformation: CMS.News.default
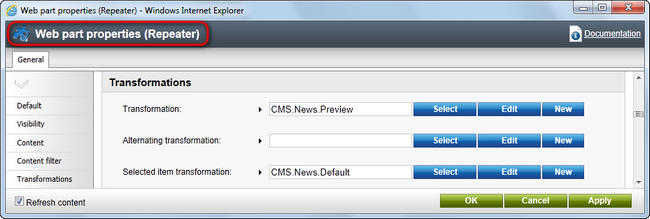
3. Click OK.
1. Add a new web part User contributions/Contribution list. It will display the New document link. Set the following values:
•Show for document types: cms.menuitem
- this ensures that the web part is displayed only when the list of news is displayed, not on the news detail page.
•Allowed new document types: CMS.News
- this means that the users will be allowed to create only news items under this section.
•Display list of documents: no (unchecked)
- this ensures that the web part displays only the New document link, without displaying the list of documents.
•Allow editing by users: Authenticated
- this means that only authenticated users will be able to edit/delete the document. Authenticated users are those who are signed-in to the website (not to the administration interface).
Leave the other values as they are by default.

2. Click OK.
1. Add a new web part User contributions/Edit contribution. It will display the Edit/Delete icons when some news item is chosen.
•Show for document types: cms.news
- this ensures that the web part is displayed only on the news detail page.
•Allow editing by users: Document owner
Please note that the Edit contribution web part is missing the Allow insert/edit properties.
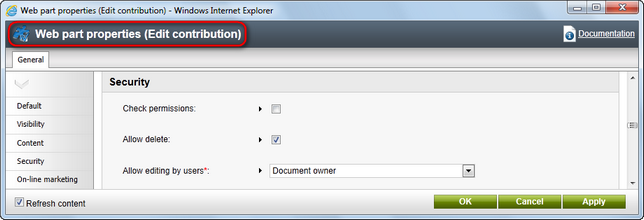
2. Click OK.
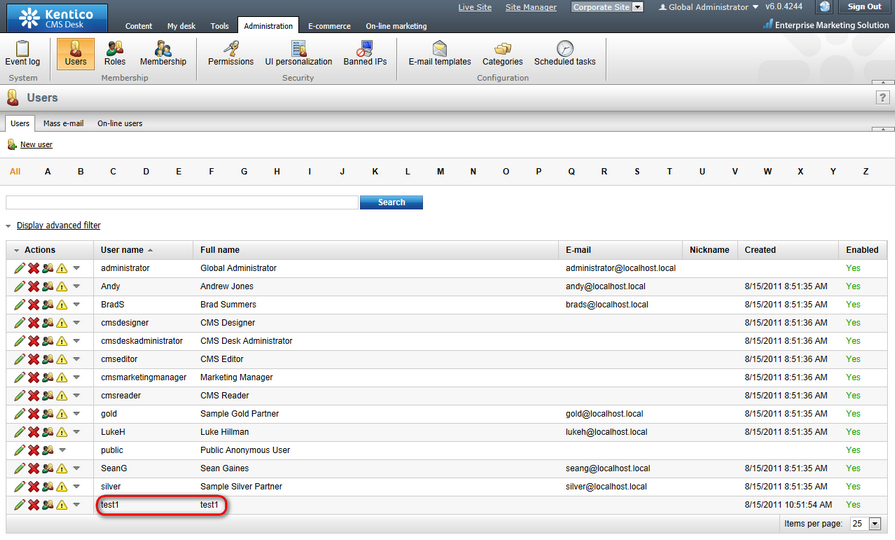
1. Go to CMS Desk -> Administration -> Users and click the ![]() New user link to create a new user with user name test1. Please note that to create a user, at least the values of the following two compulsory fields: User name and Full name must be entered.
New user link to create a new user with user name test1. Please note that to create a user, at least the values of the following two compulsory fields: User name and Full name must be entered.
2. For the purpose of this example, choose no (uncheck the box) in the Is editor field - test1 is a common site member without access to Kentico CMS Desk.
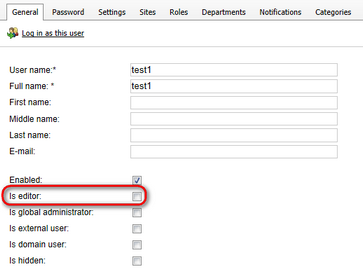
Click OK to save the changes.
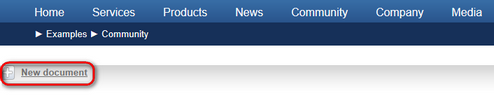
1. Sign out and go to the Examples -> Community section. You will see a blank page since the user contributions are now enabled only for site members. In order to sign in, click the My account link at the top and sign in as user test1. Then go back to the Examples -> Community section. You will see the New document link:
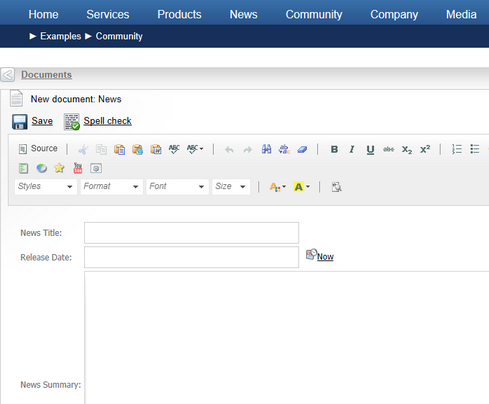
2. Click this link and you will be displayed with the news editing form:
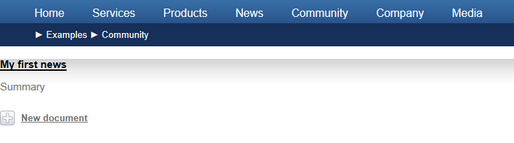
3. Enter some content and click ![]() Save. Now select Examples -> Community from the main menu at the top. You will see the Community page with your first news item:
Save. Now select Examples -> Community from the main menu at the top. You will see the Community page with your first news item:
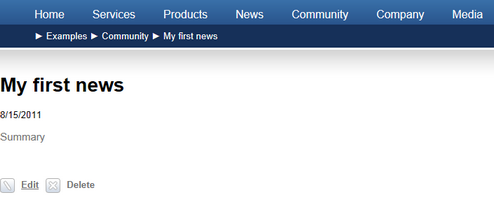
4. Click the news item link to see the details page. The ![]() Edit and
Edit and ![]() Delete links are be displayed below the news item:
Delete links are be displayed below the news item:
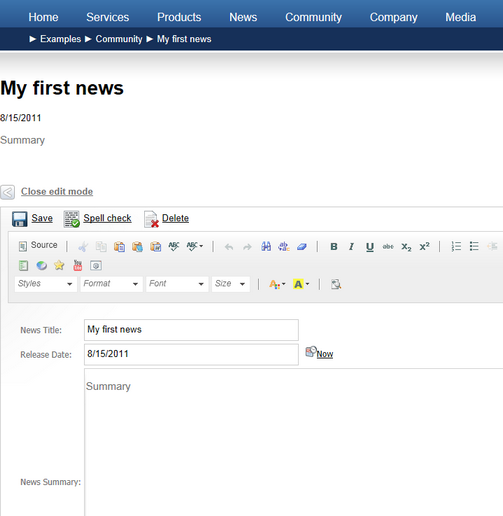
5. Choose to ![]() Edit the news item and you will be displayed with the editing form where you can edit its content:
Edit the news item and you will be displayed with the editing form where you can edit its content:
6. Make some modifications and click ![]() Save. Click the Close edit mode link to see the updated page.
Save. Click the Close edit mode link to see the updated page.
If you need to enforce some approval process for published news, you can simply set up workflow for the given site sections and all news will need to be approved by a site manager. You can find more details on workflow configuration in the Workflow overview chapter.
In this example, you have learned how to create a site section where community members can create and edit content without having access to Kentico CMS Desk.