|
|

IIS 7 and higher |

|

|

|

|
|
IIS 7 and higher |
|
|

|
|
|
|
IIS 7 and higher |
|
|
|
|
|
IIS 7 and higher |
|
|
|
|
|
|
||
If your instance of Kentico CMS is running on a server with IIS 7 or higher installed, the procedure is quite simple - it consists only of adding and modifying a few keys in your project's web.config file. Please be aware that this procedure only works for IIS 7 sites that use an Application Pool with Managed Pipeline Mode set to Integrated. This should be the default setting.
First, you need to modify the system.webServer section of your web.config file by changing the opening <modules> tag as shown in the code example below.
<system.webServer> ...
... </system.webServer> |
With this modification in your web.config, you can proceed to configuring the extensions in the administration interface of Kentico CMS. You can also perform some additional configuration as described below.
3. It is recommended to configure a custom Page-not-found (404) error page when using custom URL extensions, otherwise a blank page may be displayed in some browsers if a user attempts to access a non‑existing resource. This can be achieved by specifying the URL of the appropriate page as the value of the Page not found URL setting in Site Manager -> Settings -> Content, for example: ~/CMSMessages/PageNotFound.aspx.
Alternatively, you can add a <httpErrors> element into the system.webServer section of your web.config file according to the following:
<httpErrors existingResponse="Auto" errorMode="Custom"> |
Replace the <Virtual_Directory> string in the value of the path attribute of the <error> element with the name of the virtual directory where you run Kentico CMS.
4. You can also add the following key to the AppSettings section, which ensures that URLs remain the same even after postback.
<add key="CMSUseExtensionOnPostback" value="false" /> |
5. If you are using trailing slashes (enabled by the Use URLs with trailing slash option in Site Manager -> Settings -> URLs and SEO), you can use the following extra key to have only extensionless URLs ending with the trailing slash. URLs ending with an extension are rendered without the slash when the key is used.
<add key="CMSUseTrailingSlashOnlyForExtensionLess" value="true" /> |
Due to backward compatibility, you can also enable custom URLs by configuring your IIS manually. It is not recommended now as it is obsolete. If you receive the Lock violation error during the procedure, try the solution described here.
The setup procedure on IIS 7 is the following:
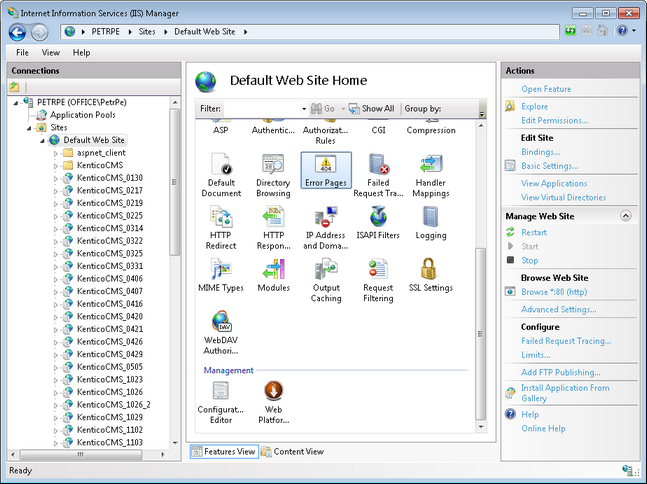
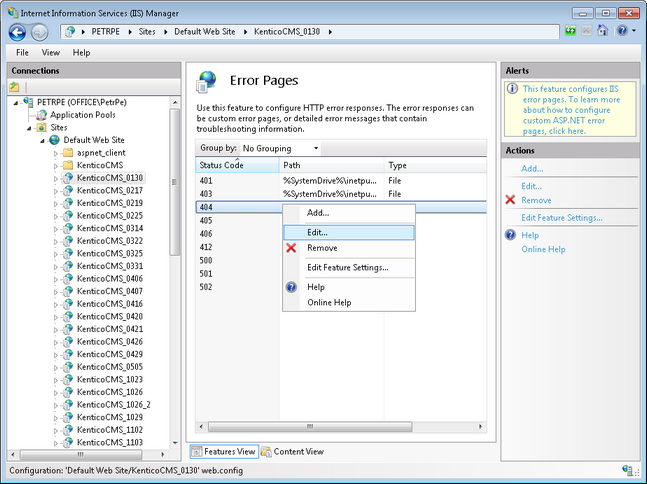
1. Open Start -> Control Panel -> Administrative Tools -> Internet Information Services (IIS) Manager.
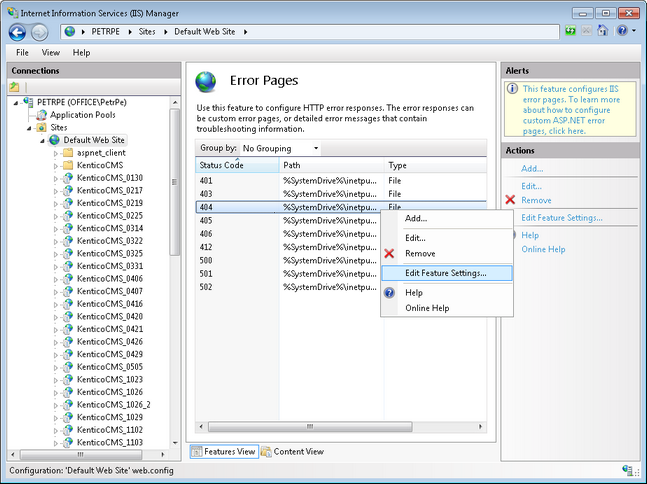
2. Select your website from the tree on the left and open the Error pages section.
3. Right-click the 404 error and choose Edit Feature Settings.
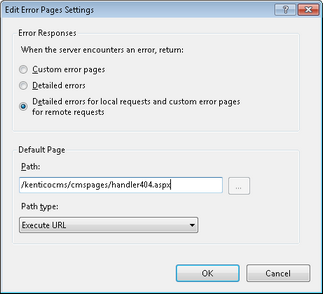
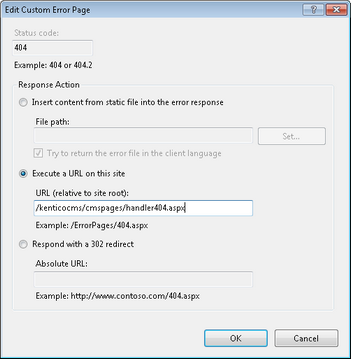
4. Enter the following values:
•Path: enter the URL of the cmspages/handler404.aspx page according to your application's URL.
Example: if you run your web project in virtual directory /kenticocms, you need to enter /kenticocms/cmspages/handler404.aspx
•Path type: Execute URL
Click OK.
5. Now right-click the 404 error again and choose Edit from the context menu.
6. Select Execute a URL on this site and enter the same URL that you entered in step 4. Click OK.
7. Go back to step 3 and repeat the same procedure for the 405 error.
8. Click OK on all dialogs to save the changes. It's not necessary to restart the application.
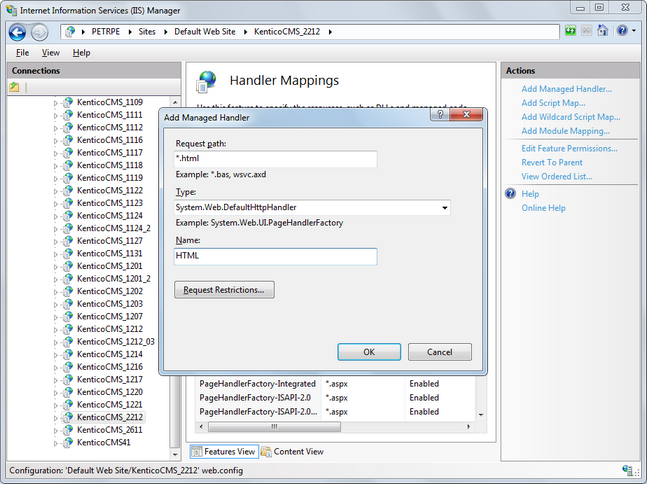
The following approach is also possible, but not recommended and considered obsolete now. To use the .html extension, go through the following steps:
1. Run IIS Manager .
2. Select your web.
3. Open Handler mappings.
4. Click to Add managed handler... .
5. Enter the following values:
•Request path: *.html
•Type: System.Web.DefaultHttpHandler
•Name: HTML
Click OK.