Configuration of custom URL extensions (.html or other)
Installation and deployment > Additional configuration tasks > Custom URL extensions and extensionless URLs:
Configuration of custom URL extensions (.html or other)
Configuration of custom URL extensions (.html or other)
When you have performed the required configuration for your version of IIS, you can proceed with entering the actual extensions.
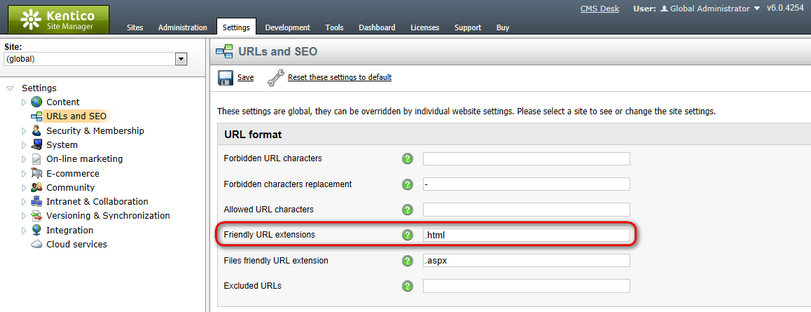
This can be done in Site Manager -> Settings -> URLs and SEO. For example, try to set the Friendly URL extensions value to .htmland click Save.
Now when you go to the live website, you will see that all URLs in menus and listings are rendered with .html extensions. In some cases, you may need to update some static links which were created with the default .aspx extension.
Using multiple extensions
You can enter multiple extensions into the Friendly URL Extension field mentioned above. The following format should be used:
.html;.htm;;.xxx;.abc
•The first extension is used as the default one and the links will be generated with it in the browser.
•Other extensions are entered divided by semicolons ( ; ). Pages can be accessed through URLs ending with all entered extensions.
•If you use a semicolons without any extension in front of it, just as in the middle of the sample entry above, extension-less URLs can be achieved.
The Redirect documents to main extension setting, which can also be found at Site Manager -> Settings -> URLs and SEO, causes URLs with non-default extensions to be redirected to corresponding URLs with the current default extension. This can be useful for SEO purposes. For example, if you want to change the extensions of your documents and want them to be used when the documents are accessed from a search engine that has your website indexed with the old extension.
Document-level extensions settings
Apart from the global settings described above, document extensions under which the document can be accessed can also be set separately for each document. The default extension with which the pages are rendered in the browser is always taken from the global settings.
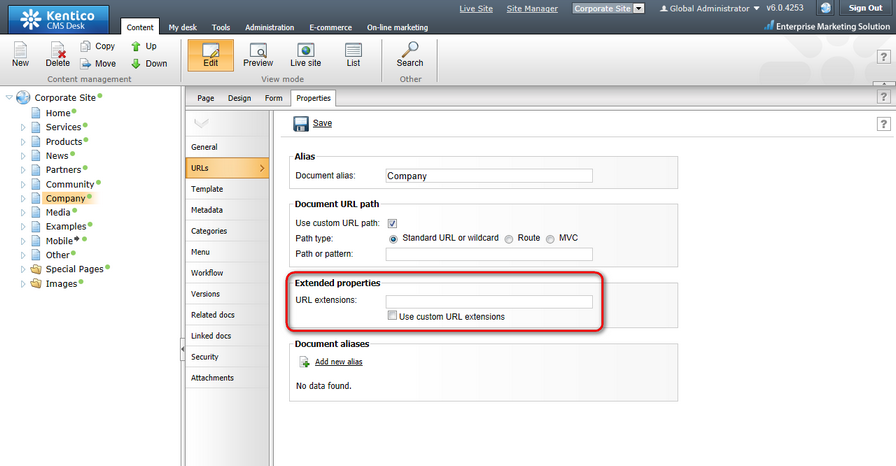
1. Select the document from the content tree.
2. Switch to its Properties -> URLs tab.
3. Enable the Use custom URL extensions check-box.
4. Enter the required extension(s) using the same rules as described above.
Please note: Even if the Use custom URL extensions option is disabled, files (cms.file documents) can be accessed under their physical extensions.