|
|

Developing custom modules |

|

|

|

|
|
Developing custom modules |
|
|

|
|
|
|
Developing custom modules |
|
|
|
|
|
Developing custom modules |
|
|
|
|
|
|
||
Here you will learn how to create a simple module with a single button that displays the current date and time. The procedure can be used for adding any kind of custom module that you develop. You will also learn how to control access to the module's functions using permissions and integration of this module into the UI using UI personalization.
1. Open Kentico CMS web project in Visual Studio. You can do that either using the WebProject.sln file in your website root or using the File -> Open -> website menu in Visual Studio.
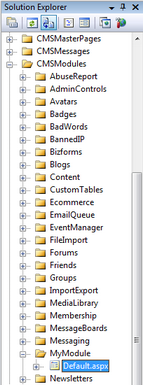
2. Create a new folder MyModule under the CMSModules folder.
3. Create a new page default.aspx under the CMSModules/MyModule folder:
4. Switch to code behind of the page and change the following line:
[C#]
public partial class CMSModules_MyModule_Default : System.Web.UI.Page |
to:
[C#]
public partial class CMSModules_MyModule_Default : CMSToolsPage |
It ensures that the module can be used only by users with access to Kentico CMS Desk.
5. Add the following code at the beginning of the page:
[C#]
using CMS.CMSHelper; using CMS.UIControls; |
6. Add the following code to the Page_Load method:
[C#]
if (!CMSContext.CurrentUser.IsAuthorizedPerResource("cms.mymodule", "read")) { RedirectToAccessDenied("cms.mymodule", "Read"); } |
It checks if the current user has the Read permission for the myprojects.mymodule module.
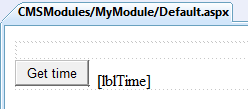
7. Switch to the Design mode and add a Button control on the page. Set its properties:
•ID: btnGetTime
•Text: Get time
8. Add a Label control on the page, next to the button. Set its properties:
•ID: lblTime
•Text: (clear the value)
9. Double-click the button and add the following code inside the btnGetTime_Click method:
[C#]
if (CMSContext.CurrentUser.IsAuthorizedPerResource("cms.mymodule", "gettime")) { lblTime.Text = DateTime.Now.ToString(); } else { lblTime.Text = "You're not authorized to get the current date and time."; } |
It checks if the current user has the gettime permission for the cms.mymodule module and if so, it displays the current date and time.
10. Run the project and sign in to Site Manager. Go to Development -> Modules and click ![]() New module. Enter the following values:
New module. Enter the following values:
•Module display name: My module
•Module code name: cms.mymodule; for the UI element to be site-related, it is important to enter the value in the cms.<elementname> format, where <elementname> is the code name of the UI element created in step 16; see this topic for more details.
Click OK. The module was registered in the system.
Please note: In the system, modules are represented by ResourceInfo and ResourceInfoProvider.
11. Go to the Permission names tab and click ![]() New permission. Enter the following values:
New permission. Enter the following values:
•Permission display name: Read
•Permission code name: read
•Display in matrix: enable
Click OK.
12. Add another permission:
•Permission display name: Get time
•Permission code name: gettime
•Display in matrix: enabled
Click OK.
13. Go to the Sites tab and enable the new module for appropriate sites. Now that the module is registered, you need to display it in the user interface. For the purposes of this example, we will place it into the Tools menu. However, the module can also be placed into other sections of the UI as listed here.
14. Go back to Development -> Modules and Edit (![]() ) the Tools module. Switch to its User interface tab, select Custom in the Tools tree and click
) the Tools module. Switch to its User interface tab, select Custom in the Tools tree and click ![]() New element. Enter the following details:
New element. Enter the following details:
•Display name: My module
•Code name: MyModule
•Element is custom: enabled
•Caption: My module
•Target URL: ~/CMSModules/MyModule/Default.aspx
Click OK.

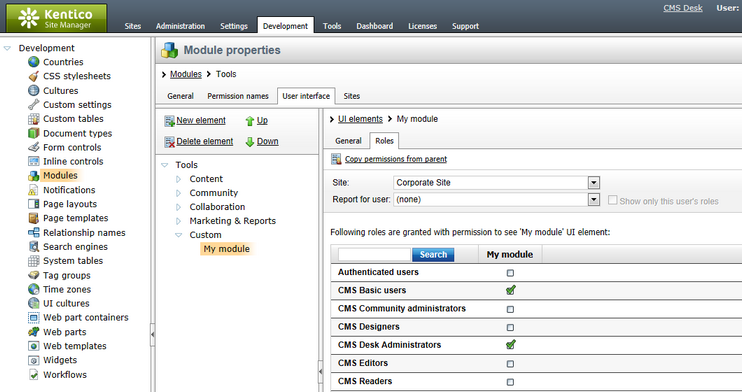
15. We will use UI personalization to enable access to this module only to members of certain roles. For this to work, UI personalization needs to be enabled. With the new UI element still selected, switch to the Roles tab and enable the element for members of the CMS Basic users and CMS Desk Administrators roles.
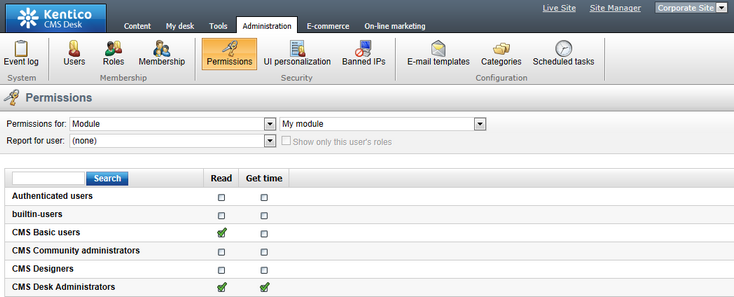
16. Go to CMS Desk -> Administration -> Permissions and choose Permission for: Module / My module. Grant the Read permission to the CMS Basic users role and both the Read and Get time permissions to the CMS Desk Administrators role:
17. Now go to CMS Desk -> Tools logged in as administrator (with blank password). As you can see, the My module item is now available in the menu. Click it and you will see your form created in steps 3-9. When you click the Get time button, the current date and time is displayed.

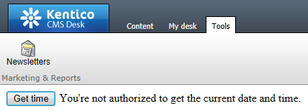
18. Finally, try logging in as Andy (with blank password) and go back to CMS Desk -> Tools. Andy is a member of the CMS Basic users role. In step 16, you configured that members of this role have only the Read permission necessary for the module to be displayed (ensured in step 6), but not the Get time permission necessary for the button functionality. Try clicking it, you will see the access denied message that you defined in step 9.
|
Exporting custom modules
The following folders will be included in the export package when the custom module is selected for export. It is therefore recommended that your modules data is stored within these folders:
•~/App_Code/CMSModules/<module_name> •~/App_Data/CMSModules/<module_name> •~/CMSModules/<module_name>
The <module_name> value needs to be the same as the code name of the module in the administration interface, so for example for a module named CMS.Test, the folders would be:
•~/App_Code/CMSModules/CMS_Test •~/App_Data/CMSModules/CMS_Test •~/CMSModules/CMS_Test
|
