|
|

Creating the Logon page |

|

|

|

|
|
Creating the Logon page |
|
|

|
|
|
|
Creating the Logon page |
|
|
|
|
|
Creating the Logon page |
|
|
|
|
|
|
||
On the Master page, we placed the Sign out button web part and set its Sign in page path property to /Logon. This is where the user will be redirected in order to sign in. This can also happen in other cases such as when a user tries to access a section which is available only to authorized users.
The page will provide the sing-in functionality via the Logon form web part, as well as the possibility to register for anonymous site visitors, which will be achieved using the Custom registration form web part.
Information about the Custom registration form and how you can modify the appearance of the form can be found in this chapter.
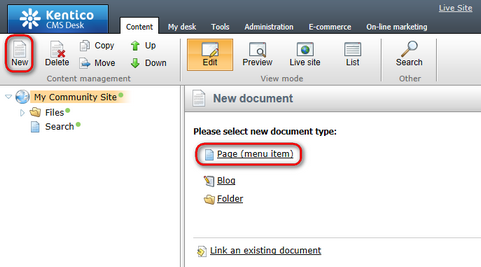
1. Go to CMS Desk, select the root of the content tree and click New. Choose the Page (menu item) document type.
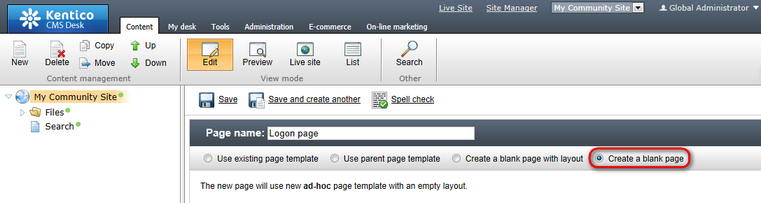
2. Choose the Create a blank page option. For Page name, enter Logon page and click Save.
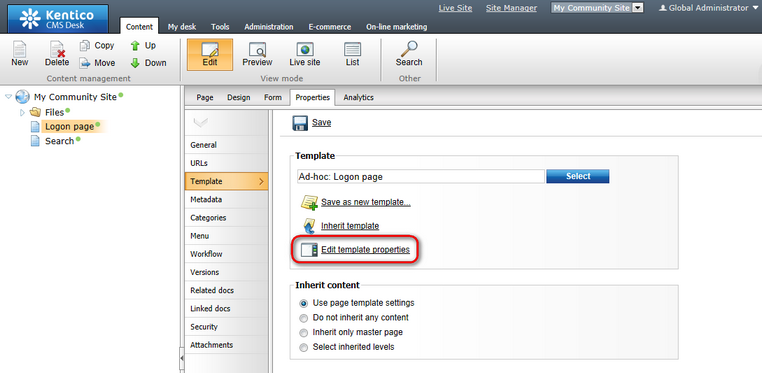
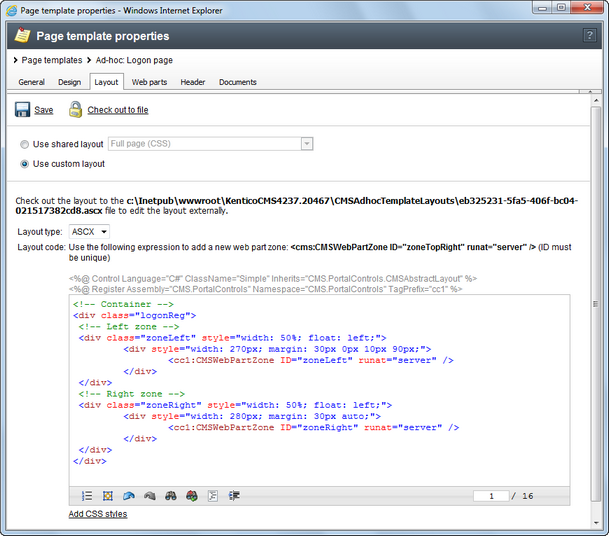
3. Switch to the Properties -> Template tab and click the Edit template properties link.
4. In the pop-up Page template properties window, switch to the Layout tab and replace the original layout with the following code:
<!-- Container --> <div class="logonReg"> <!-- Left zone --> <div class="zoneLeft" style="width: 50%; float: left;"> <div style="width: 270px; margin: 30px 0px 10px 90px;"> <cc1:CMSWebPartZone ID="zoneLeft" runat="server" /> </div> </div> <!-- Right zone --> <div class="zoneRight" style="width: 50%; float: left;"> <div style="width: 280px; margin: 30px auto;"> <cc1:CMSWebPartZone ID="zoneRight" runat="server" /> </div> </div> </div> |
Click Save.
5. Switch to the Design tab. You should see two web part zones on the page - zoneLeft and zoneRight - just as you defined by the layout code above. The left web part zone will host the logon form, the registration form will be placed in the right one. Click the Add web part (![]() ) icon of the zoneLeft web part zone and choose the Membership -> Logon form web part. Set the following properties of the web part, the rest can be left at their default values:
) icon of the zoneLeft web part zone and choose the Membership -> Logon form web part. Set the following properties of the web part, the rest can be left at their default values:
•Default target URL: ~/Home.aspx
•Web part container: Community Site - Blue Box Light
•Web part container title: Sign in
•Content before: <div style="min-height: 160px;height:auto">
•Content after: </div>
Click OK.
6. User registration will be achieved using the Custom registration form web part. This web part has no default appearance - the way it will look like is defined by an alternative form of the cms.user system table. We will use the pre-defined Registration form alternative form. However, you can customize the alternative form according to your needs, as described here, or even create your own form a similar way.
First, click the Add web part (![]() ) icon of the zoneRight web part zone and choose the Membership -> Custom registration form web part. Set the following properties of the web part, all other properties can be left at their default values:
) icon of the zoneRight web part zone and choose the Membership -> Custom registration form web part. Set the following properties of the web part, all other properties can be left at their default values:
•Alternative form: cms.user.RegistrationForm
•Redirect to URL: ~/Members/{%CMSContext.CurrentUser.UserName%}.aspx
•Registration error message: There was an error during registration. Please see details below.
•E-mail confirmation page: ~/Special-pages/Registration-approval.aspx
•Web part container: Community Site - Blue Box Light
•Web part container title: Join the community
Click OK.
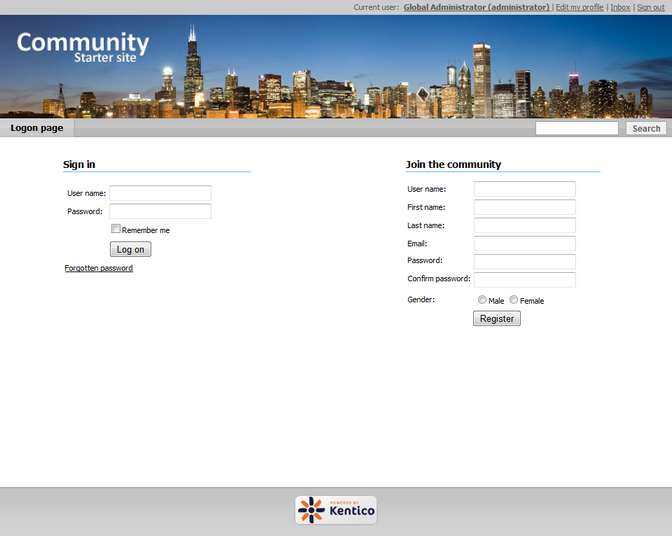
7. If you switch to the Live site mode, you should see the following appearance of the page.
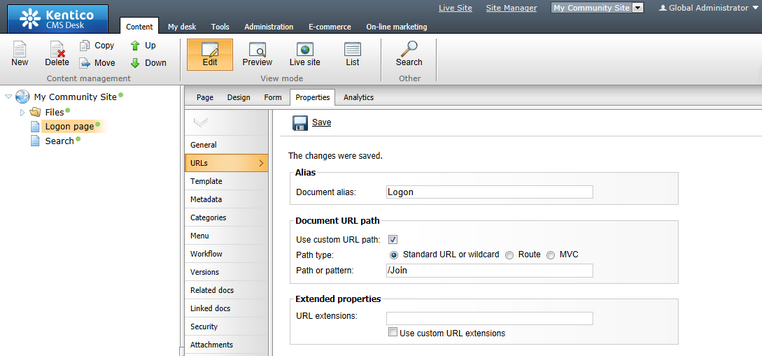
8. Switch back to the Edit mode and go to the Properties -> URLs tab. Enter the following details:
•Document alias: Logon
•Document URL path: /Join
Click Save.
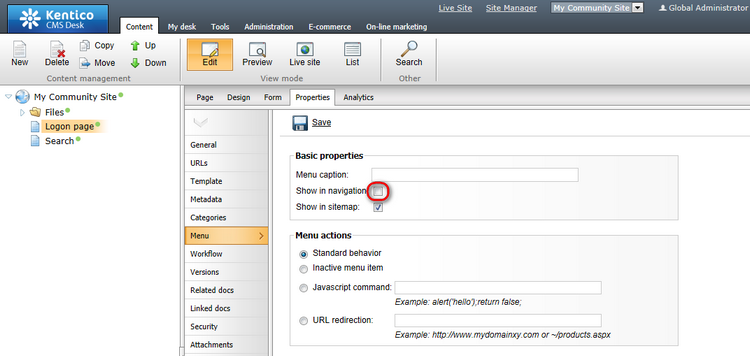
9. We don't want the Logon page to be displayed in the menu. Go to the Properties -> Menu tab and disable the Show in navigation check-box. Click Save.
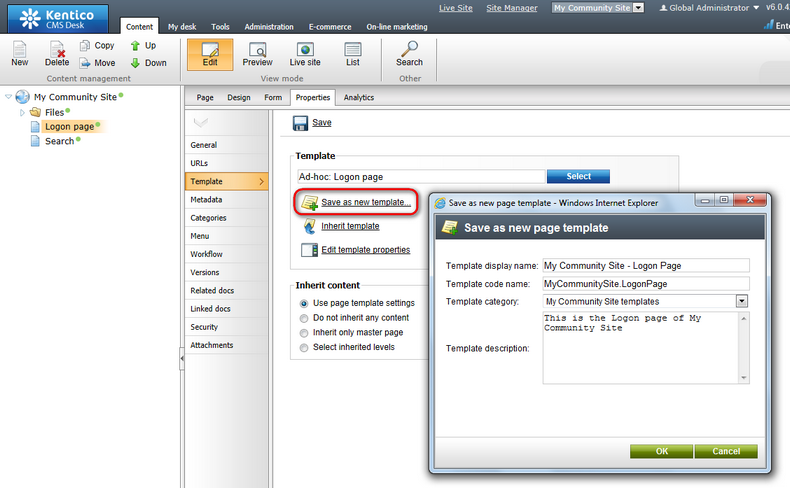
10. Finally, we will save the page as a page template for further re-usability. Go to the Properties -> Template tab and click the Save as new template link. Enter the following details:
•Template display name: My Community Site - Logon Page
•Template code name: MyCommunitySite.LogonPage
•Template category: My Community Site templates
•Template description: some text describing the page template
Click OK.