|
|

Creating the Invitations page |

|

|

|

|
|
Creating the Invitations page |
|
|

|
|
|
|
Creating the Invitations page |
|
|
|
|
|
Creating the Invitations page |
|
|
|
|
|
|
||
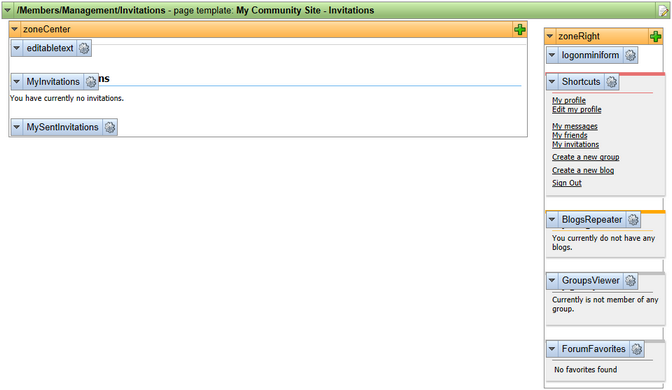
On the Invitations page, users will see their invitations to groups and will be able to manage them. This functionality will be provided by the My invitations and My sent invitations web parts. The page is accessible from the Shortcuts menu, by clicking the My invitations link.
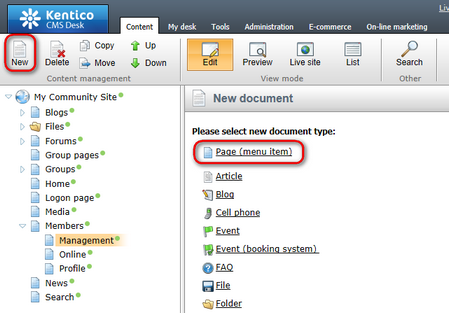
1. Select the Management page in the content tree and click New. Choose the Page (menu item) document type.
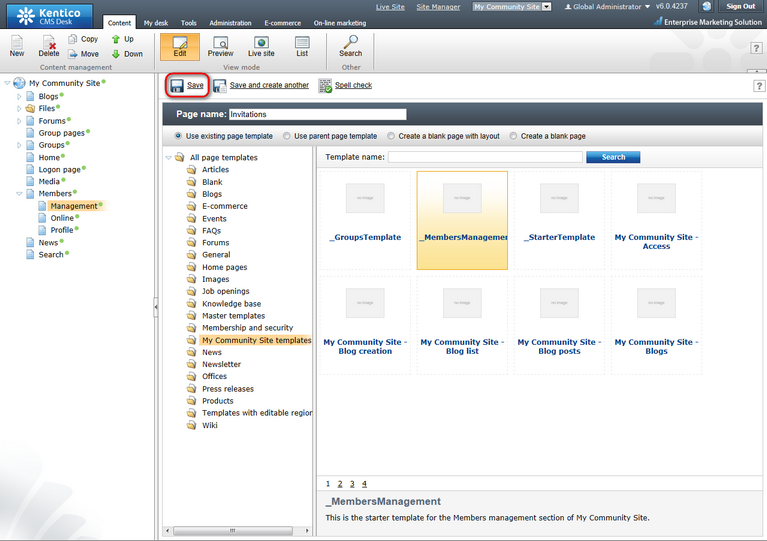
2. Select the My Community Site templates -> _MembersManagement page template created in this chapter. Into the Page name field, enter Invitations and click Save.
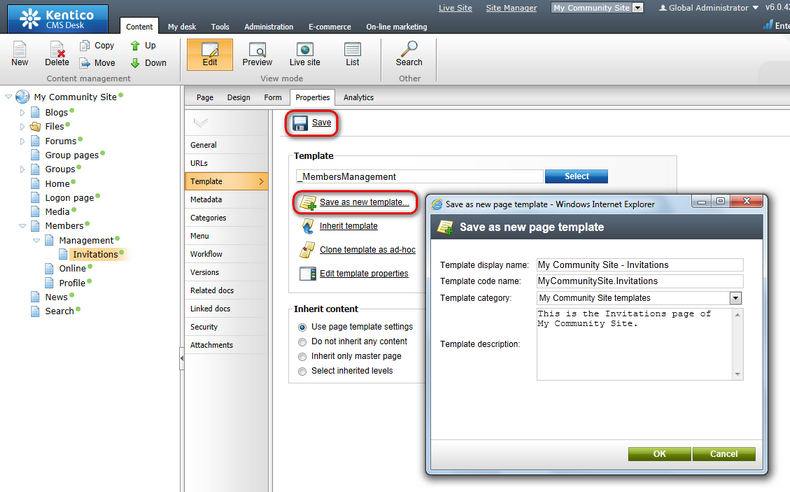
3. Switch to the Properties -> Template tab and click the Save as new template link. Enter the following details in the pop-up dialog:
•Template display name: My Community Site - Invitations
•Template code name: MyCommunitySite.Invitations
•Template category: My Community Site templates
•Template description: some text describing the page template
Click OK. Click Save.
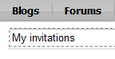
4. Switch to the Page tab. Enter My invitations into the Editable text web part's text field and click Save.
5. Switch to the Design tab. First, we will add the My invitations web part, which will display the user's received invitations. Click the Add web part (![]() ) icon of the zoneCenter web part zone and choose the Community -> My invitations web part. Set the following properties of the web part, leave the default values for the rest of them:
) icon of the zoneCenter web part zone and choose the Community -> My invitations web part. Set the following properties of the web part, leave the default values for the rest of them:
•Zero rows text: You have currently no invitations.
•Hide control for zero rows: disabled
•Web part container: Community Site - Blue Box Light
•Web part container title: Received invitations
Click OK.
6. The second web part on this page will be displaying the user's sent invitations. Click the Add web part (![]() ) icon of the zoneCenter web part zone and choose the Community -> My sent invitations web part. Set the following properties of the web part, leave the default values for the rest of them:
) icon of the zoneCenter web part zone and choose the Community -> My sent invitations web part. Set the following properties of the web part, leave the default values for the rest of them:
•Web part container: Community Site - Blue Box Light
•Web part container title: My sent invitations
Click OK.
7. The page is now finished. In Design tab, it should look as in the following screenshot.