|
Defining a new product type |

|

|

|

|
|
Defining a new product type |
|
|
|
|
1. Go to Site Manager -> Development -> Document Types.
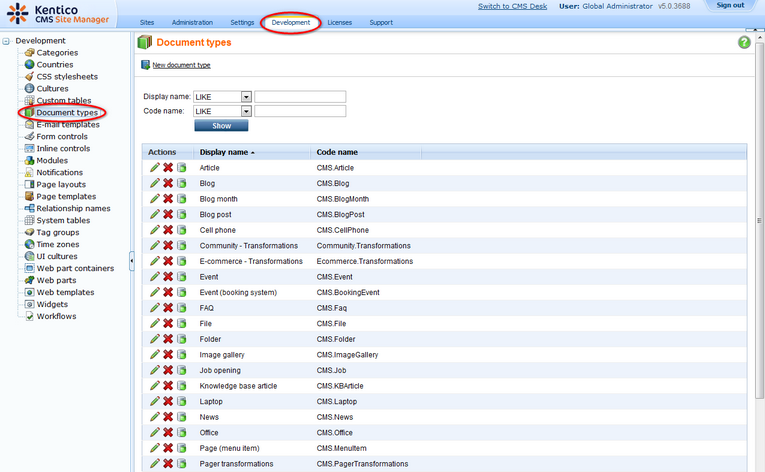
2. Click the ![]() New Document Type link.
New Document Type link.
3.You have been redirected the New document type wizard.
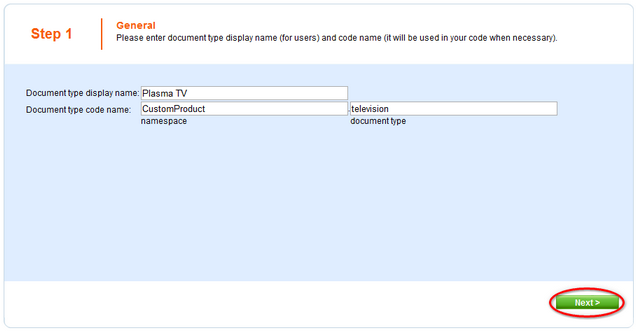
In the Step 1, enter:
- Document type display name: Plasma TV
- Document type code name: CustomProduct (namespace), television (document type)
Click Next.
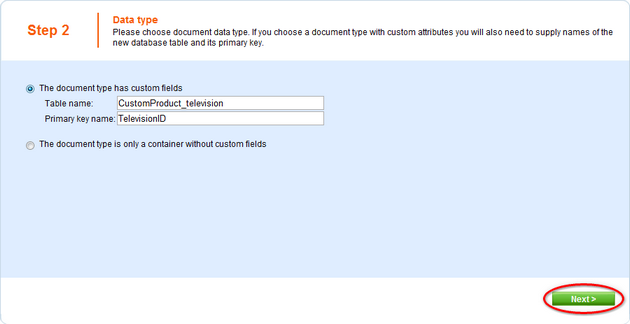
4. In the Step 2, leave the default values and click Next again.
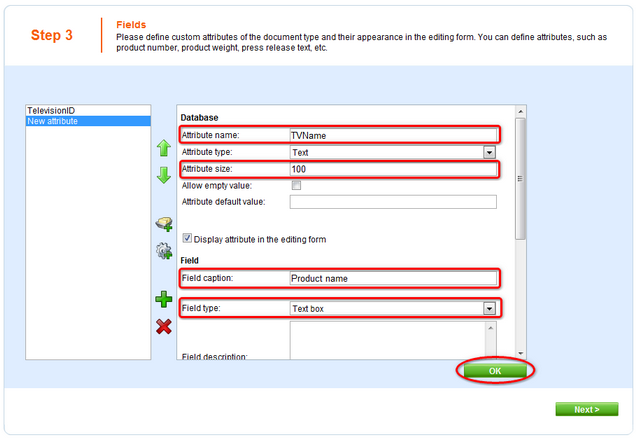
5. In the Step 3, you are asked to define attributes for the new document type. Click New Attribute (![]() ) and enter:
) and enter:
- Attribute name: TVName
- Attribute size: 100
- Field caption: Product name
From the Field type drop-down list, choose Textbox and click OK.
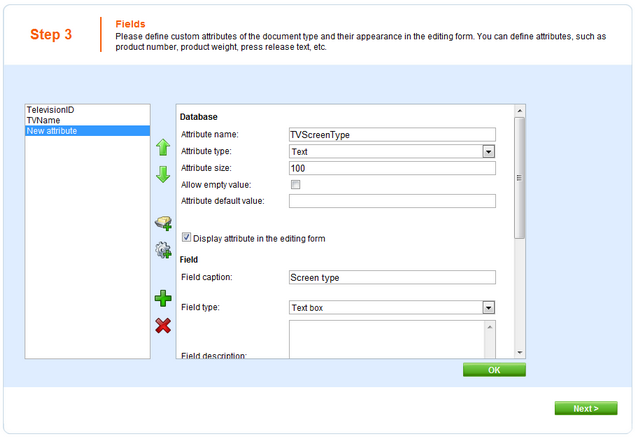
6. Click New Attribute again. Enter:
- Attribute name: TVScreenType
- Attribute size: 100
- Field caption: Screen type
From the Field type drop-down list, choose Textbox and click OK.
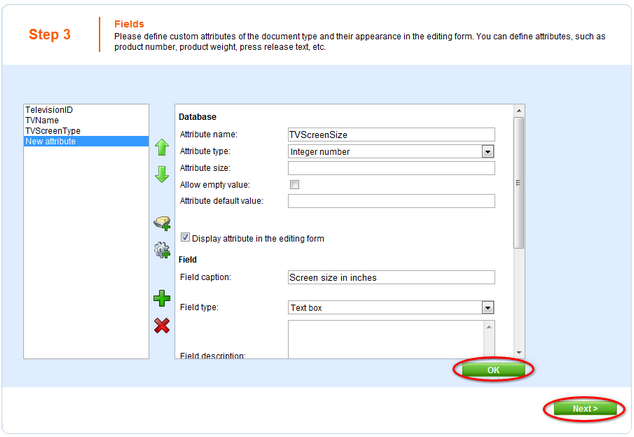
7. Now click New Attribute again and enter information for the last attribute:
- Attribute name: TVScreenSize
- Attribute type: Integer number
- Field caption: Screen size in inches
From the Field type drop-down list, choose Textbox and click OK.
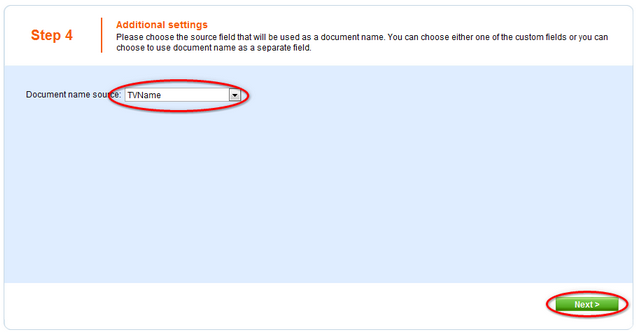
8. In the Step 4, choose TVName in the Document name source drop-down list. Click Next.
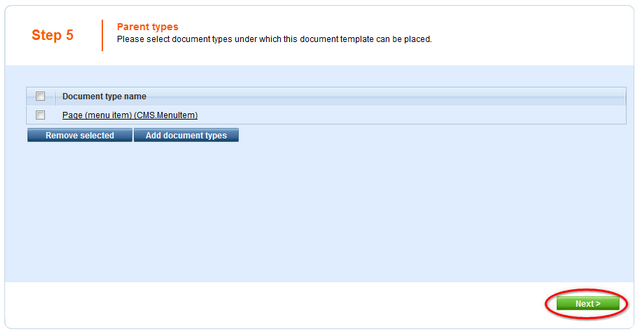
9. In the Step 5, click the Add document types button and select the Page (menu item) document type. Click Next.
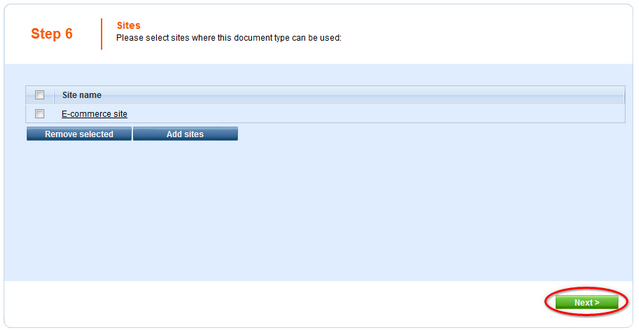
10. Now make sure that you have assigned the document type to the Ecommerce site and click Next.
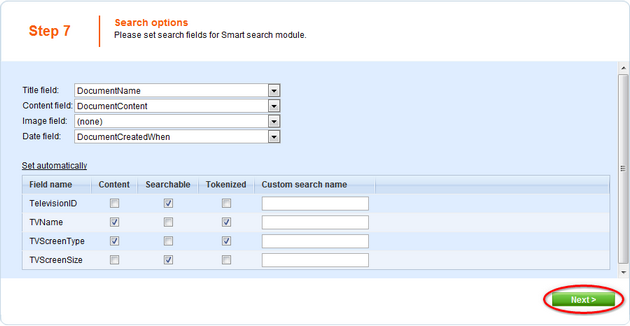
11. In the Step 7, you are asked to specify how documents of this type will be indexed and displayed in the search results. For more information on these settings, please refer to the Settings for particular object types topic of Kentico CMS Developer's Guide. Make your choice and click Next.
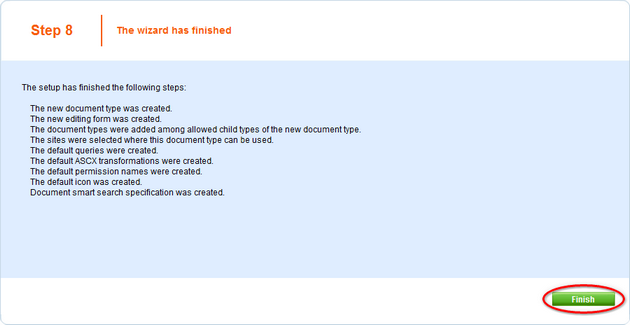
12. The wizard has finished the configuration of the new document type. It has automatically created not only the database table, but also the SQL queries for SELECT, INSERT, UPDATE, DELETE operations and a default transformation.
Click Finish.
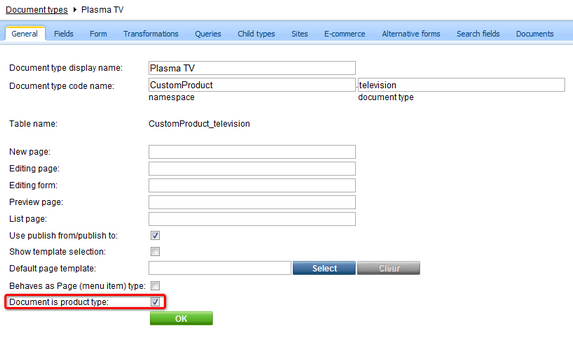
12. You will be redirected to the General tab of the product type editing interface. Enable the Document is product type option and click OK.
13. Now go to CMS Desk -> Products -> Plasma TV and click New at the document action toolbar. You'll see that you can choose Plasma TV as the new document type.
|
Adding attributes
This chapters explains how to add an attribute to specific document type. (e.g. product-camera, product - cell phones).
For adding attribute common to all products, please refer to the Adding product custom fields chapter. |
|
Changing document type icon
The default icon is created with the new document type. Should you want to replace this icon with your own, go to <your web project folder>\App_Themes\Default\Images\ CMSDesk\Icons\ and find the file named <namespace>_<your new document type>.gif (in our example, this is going to be CustomProduct_television.gif). All you have to do is replace this file with the image file of your new icon. Please note that the new file has to be named the same as the one being replaced. |
Page url: http://devnet.kentico.com/docs/5_5r2/ecommerceguide/index.html?defining_a_new_product_type.htm


