|
My messages |

|

|

|

|
|
My messages |
|
|
|
|
The CMS Desk -> My desk -> My messages section of the administration interface is divided into the following four tabs:
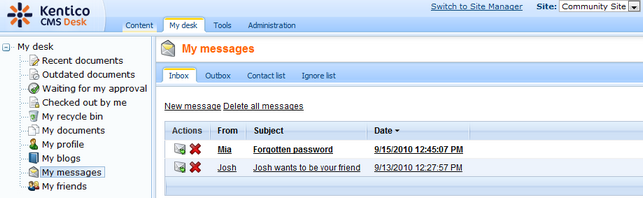
Inbox
On this tab, the current user can see all their received messages. A particular message can be displayed by clicking its Subject, Date or sender in the From column. The following two actions are available for each message:
| • |
| • |
The Delete all messages link deletes all messages in the list.
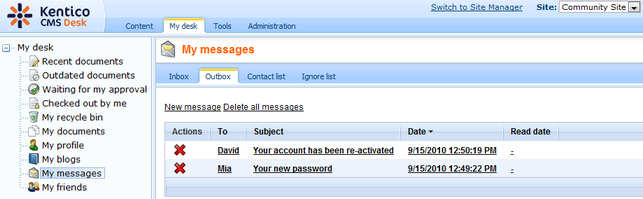
Outbox
This tab lists all messages sent out by the current user. A particular message can be displayed by clicking its Subject, Date or recipient in the To column. You can delete particular messages using the Delete (![]() ) icon, or delete all listed messages using the Delete all messages link. The New message link opens a dialog where a new message can be written and sent out.
) icon, or delete all listed messages using the Delete all messages link. The New message link opens a dialog where a new message can be written and sent out.
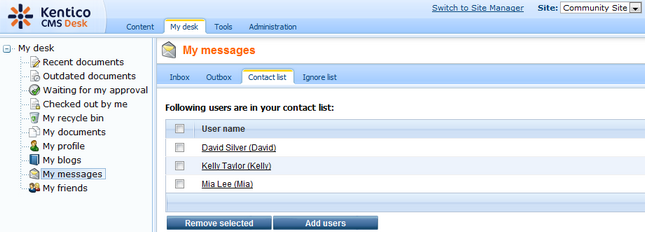
Contact list
This tab represents the current user's contact list, i.e. a list of users they communicate with. Having a user in the contact list makes it easier to select the user as a recipient when creating a new message.
The Add users button opens a pop-up dialog where you can select users to be added to the list. The Remove selected button removes users selected by the check-boxes from the list.
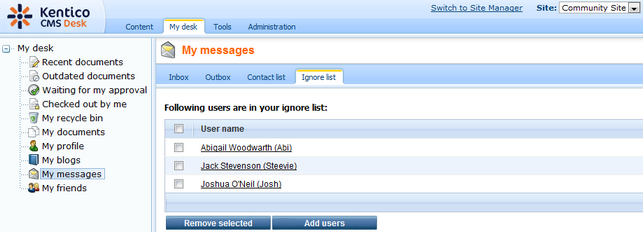
Ignore list
This tab represents the current user's ignore list, i.e. a list of users from which no messages will be received. If a user who is in your ignore list sends you a message, the message will simply not be delivered.
The Add users button opens a pop-up dialog where you can select users to be added to the list. The Remove selected button removes users selected by the check-boxes from the list.
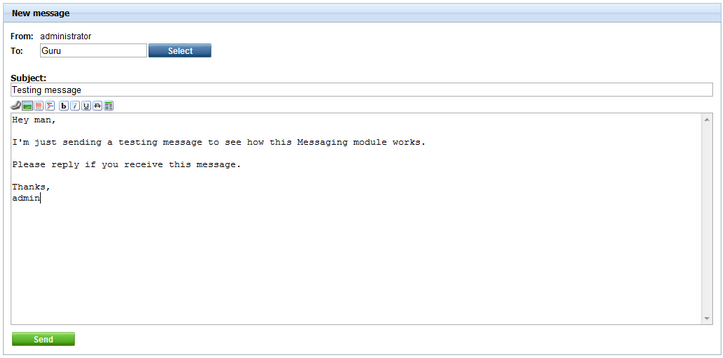
New message
On the Inbox and Outbox tabs, you can find the New message link. Clicking the link opens the New message dialog where new messages can be created and sent out. The New message dialog is depicted in the screenshot below.
When creating a message, you first need to select its recipient by clicking the Select button next to the To field. Clicking the button opens a pop-up dialog where the recipient can be selected from the contact list, from the user's friends, or searched from all visible website users.
Then you need to fill in the Subject field and the actual text of the message into the large text area. Entered text can be formatted using BBCode. This is possible either by entering BBCode tags directly, or using the icons above the main text area. Supported BBCode tags are listed and explained in Modules -> Forums -> BBCode support.
Finally, the message can be sent out using the Send button.
Page url: http://devnet.kentico.com/docs/5_5r2/devguide/index.html?messaging_my_messages.htm

