|
Creating the Friends page |

|

|

|

|
|
Creating the Friends page |
|
|
|
|
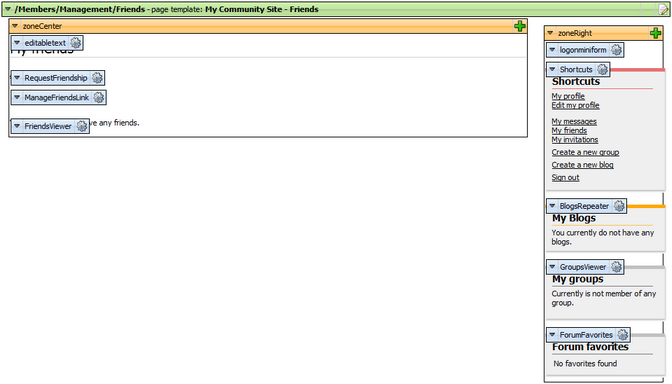
On the Friends page, users will see an overview of their friends, provided by the Friends viewer web part. Users will be able to request new friendships from this page too. There will also be a link to the Manage friends page which we will create in the following example. Detailed information on the Friends module can be found in Kentico CMS Developer's Guide -> Module Friends.
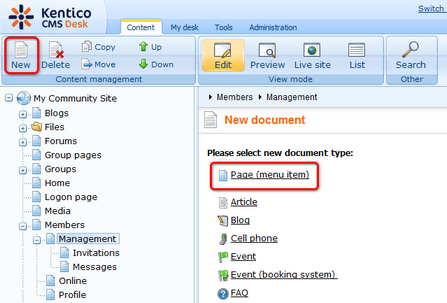
1. Select the Management page in the content tree and click New. Choose the Page (menu item) document type.
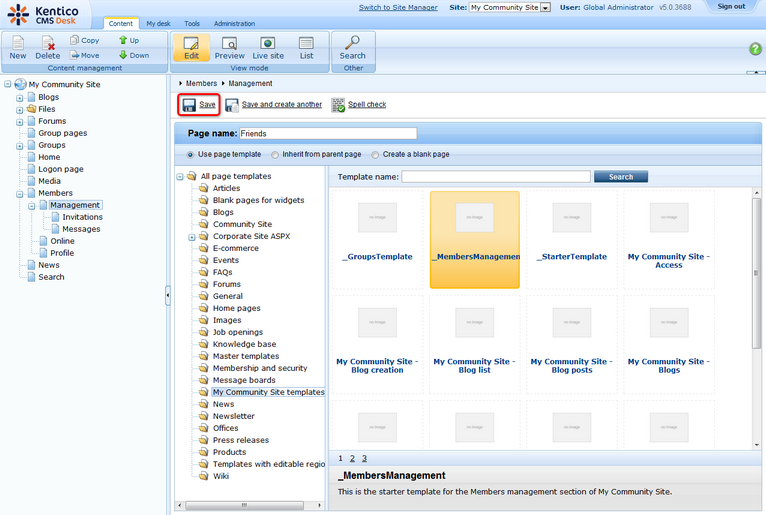
2. Select the My Community Site templates -> _MembersManagement page template created in this chapter. Into the Page name field, enter Friends and click Save.
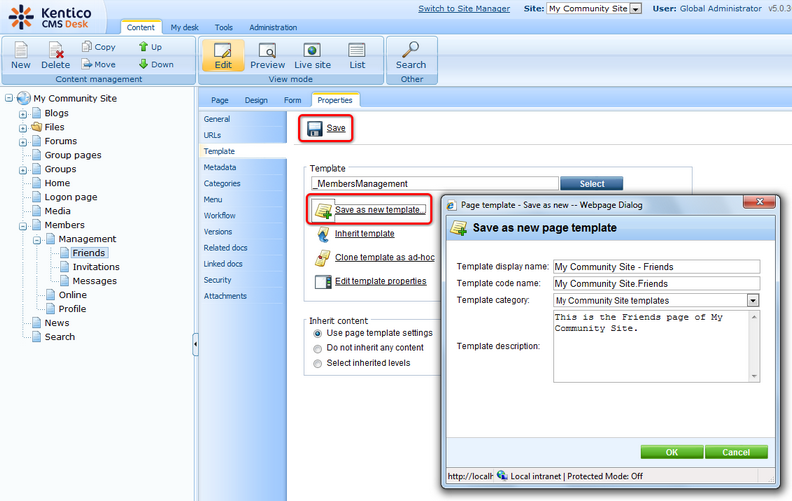
3. Switch to the Properties -> Template tab and click the Save as new template link. Enter the following details in the pop-up dialog:
| • | Template display name: My Community Site - Friends |
| • | Template code name: My Community Site.Friends |
| • | Template category: My Community Site templates |
| • | Template description: some text describing the page template |
Click OK. Click Save.
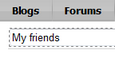
4. Switch to the Page tab. Enter My friends into the Editable text web part's text field and click Save.
5. Switch to the Design tab. Frist, we will add the Request friendship web part, which will enable users to request other users' friendship. Click the Add web part (![]() ) icon of the zoneCenter web part zone and choose the Community -> Friends -> Request friendship web part. Set only the following property of the web part, leave the rest at the default values.
) icon of the zoneCenter web part zone and choose the Community -> Friends -> Request friendship web part. Set only the following property of the web part, leave the rest at the default values.
| • | Link text: Add a friend |
Click OK.
6. Below, we will place the Static text web part with a link to the Manage friends page. Click the Add web part (![]() ) icon of the zoneCenter web part zone and choose the Text -> Static text web part. Set the following properties of the web part, leave the rest at the default values.
) icon of the zoneCenter web part zone and choose the Text -> Static text web part. Set the following properties of the web part, leave the rest at the default values.
| • | Web part control ID: ManageFriendsLink |
| • | Text: |
<span class="ManageFriends"><a href="~/Members/Management/Manage-friends.aspx">Manage my friends</a></span><br /><br /><br /> |
Click OK.
7. Finally, we will add the Friends viewer web part, which will display the user's friends. Click the Add web part (![]() ) icon of the zoneCenter web part zone and choose the Community -> Friends -> Friends viewer web part. Set the following properties of the web part, leave the rest at the default values.
) icon of the zoneCenter web part zone and choose the Community -> Friends -> Friends viewer web part. Set the following properties of the web part, leave the rest at the default values.
| • | Transformation name: Community.Transformations.MembersList |
| • | Hide if no record found: disabled |
| • | No record found text: You currently do not have any friends. |
| • | Friend status: Approved |
Click OK.
8. The page is finished. In Design tab, it should look as in the following screenshot.
Page url: http://devnet.kentico.com/docs/5_5r2/communitysiteguide/index.html?creating_the_friends_page.htm

