|
Creating the News page |

|

|

|

|
|
Creating the News page |
|
|
|
|
The News page will contain a repeater displaying news. News items can be created by users with access to CMS Desk, typically content editors or site administrators. They are useful for announcing important information to all site users and visitors.
Creating the News page will be very simple. We will re-use the starter page template created in this chapter and add some web parts, mainly the Repeater for displaying news items.
1. Go to CMS Desk, select the root of the content tree and click New. Choose the Page (menu item) document type.
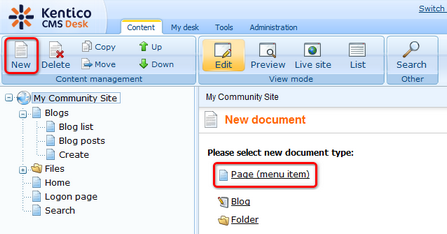
2. Choose the My Community Site templates -> _StarterTemplate page template. For Page name, enter News and click Save.

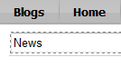
3. View the page in Page tab and enter News into the heading Editable text web part's text box. Click Save.
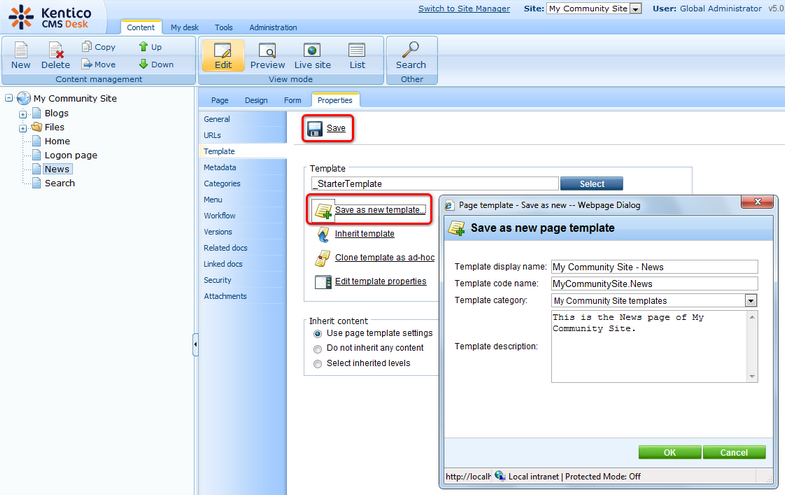
4. Switch to the Properties -> Template tab and click the Save as new template link. Enter the following details into the pop-up dialog:
| • | Template display name: My Community Site - News |
| • | Template code name: MyCommunitySite.News |
| • | Template category: My Community Site templates |
| • | Template description: some text describing the page template |
Click OK. Click Save.
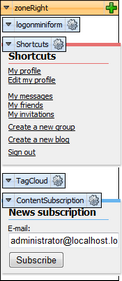
5. Switch to the Design tab. Firstly, we will add a tag cloud that will display tags from the News tag group. After clicking a tag, users will be redirected to this page again, where the repeater in the zoneCenter web part zone will display all news items tagged with the clicked tag.Click the Add web part (![]() ) icon of the zoneRight web part zone and choose the Tagging & Categories -> Tag cloud web part. Set the following properties of the web part, leave the rest of them at their default values:
) icon of the zoneRight web part zone and choose the Tagging & Categories -> Tag cloud web part. Set the following properties of the web part, leave the rest of them at their default values:
| • | Tag group name: News |
| • | Document list URL: /News |
| • | Web part container: Community Site - Orange Box |
| • | Web part container title: Tag cloud |
Click OK.
6. Now we will add the Content subscription web part to enable users subscribe to receiving notifications about new news items. Click the Add web part (![]() ) icon of the zoneRight web part zone and choose the Notifications -> Content subscription web part. Set the following properties of the web part, leave the rest of them at their default values:
) icon of the zoneRight web part zone and choose the Notifications -> Content subscription web part. Set the following properties of the web part, leave the rest of them at their default values:
| • | Display to roles: _authenticated_ |
| • | Path: /News/% |
| • | Document types: CMS.News |
| • | Create event enabled: enabled |
| • | Create event display name: Community news notification |
| • | Create event template name: News notification |
| • | Web part container: Community Site - Blue Box |
| • | Web part container title: News subscription |
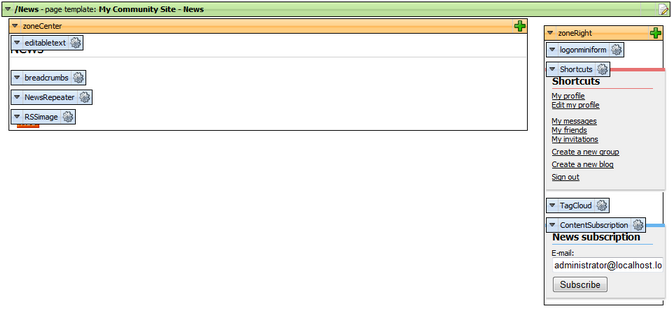
Click OK. The zoneRight web part zone is finished and in Design tab, it should look as in the screenshot below.
7. Now to the zoneCenter web part zone. The main web part will be a repeater displaying the news items. Click the Add web part (![]() ) icon, choose the Listings and viewers -> Repeater web part and click OK. In the web part properties window, set the following properties:
) icon, choose the Listings and viewers -> Repeater web part and click OK. In the web part properties window, set the following properties:
| • | Web part control ID: NewsRepeater |
| • | Path: /News/% |
| • | Document types: CMS.News |
| • | ORDER BY expression: NewsReleaseDate DESC |
| • | WHERE condition: |
({?tagid|(toint)?} = 0) OR (DocumentID IN ( SELECT DocumentID FROM CMS_DocumentTag WHERE TagID = {?tagid|(toint)?} )) |
| • | Transformation: Community.Transformations.NewsPreview |
| • | Selected item transformation: Community.Transformations.NewsDetail |
| • | Show new button: enabled |
| • | New button text: Add news<br /> |
| • | Show Edit and Delete buttons: enabled |
| • | Content before: <div class="newsRepeater"> |
| • | Content after: </div> |
Click OK.
8. Now let's add the Breadcrumbs web part. This web part will be displayed only when a news item is displayed, not in the list of news items. When the News item is displayed, the breadcrumbs will make the heading of the page in format News > Title of the news item. Click the Add web part (![]() ) icon of the zoneCenter web part zone and choose the Navigation -> Breadcrumbs web part. Set the following properties of the web part, leave the rest of them at their default values:
) icon of the zoneCenter web part zone and choose the Navigation -> Breadcrumbs web part. Set the following properties of the web part, leave the rest of them at their default values:
| • | Show for document types: CMS.News |
| • | Breadcrumb separator: <span class="TitleBreadCrumbSeparator"> </span> |
| • | Encode name: disabled |
| • | Web part container: Breadcrumbs box |
| • | Content before: <div class="blogsTopBreadcrumbs"> |
| • | Content after: </div> |
Click OK and drag-and-drop the web part between the NewsTitle and the NewsRepeater web part.
9. Finally, we will add the possibility to sign up for RSS notifications about new news items. Click the Add web part (![]() ) icon of the zoneCenter web part zone and choose the Text -> Static text web part. Set the following properties of the web part, leave the rest of them at their default values:
) icon of the zoneCenter web part zone and choose the Text -> Static text web part. Set the following properties of the web part, leave the rest of them at their default values:
| • | Web part control ID: RSSImage |
| • | Text: |
<br /><a href="~/CMSPages/NewsRss.aspx" style="border:0; padding-left: 10px; padding-right: 10px;"><img src="~/App_Themes/Default/Images/rss.gif" border="0" alt="RSS" /></a> |
Click OK. The News page is now ready. You can try out its functionality by adding some news items under the News page via CMS Desk. The page should display the news items correctly. In Design tab, the page should look as in the screenshot below.
Page url: http://devnet.kentico.com/docs/5_5r2/communitysiteguide/index.html?creating_the_news_page.htm

