|
Creating a starter page template |

|

|

|

|
|
Creating a starter page template |
|
|
|
|
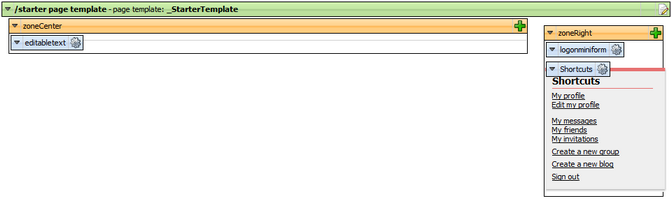
Many pages on the site will have the same layout and contain the same web parts. To prevent repeating the same development tasks again and again, it is a good practice to create a starter page template. This template will contain the required layout with two web part zones and three web parts - Editable text for heading in zoneLeft web part zone and the Logon mini form and Shortcuts web parts in zoneRight web part zone.
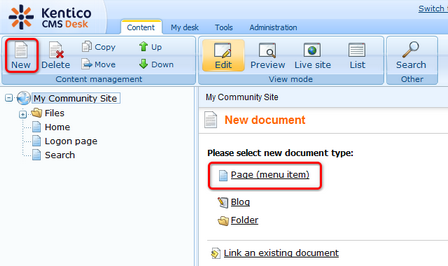
1. Go to CMS Desk, select the root of the content tree and click New. Choose the Page (menu item) document type.
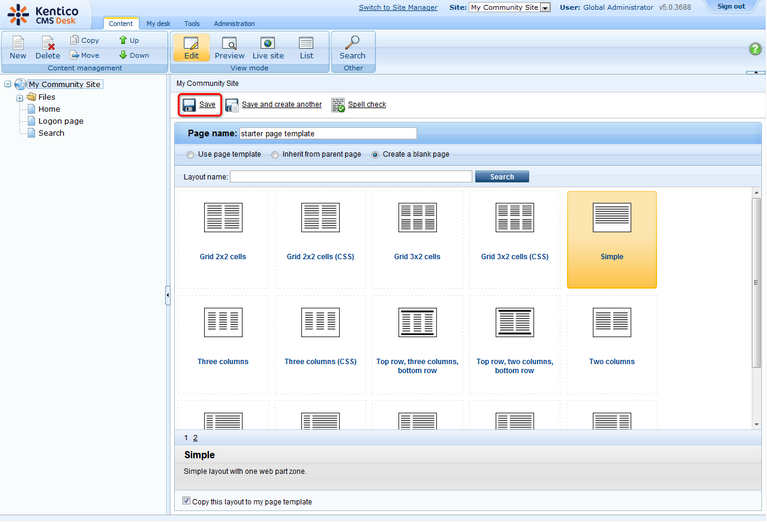
2. Choose to Create a blank page using the Simple layout. For Page name, enter starter page template and click Save.
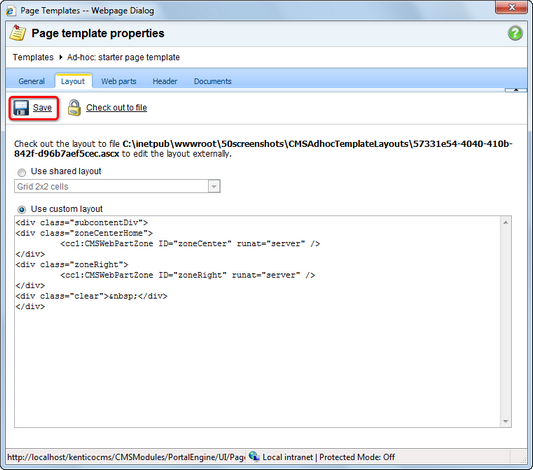
3. Switch to the Properties -> Template tab and click the Edit template properties link.

4. In the pop-up window, switch to the Layout tab and replace the original layout with the following code:
<div class="subcontentDiv"> <div class="zoneCenterHome"> <cc1:CMSWebPartZone ID="zoneCenter" runat="server" /> </div> <div class="zoneRight"> <cc1:CMSWebPartZone ID="zoneRight" runat="server" /> </div> <div class="clear"> </div> </div> |
Click Save.
5. Switch to the Design tab. You can see a page layout with two web part zones - zoneCenter and zoneRight. This layout is common to many of pages that we will create on the site. In the zoneCenter web part zone, all of the pages will contain a heading, provided by the Editable text web part. We will add the web part now. Click the Add web part (![]() ) icon, choose the Text -> Editable text web part and click OK. In the web part properties window, set the following properties:
) icon, choose the Text -> Editable text web part and click OK. In the web part properties window, set the following properties:
| • | Editable region type: Text box |
| • | Content before: <h1 class="header"> |
| • | Content after: </h1> |
Click OK.
6. In the zone zoneRight web part zone, two web parts will be common to all the pages. The first of them will be the Logon mini form. Click the Add web part (![]() ) icon of the zoneRight web part zone and choose the Membership -> Logon mini form web part. Set the following properties of the web part, leave the rest of them as they are:
) icon of the zoneRight web part zone and choose the Membership -> Logon mini form web part. Set the following properties of the web part, leave the rest of them as they are:
| • | Display to roles: _notauthenticated_ |
| • | Logon failure text: Error logging in. |
| • | Web part container: Community Site - Red Box |
| • | Web part container title: Sign in |
Click OK.
7. The next web part common on all the pages is the handy Shortcuts web part, displaying shortcuts to various actions and sections depending on the current context. Click the Add web part (![]() ) icon again, choose the Community -> Shortcuts web part and click OK. In the web part properties window, set the following properties. Leave the rest of the properties at the default values:
) icon again, choose the Community -> Shortcuts web part and click OK. In the web part properties window, set the following properties. Leave the rest of the properties at the default values:
| • | Display Join/Leave the group link: disabled |
| • | Display Friendship links: disabled |
| • | Display Add to contact list link: disabled |
| • | Display Add to ignore list link: disabled |
| • | Display manage group link: disabled |
| • | Display Sign in link: disabled |
| • | My messages path: /Members/Management/Messages |
| • | My friends path: /Members/Management/Friends |
| • | My invitations path: /Members/Management/Invitations |
| • | Sign out path: /Home |
| • | Web part container: Community Site - Red Box |
| • | Web part container title: Shortcuts |
Click OK.
When you are finished, the page in Design tab should look as in the following screenshot.
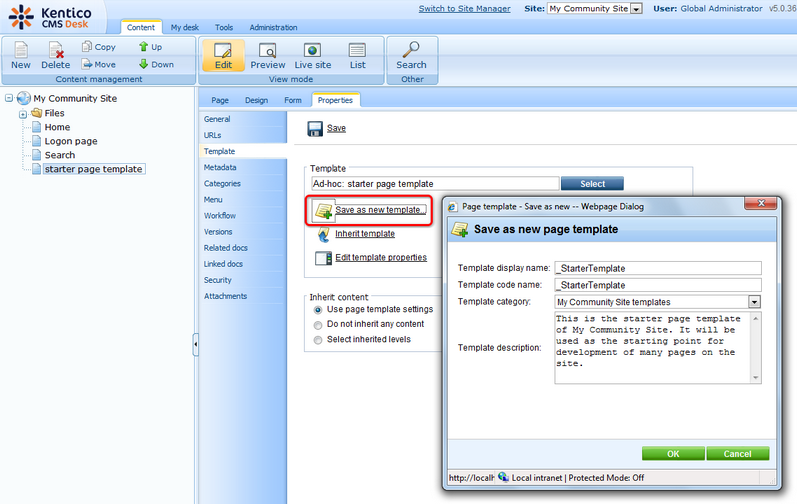
8. We will save the page template so that it can be reused later. Switch to the Properties -> Template tab and click the Save as new template link. Enter the following details into the pop-up dialog:
| • | Template display name: StarterTemplate |
| • | Template code name: StarterTemplate |
| • | Template category: My Community Site templates |
| • | Template description: enter some text describing the page template |
Click OK. Click Save.
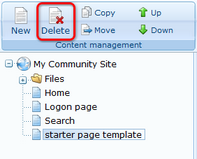
9. As the page template is now saved, we do not need the page created in this chapter anymore. Delete the page from the content tree. The page template will remain saved and can be used in the future.