The site master page is defined by the root document. Click the root of the site in the content tree and choose the Design tab. You will see the blank page template:
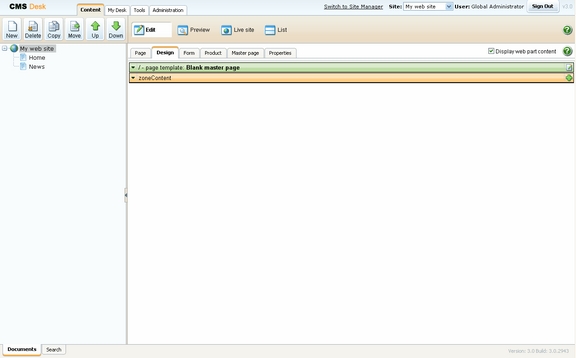
As you can see, there are no web parts at this moment. Click the icon in the green box ![]() to edit the HTML layout.
to edit the HTML layout.
Clear the text box content and copy and paste the HTML code inside the <BODY> element from file home.htm (it's part of the web site template located in folder C:\Program Files\Kentico CMS\<version>\CodeSamples\SampleWebTemplate) into the text box:

Click Save.
|
Using CSS-based layout instead of tables
If you prefer using CSS-based layout, you can easily change the HTML code here and replace the tables with DIV elements. You may also need to modify page layouts in Site Manager -> Development -> Page layouts so that they use CSS-based layout. We use table-based layout by default since it's easier to understand, although we are aware of advantages of the CSS-based layout. |

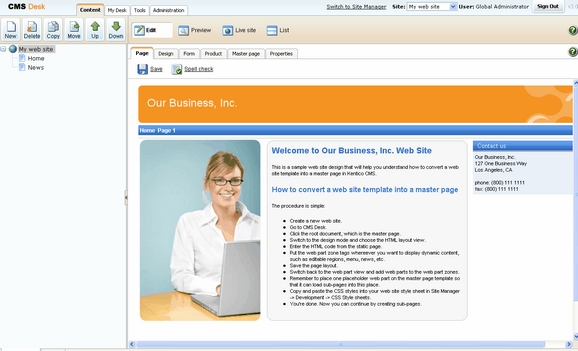
Click the Page tab now and you can see your new web site design (it's still static):
Adding web part zones
Now we need to replace static text with web part zones, so that we can put dynamic web parts on the page. Click Design and click HTML layout.
Locate the <!-- main menu --> section in your page template and replace the following code:
<!-- main menu --> <div class="MainMenu"> <table cellspacing="2" cellpadding="2" border="0"> <tr> <td class="MainCMSMenuHighlightedMenuItem">Home</td> <td class="MainCMSMenuItem">Page 1</td> </tr> </table> </div> |
with:
<!-- main menu --> <div class="MainMenu"> <cc1:CMSWebPartZone ID="zoneMenu" runat="server" /> </div> |
Now replace the main content section between <!-- main content --> and <!-- /main content --> lines with:
<cc1:CMSWebPartZone ID="zoneMain" runat="server" /> |
Click Save. After you close the HTML layout, you will see the new layout with web part zones:
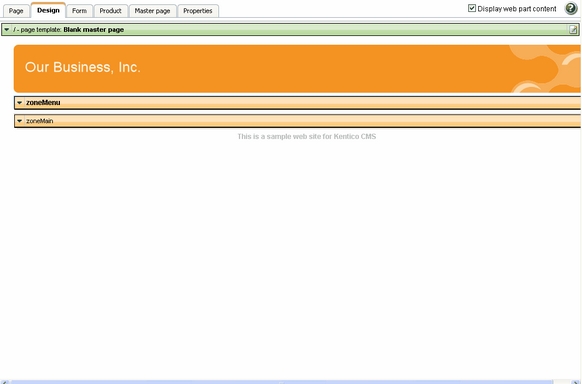
|
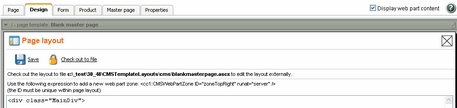
Tip 1: Editing HTML layout code in an external editor
If you prefer to edit the HTML layout code in some external editor, such as Visual Studio or Dreamweaver, you can Check-out the code to file on your disk using the Check out to file button in the HTML layout editor:
Now you can open the file using the path displayed on the screen in your favorite editor. You can modify the HTML code and preview the changes on the live site. After you finish the changes, you can check in the code back to the system and make the changes available to all users.
Please note: If you check-in the file or undo the check-out, the file is deleted on your disk.
You can use the same concept with transformations and CSS stylesheets as well. |

|
Tip 2: Master page tab
The Master page tab allows you to add custom DOCTYPE directive, custom HEAD section elements and custom BODY attributes. It also allows you to edit the master page HTML layout directly (this is the same code that you edit in the HTML layout mode of the Design view).
|

