Kentico CMS allows you to export whole web site including its settings and related objects (such as document types, workflows, web parts, page templates, etc.) into a single file that can be imported on the same or different Kentico CMS instance.
Exporting a site
Go to Site Manager -> Sites and click the Export site icon next to the site you want to export. This will start the export wizard.

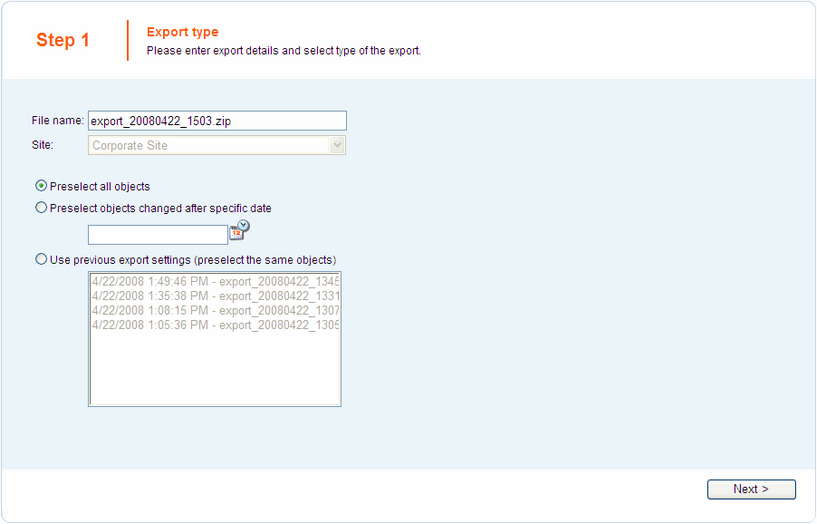
On the first screen of the wizard, enter the name of the export package (ZIP file). The file will be exported to the <web project>\CMSSiteUtils\Export folder. By selecting the appropriate radio button below, you can choose whether you want to preselect all objects, objects changed after a selected date or use the same settings as at the previous export. Select the option that suits your purposes and click the Next button.
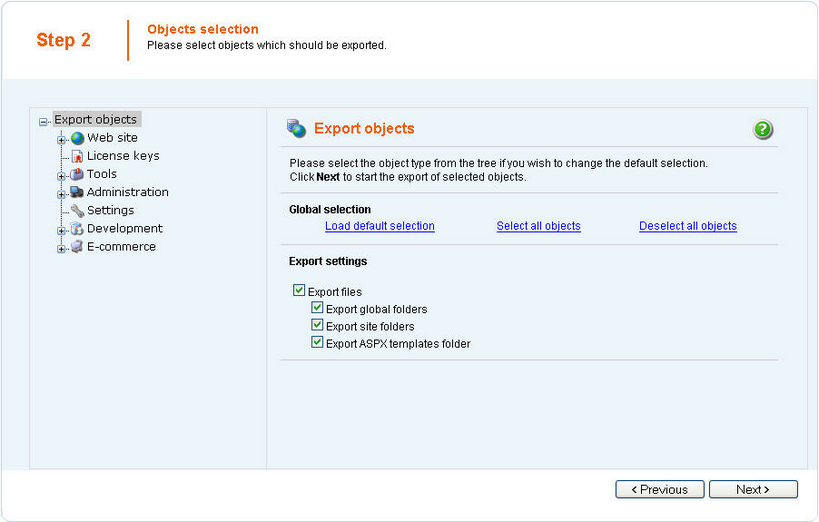
In Step 2 of the Export wizard, you can select which objects will be exported. The tree view on the left side of the screen shows particular categories into that the objects are divided. The Web site category contains objects related to the selected web site. The other categories contain global objects that can be used by various web sites.
By selecting a category, a set of check boxes appears in the right part of the screen, letting you select which objects are to be exported and which are not. If you have checked the "Log export tasks" check-box in Site Manager -> Settings -> Content Staging, a list of export tasks may also be displayed under the objects list. This happens when some global objects have been deleted (just as the two Web part containers in the screenshot below). If you leave the check-boxes checked, these objects will be deleted on the target server.

Alternatively, you can switch to the root of the tree and use one of the links in the Global selection section. Using these, you can load the default selection and select or deselect all objects. The Export global folders check-box determines if global files (all categories except of Web site) should be exported. The Export object folders check-box determines whether object files (e.g. web part files) will be exported or not. The Export ASPX templates folders check-box determines whether ASPX templates should be exported.
Make the selection and click Next.
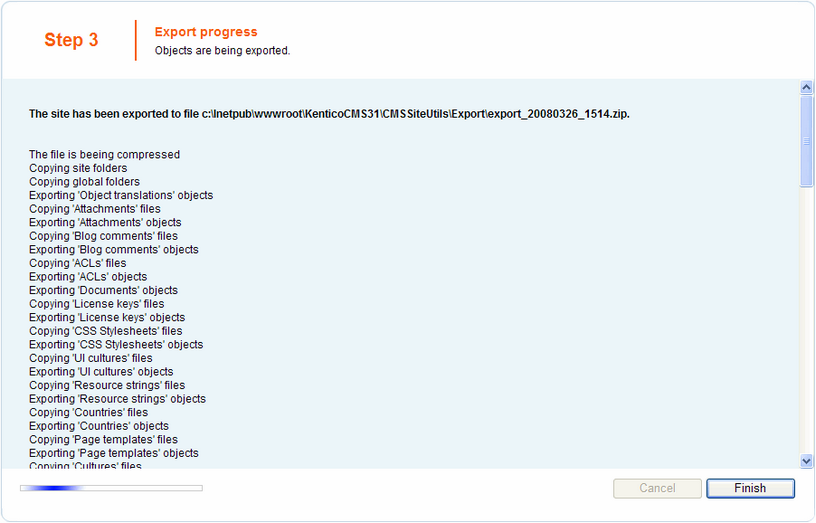
A log appears, showing you the progress of export. You can abort exporting by clicking the Cancel button at any time. After exporting is finished, a message appears at the top of the log, telling you the full path to the exported file. Click the Finish button. You will be redirected back to Site manager -> Sites.
Now you can import the site on some other machine using the Import site wizard described in chapter Importing a site or objects.