|
|

Creating a new workgroup |

|

|

|

|
|
Creating a new workgroup |
|
|

|
|
|
|
Creating a new workgroup |
|
|
|
|
|
Creating a new workgroup |
|
|
|
|
|
|
||
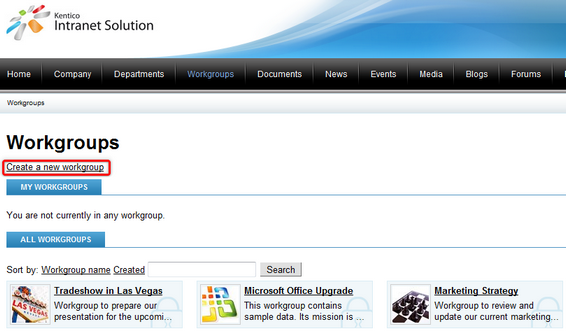
The creation of a new workgroup is a simple procedure that can be performed by any employee. The following example can be used as a guide through this process:
1. Access the portal and sign in. Now navigate to the Workgroups section using the main menu and click the Create a new workgroup link.
2. You will now see the Create workgroup form. Fill in the following properties:
•Group name - the name of the new workgroup that will be displayed on the portal.
•Description - text describing the new workgroup.
•Approve members - this selection determines if users can join the workgroup with or without a workgroup administrator's approval. The Only approved members can join option requires all new members to be approved, while Only approved members can join except for invited members allows users who accept an invitation from a workgroup member to join without approval.
•Content access - this selection determines what type of users can view the content of the workgroup. Please keep in mind that if the Only group members can view the content option is selected, users cannot apply to join the workgroup and must be invited to become members.
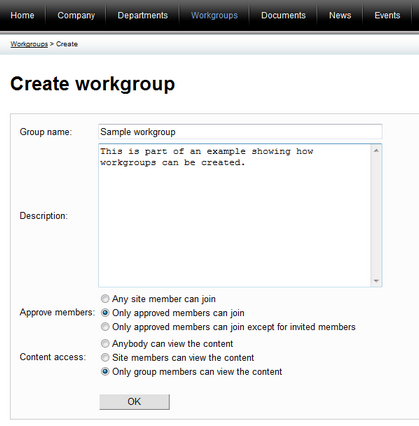
Click OK.
3. The workgroup will now be created, but before it can become active on the portal, it will usually require approval from a portal administrator. Once approved, the workgroup will be displayed on the Workgroups section, ready to be used. As the creator of the workgroup, you will automatically be assigned as its administrator. Details about the options available to workgroup administrators can be found in the Managing workgroups sub‑chapter.