|
|

Using the wizard |

|

|

|

|
|
Using the wizard |
|
|

|
|
|
|
Using the wizard |
|
|
|
|
|
Using the wizard |
|
|
|
|
|
|
||
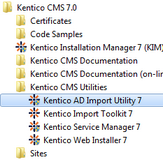
The AD Import Utility wizard can be executed either from Start menu -> All programs -> Kentico CMS <version number> -> Kentico CMS Utilities, or by launching the ADImport.exe file located in <Kentico CMS installation folder>\Bin (typically c:\Program Files (x86)\KenticoCMS\<version number>\Bin).
The following text describes particular steps of the wizard:
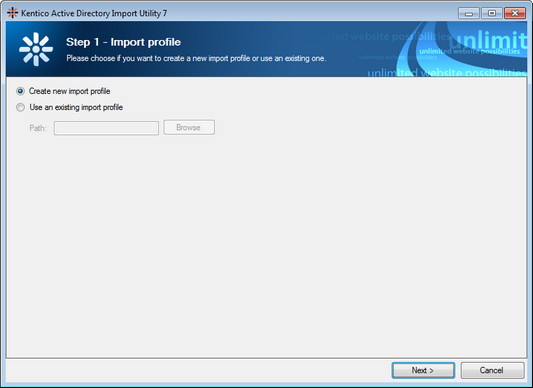
In the first step, you need to choose if you want to create a new import profile or use an existing XML profile. If you select an existing profile, values will be pre-filled in the following steps based on the profile settings.
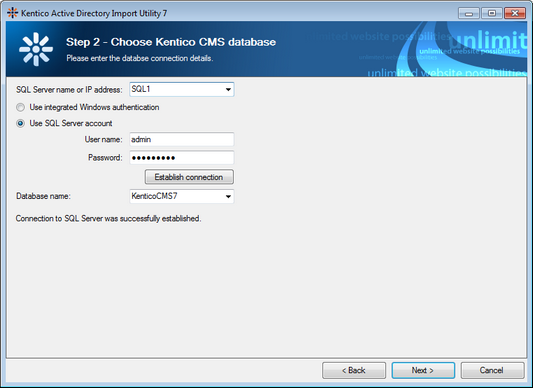
In the second step, specify the target database of the CMS where the users and roles will be imported:
•SQL Server name or IP address - name or IP address of the server where the target database is stored.
•Database name - name of the target database.
•Use integrated Windows authentication - choose this option if you want to log on to the server using Windows authentication.
•Use SQL Server account - choose this option if you want to log on to the server using credentials filled in the fields below.
It is a good idea to test the specified connection using the Test connection button before proceeding to the next step.
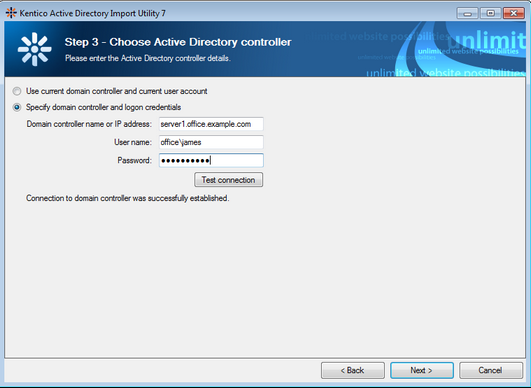
In the third step, specify the source AD‘s domain controller. You have two options:
•Use current user account - uses the domain where the current user belongs.
•Specify domain controller and logon credentials - if you choose this option, you can enter the logon details manually into the fields below.
Here again, it is recommended to test the specified connection using the Test connection button.
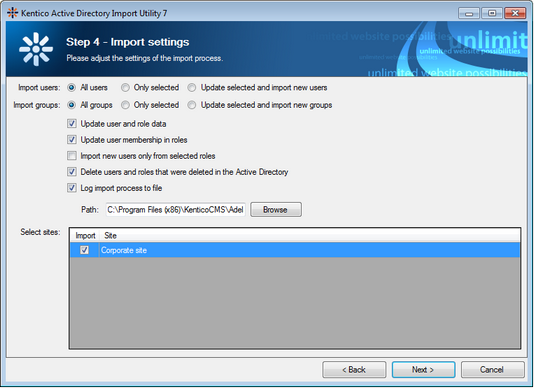
In this step, you can adjust some general settings of the import process:
•Import users/groups - determines which users or groups (roles) will be pre-selected in Step 6, you have the following options:
•All - all users or groups will be pre-selected.
•Only selected - when using an existing import profile, selection stored in the profile will be used. Otherwise, nothing will be pre-selected.
•Only selected and new - same as above, while new users and groups will be selected as well.
•Update user and role data - if enabled, properties of users and roles already imported from the AD will be updated in the CMS based on the current values in AD.
•Update user membership in roles - if enabled, membership of users imported from the AD will be updated in the CMS based on the current membership settings in AD.
•Import new users only from selected roles - if enabled, only those new users who belong to at least one role (group) selected in Step 6 or 8 of the wizard will be imported. Please note that enabling this option may override previous selection of users to be imported.
•Delete users and roles that were deleted in the Active directory - if enabled, users who were previously imported from the Active Directory but were deleted on the source server since then will be deleted in the CMS.
•Log import process to file - if enabled, you can specify a file where the import log will be stored.
•Select sites - choose the sites to which the imported users and roles will be assigned.
|
Please note
If you do not choose any site in this step, the rest of the wizard will leave out steps related to the import of roles (groups). This happens because it is currently not possible to import roles from AD into Kentico CMS as global objects and they must be assigned to a specific site.
|
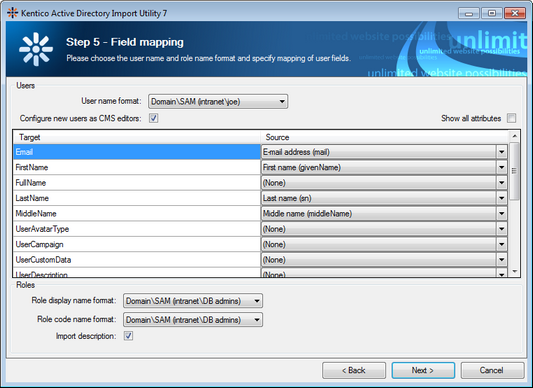
In this step, you are asked to define user name and role name format and to bind AD user properties to CMS user properties. The following options can be defined:
•User name format - choose one of the three possilbe formats:
•Domain\SAM (e.g. intranet\joe)
•SAM account name (e.g. joe)
•UPN (joe@intranet.mycompany.com)
•Configure user as CMS editor - turn on to enable the Is editor option for newly imported users. This option is located in Administration -> Users -> user edit -> General.
•Target/Source - you can choose which attributes from AD (Source) will be mapped to particular attributes of the CMS_User role.
•Show all attributes - turn on to enable all the attributes, including custom attributes, from your AD schema to be selected as Source. Note that you can import attributes of any data type, however, their values are always imported to Target as string.
•Role display name format - choose one of the two possible formats:
•Domain\SAM (intranet\DB Admins)
•SAM (DB Admins)
•Role code name format - choose one of the following formats:
•Domain\SAM (intranet\DB Admins)
•SAM (DB Admins)
•Guid (16-byte number)
•Import description - indicates if role description should be imported from the AD.
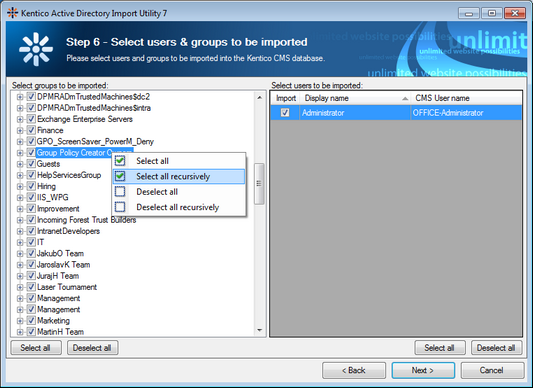
In the sixth step, you can select which roles and users will be imported. It will be possible to adjust the settings made here in the following two steps.
On the left, you can see all groups (roles) found on the source server. If you select a group, its members are displayed in the list on the right. You can define which users and roles will be imported using the appropriate check-boxes.
By right-clicking a group, you can display a context menu with the following actions:
•Select all - selects all child groups directly under the selected group.
•Select all recursively - selects all child groups under the selected group until the last level.
•Deselect all - selects all groups directly under the selected group.
•Deselect all recursively - selects all group under the selected group until the last level.
All users in a role or all roles can be selected or deselected in one click using the Select all and Deselect all buttons.
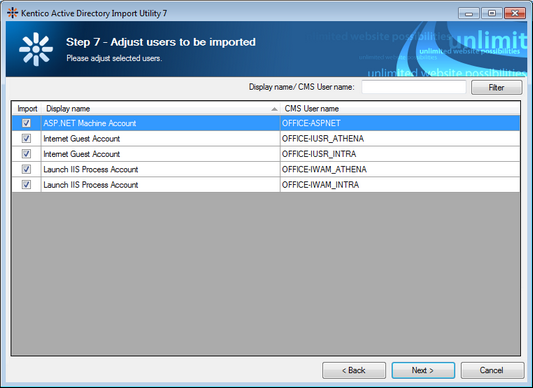
In this step, you can adjust the users to be imported. Users are selected based on settings made in the previous step, while you can adjust the selection using the check-boxes. You can also filter the listed users by Display name and User name using the filter above the list.
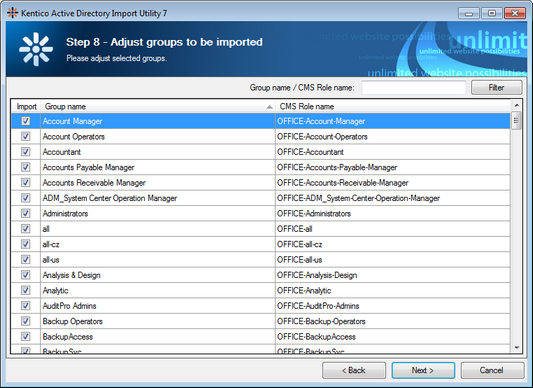
This step is similar to the previous one, while groups (roles) to be imported can be adjusted here using the check-boxes. Listed groups can be filtered by Group name using the filter above the list.
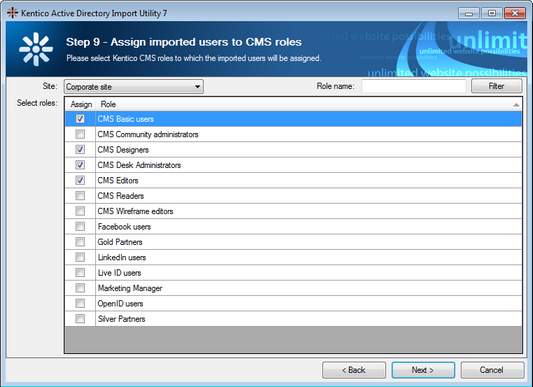
In the sixth step, you can select roles to which the imported users will be assigned. If you are importing to multiple sites, you first need to choose the site whose roles should be displayed using the Site drop-down.
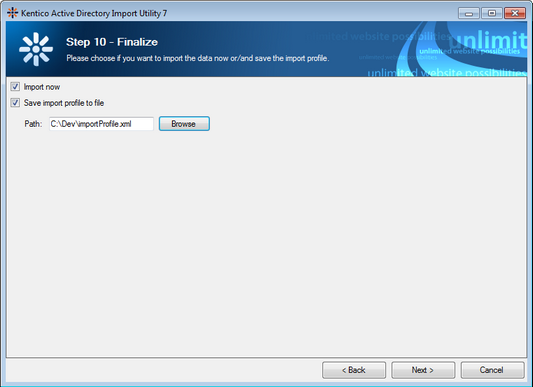
Now you have your import profile configured. You can execute it immediately, save it into a file or perform both of these actions, depending on which of the Import now and Save import profile to file check-boxes is enabled.
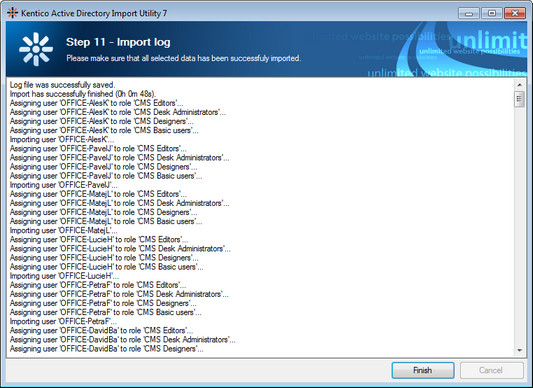
The last step displays an import log, showing the progress of the import process. When the import finishes, you can close the wizard using the Finish button.