|
|

Creating an MVT test |

|

|

|

|
|
Creating an MVT test |
|
|

|
|
|
|
Creating an MVT test |
|
|
|
|
|
Creating an MVT test |
|
|
|
|
|
|
||
The sections below describe the tasks that must be performed to successfully set up a multivariate test on your website.
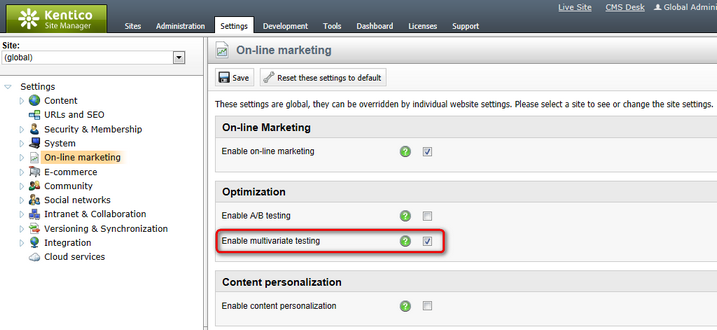
Before you can start creating MVT tests for pages, it is first necessary to enable the module by going to Site Manager -> Settings -> On-line marketing and checking the Enable multivariate testing field.
Since web analytics are used to log conversion statistics for individual versions of tested pages, the Enable web analytics and Track conversions fields must also be enabled in the On‑line marketing -> Web analytics sub‑category of the settings. All other requirements for the correct functioning of the Web analytics module also need to be fulfilled, so please refer to Modules -> Web analytics if you encounter any problems with conversion tracking while performing an MVT test.
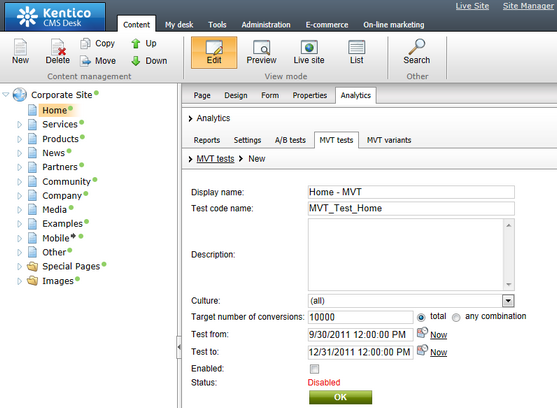
To start optimizing a page on your website via multivariate testing, create and configure an MVT test object for it. To do this, open CMS Desk, select the appropriate document from the content tree and switch to its Analytics -> MVT tests tab. Here you can find a list of all MVT tests assigned to the currently selected document and manage them as required.
Click ![]() New MVT test and fill in the test's properties according to the information in the table below:
New MVT test and fill in the test's properties according to the information in the table below:
Display name |
The name of the MVT test displayed in the administration interface. |
Test code name |
Sets a code name that serves as an identifier for the test. It is also used in the name of the browser cookie used to store which of the test's variant combinations was assigned to a visitor. |
Description |
Can be used to enter a text description for the test in order to give information about its purpose, goals, etc. |
Culture |
Used to select which culture version(s) of the document should be included in the test. |
Target number of conversions |
Sets the number of conversion hits that must be logged to complete the test. Once this number is reached, the MVT test will automatically stop working and switch to the Finished status.
If the total option is selected, then the number will be compared with the total amount of conversion hits logged for all of the test's combinations. If any combination is chosen, then the test will be concluded when the specified number is reached by one combination (the one with the most conversion hits).
Leaving this property empty or setting it to 0 means that there will be no conversion hit limit for the test. |
Test from/to |
Sets the time interval during which the test should occur. The Calendar button ( |
Enabled |
This property may be used to manually start or stop the test. |
Status |
Displays the current status of the MVT test. The following statuses are possible:
•Disabled - indicates that the test is not active. The default content of the tested page will always be displayed to visitors and conversions will not be logged for the test's combinations. •Not running - indicates that the test is not active. Used when the test is enabled, but the Test from date is still in the future. •Running - indicates that the test is currently active. •Finished - this status is automatically assigned after the Test to date passes or when the Current number of conversions reaches the Target number of conversions. Tests with this status are no longer active.
Each page may have only one MVT test running at a given time. It is however possible to have multiple finished or disabled tests assigned to a page, which can be used to archive data from previous tests or when preparing future tests. Different culture versions of a page may each have a different test running at the same time. |
Click OK to confirm the configuration and the test will be assigned to the document.
|
Managing MVT tests through the Web analytics interface
If you wish to manage all tests assigned to different pages from a single location, go to CMS Desk -> Tools (or On-line marketing) -> Web analytics. Then expand the Optimization -> MVT tests category, select one of the contained items (reports) and switch to the MVT tests tab.
Here, all MVT tests defined on the current website may be managed in the same way as described for individual documents. The only difference is that the Page property is additionally available when editing a test, which can be used to assign tests to specific pages. |
Once a page contains an MVT test, you can start creating the content options that you wish to evaluate. This is done by defining variants for the elements that make up the content of the page. It is possible to use the following objects as variables:
•Web parts - each variant is another instance of the original web part. A variant's properties may be configured differently and an alternative Web part layout can be specified.
•Web part zones - in this case, variants are added as entire web part zones. Each zone variant may contain any type or number of child web parts as required. The basic properties of the zone may also be set differently. When a new variant is added to a zone, the content of the original is automatically copied into it, so you do not have to rebuild the zone from scratch if you only need to make small modifications. Please note that creating variants for individual web parts inside zone variants is not supported.
•Editor widgets - like with web parts, each variant is a widget of the same type as the original that provides the option to set different values for its properties.
If you are not familiar with the basics of page development in Kentico CMS, it is recommended to read through the Development -> Web parts and Widgets chapters of this guide before you continue.
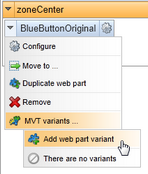
To add an MVT variant to a web part or zone, open the page on the Design tab, expand the context menu of the given object by right clicking its header (or through the ![]() icon), hover over the MVT variants option and select Add <object type> variant from the second level of the menu.
icon), hover over the MVT variants option and select Add <object type> variant from the second level of the menu.
Then, fill in the following properties in the displayed dialog:
•Display name - the name used in lists of MVT variants in the administration interface.
•Code name - sets a code name that serves as an identifier of the variant.
•Description - can be used to enter a text description of the variant.
•Enabled - indicates if the variant should be considered as a possible testing option. If you disable an MVT variant, all testing combinations that include this variant will also be disabled.
After you enter and confirm these basic values for the new variant, a configuration dialog will be opened, just like when creating a standard web part or widget. Here, you can set up the available properties (according to the type of the given object) so that the variant generates the content that you wish to test. By default, the values set for the original will be loaded into the properties, so you only have to change the parts of the configuration that are unique for the given variant.
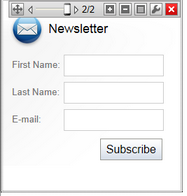
Each object for which you create testing variants will have a slider available in its header as shown below:
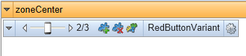
This slider can be used to switch between individual variants as needed (including the original). The content specified by the current selection on the page's variant sliders will be displayed in CMS Desk on the Design and Page tabs, and in Preview mode. You can also switch between different versions of the page's content by using the combination panel, which is described in the next section below.
If you wish to view the content of variants while cycling through the slider on the Design tab, make sure that the Display web part content checkbox on the right side of the Edit mode header is checked. To make orientation easier, it is recommended to assign an appropriate title property for each web part or zone variant, so that you can identify which one you are working with straight from the header text.
The buttons on the right of the slider allow you to add new variants (![]() ), remove the currently selected one (
), remove the currently selected one (![]() ) or open a list (
) or open a list (![]() ) of all variants that the given object currently has. At any time, you can Configure (
) of all variants that the given object currently has. At any time, you can Configure (![]() ) the properties of the variant currently chosen on the slider.
) the properties of the variant currently chosen on the slider.
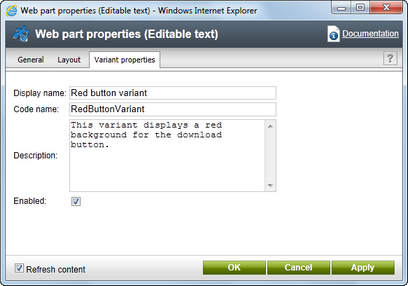
When editing a variant like this, you can access the properties that affect the content on the General tab. The specific settings related to the testing functionality of the specific variant (the same options that were offered when creating a new variant) can be changed on the additional Variant properties tab.
In the case of editor widgets, multivariate testing variants are handled using a very similar approach. The only difference is that editing is done on the Page tab of CMS Desk and the slider and actions for variant management are located on the pop‑up menu of individual widgets.
You can access a list of all multivariate testing variants defined on a given document (page), by selecting it from the content tree in CMS Desk -> Content -> Edit and going to Analytics -> MVT variants. The variants of all three object types are included here, and they can be removed or edited as necessary.
There are some general rules that apply to all MVT variants:
•If you delete an object from the page, any variants that it might have will be removed along with it.
•Variants are not linked to a specific MVT test. Instead, they are either stored on the page template used by the given document (in the case of web parts and zones) or bound to the document itself (editor widget variants). This means that existing variants may be used by other MVT tests performed on the given page at another time. Also keep this in mind if you wish to Export a multivariate testing scenario to another website. Variants will be transferred along with documents and page templates, not MVT test objects.
|
Multivariate testing and Content personalization
Please note that it is not possible to create multivariate testing variants of web parts, zones or widgets that already have variants defined for Content personalization.
|
Individual testing scenarios are represented by combinations of the MVT variants created on the page. By default, all possible combinations of the page's content will be included in a multivariate test, but you may perform some additional configuration to fine‑tune your test as required.
Combinations can be managed for documents that have an MVT test defined via a panel located at the top of the page editing interface in CMS Desk. This panel is available on both the Page and Design tabs, and in Preview mode.

You can choose any of the available combinations through the Combination selector. Doing so will cause the page to display the content defined by the variants that make up the given combination. The selection made through the combination panel is linked with the positions set on the MVT sliders of variable objects on the page. If you switch to a different variant through an object's slider, the current combination will also change accordingly and vice versa.
Pages where there are several variants for multiple objects will have a large amount of possible combinations. For this reason, it is recommended to carefully choose which combinations should be included in the page's MVT test. You can include or exclude a combination by toggling the Enabled checkbox located on the panel next to the selector. There is a close relationship between the status of a combination and its variants. If an individual variant is disabled through its properties, all combinations that include it will also be disabled. If a disabled combination is enabled at a later point, all of its variants will be enabled automatically if needed.
A good way to evaluate potential combinations is to check them in the Preview mode of CMS Desk, and disable those where the variants clash visually, have conflicting logic or are otherwise incompatible. We recommend leaving the Default page combination enabled, so you can compare any improvements with the baseline statistics of the original page.
Another best practice is to set a descriptive custom name for each active combination, so that you can easily differentiate between combinations in the editing interface and identify them in the test's result reports. To do this, simply select a combination through the panel, enter the appropriate text into the Custom name field and click the Change button. The default names assigned to new combinations are composed of a number indicating their order, followed by a list of the display names of all variants that are included in the given combination.
Once the page's variants and combinations are all configured as needed, you can enable your MVT test on the Analytics -> MVT tests tab of the document. Making further modifications on the page while an MVT test is running is not recommended, since this may affect the accuracy and relevance of the measured statistics. A warning will be displayed below the combination panel on pages where a test is running.
The Set as result action should only be used after the conclusion of the test, once you have analyzed the logged conversion data and identified the combination that provides the best results. The action allows you to easily set the winning combination as the permanent content of the page. Simply select the given combination via the combination panel, then click the button and confirm the action. This will replace the original web parts, zones and widgets with the variants included in the currently selected combination and remove all other MVT variants from the page.
Conversions allow you to track the behaviour and actions of the website's visitors, so they must be used in order to get MVT testing results. They work on a site‑wide level and are not assigned to MVT tests in any way. All that needs to be done is define conversion objects and link them with the actions that you wish to log for the test.
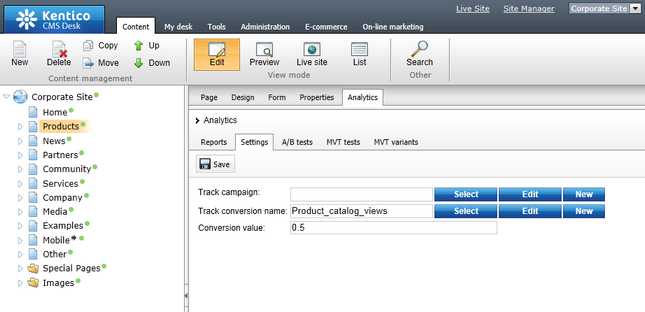
There are many ways to specify that an action should be logged as a conversion. For example, to have the system log a conversion hit whenever a specific page is viewed by a user, select the given document from the content tree in CMS Desk and switch to its Analytics -> Settings tab. Use the Track conversion name property to either create a conversion via the New button, or Select an existing one.
Additionally, many web parts and widgets that allow users to perform important actions (e.g. registration) also have the Track conversion name property, which can be used to specify a conversion in the same way. Further details about conversion management may be found in the Modules -> Web analytics -> Conversions chapter.
When an action designated as a conversion is performed anywhere on the website, the system checks if the given user has passed through a page with a running MVT test (according to the presence of a cookie). If this is the case, the conversion hit will be logged for the content combination that was assigned to the user.
Once you enable the MVT test and it starts running on the live site, the conversion statistics for individual combinations can be monitored using pre‑defined reports, as described in the Analyzing MVT test results topic.

