Multiple websites on a single domain (in subfolders)
Managing sites:
Multiple websites on a single domain (in subfolders)
Multiple websites on a single domain (in subfolders)
In some cases, you may want to run multiple websites in separate subfolders, without getting a new domain for each one. This can be achieved by configuring IIS and the domain names (or domain aliases) of the websites like in the following example:
Example
1. Install Kentico CMS to the following folder: C:\inetpub\wwwroot\mykenticofolder. Make sure the name of the folder is different from the virtual directory name that you will later enter in IIS. In the same step of the installer, choose This is an installation to the root (do not create virtual directory). When the setup finishes, the link to your new website will not work as the virtual directory is not created in IIS.
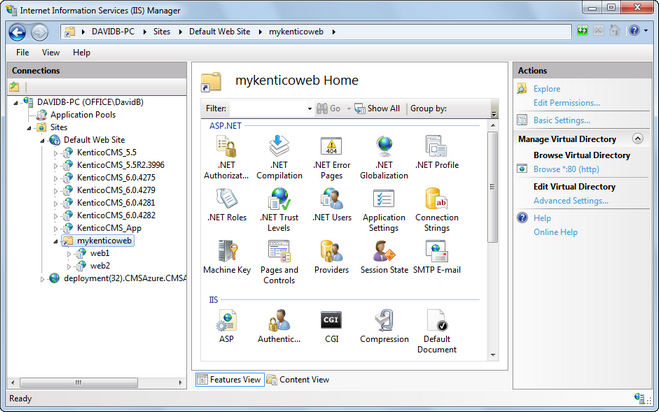
2. Open the IIS console (Control Panels -> Administrative Tools -> Internet Information Services) and create a new virtual directory named mykenticoweb. Assign it to a non-website-root folder on your disk. Ideally, create an empty folder on the disk for this purpose (e.g. c:\empty).
3. Create two applications under mykenticoweb called web1 and web2. Both of them need to be have their physical path assigned to the installation folder on the disk, which is C:\inetpub\wwwroot\mykenticofolder in this example. Remember to set an appropriate application pool according to the type of installation that you specified.
4. Now open your browser and type in either http://localhost/mykenticoweb/web1 or http://localhost/mykenticoweb/web2. Kentico CMS Database setup appears. Continue through the setup as usual and install the first site.
5. When the setup finishes, go to Site Manager -> Sites and install the second site.
6. Configure the domain name for website 1 as: localhost/mykenticoweb/web1
7. Configure the domain name for website 2 as: localhost/mykenticoweb/web2
Now when you go to http://localhost/mykenticoweb/web1, you will see website 1. If you go to http://localhost/mykenticoweb/web2, you will see website 2.
8. To ensure the synchronization of settings and global objects between the two sites, it is necessary to set up a Web farm scenario. This can be done by adding the following keys to the <appSettings> section of the web.config file in the installation directory shared by both websites:
This enables web farms in general and disables synchronization of files, which is not needed since the applications already use the same physical folder. Notice that each application has a different web farm server name specified via a prefix in the name of the CMSWebFarmServerName key. This prefix must match the path that was set for the corresponding application in IIS, including the virtual directory.
Then go to Site Manager -> Administration -> Web farm on one of the sites and create a web farm server for each application according to the instructions in Defining web farm servers.
9. Next, to prevent potential problems with conflicts during Smart search indexing operations, specify a different physical folder for each application's search index files through the keys shown below: