|
|

Managing sites |

|

|

|

|
|
Managing sites |
|
|

|
|
|
|
Managing sites |
|
|
|
|
|
Managing sites |
|
|
|
|
|
|
||
You can manage websites through the Site Manager -> Sites dialog. Please see New site wizard for more details on creating a new website. If you Edit (![]() ) a specific site, you can configure its details on the following tabs:
) a specific site, you can configure its details on the following tabs:
Site display name |
The name of the site displayed in the administration interface and in site selectors. |
Site code name |
The name of the site used in the code. |
Site domain name |
The main domain of the website. Enter the domain name without the http:// protocol and www prefix. If you wish to use a different port than 80, specify it as well.
Correct: mycompany.com partners.mycompany.com mycompany.com:8080
Incorrect: http://mycompany.com www.mycompany.com |
Default content culture |
Default culture of the site's content. It can be changed using the Change button. |
Visitor culture |
Sets the content culture that should be displayed by default to visitors who do not have a preferred culture selected (the value of a browser cookie is checked). The (Automatic) option means that the culture will be decided based on the preferences configured in the visitor's browser.
If the Site Manager -> Settings -> URLs and SEO -> Force domain culture setting is enabled, the culture specified here will always be selected and displayed when the site is accessed through its main domain name. All URLs of documents in the given culture will also be generated with the main domain name. |
Site CSS stylesheet |
Default CSS stylesheet used for all pages on the site unless they override the value with their own CSS stylesheet. |
Editor CSS stylesheet |
CSS stylesheet used for the WYSIWYG editor content. |
Site description |
Optional text description of the website for internal use. |
Here you can manage the website's domain aliases. Each alias represents a different domain name under which the site will be available. For example, if your website uses mycompany.com as its main domain and you also wish to assign the my-company.co.uk domain to the same website, you need to add this domain name to the list of domain aliases. This can be particularly useful for multilingual websites.
The following fields can be set when creating a new alias or editing (![]() ) an existing one:
) an existing one:
Domain alias |
Specifies the domain name used for the alias. Like with the site's main domain name, include the port number if it is not 80, but do not enter the http:// protocol or www prefix. |
Visitor culture |
Sets the content culture that should be displayed by default to visitors who arrive on the website through a URL containing this domain alias.
If the Force domain culture setting is enabled for the website, the culture specified here will always be selected and displayed when the site is accessed through the alias's domain name. All URLs of documents in the given culture will also be generated with the this domain name. |
Default alias path |
Used to select the default page (document) that should be displayed when the website is accessed through the alias. This overrides the Site Manager -> Settings -> Content -> Default alias path setting. |
Redirect URL |
Users will be redirected to the entered URL when they access the website through this domain alias. Both absolute and relative URLs are accepted. This field supports macro expressions.
If the only purpose of your aliases is to make the site available under multiple domain names, it is recommended to redirect them to the website's main domain. This is a common Search engine optimization practice that prevents duplicate web content (i.e. having several URLs leading to the same content).
Example:
Imagine that the main domain of your website is domain.com and you have domain.co.uk defined as a domain alias with the Redirect URL field set to:
{%protocol%}://domain.com{%relativepath%}
These macros can be used to dynamically redirect users to the correct page under a different domain.
{%relativepath%} - is resolved into the current relative URL path when the redirection takes place
{%protocol%} - is resolved into the current URL scheme name (protocol) when the redirection takes place
Now if a user accesses for example http://domain.co.uk/example.aspx, they will be redirected to http://domain.com/example.aspx.
|
Here you can assign content cultures to the site, which can then be used to create translated versions of the website's documents. You will use this tab to configure websites that provide content in multiple languages. To learn more, please see the Content management -> Multilingual content chapter.
Here you can make the currently edited site unavailable for regular users.
When in off‑line mode, the live version of the website will not be accessible by visitors, but the site will still remain running and can be worked with normally through the CMS Desk or Site Manager interface by editors and administrators. This can be useful if you need to make major modifications to the site and wish to hide it while the update is in progress. To enable this mode, click the Take the site off-line button.
You can choose between two ways of handling users who attempt to access the site while it is off-line:
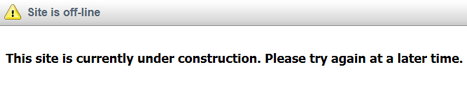
1. Select the Display following message option and add some content using the WYSIWYG editor:
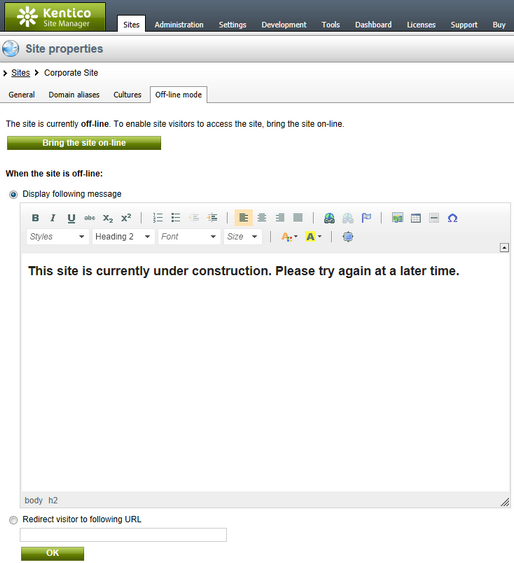
Click OK to save the message and its content will be displayed to all visitors. The HTTP response status code of the page will be set to 503, so applications and crawlers who access the site should be able to correctly recognize the situation.
2. Choose Redirect visitor to following URL and enter the address of an alternate website or page to which users will automatically be redirected until the site is returned back on-line.
At any time, you can allow visitors to access the site again by clicking the Bring the site on-line button.