|
|

Groups management |

|

|

|

|
|
Groups management |
|
|

|
|
|
|
Groups management |
|
|
|
|
|
Groups management |
|
|
|
|
|
|
||
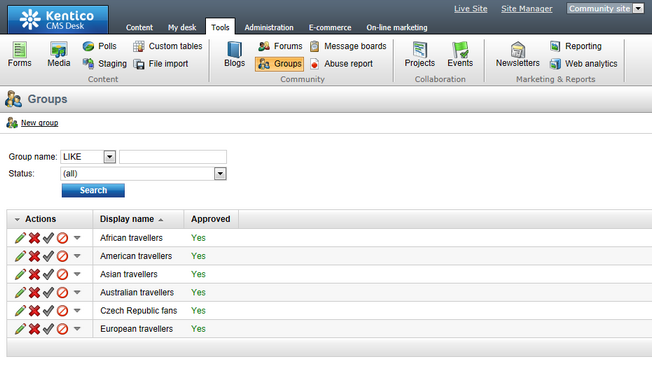
In the screenshot below, you can see the groups management interface located in CMS Desk -> Tools -> Groups. On this page, you can see a list of all groups on the site. You can filter displayed groups using the filter above the list. Filtration is possible by the group's display name and approval Status.
Even though groups are typically created by site users on the live site, you can create new groups in this section of the administration interface too. It can be done by clicking ![]() New group at the top part of the page. Groups in the list can be Edited (
New group at the top part of the page. Groups in the list can be Edited (![]() ) or Deleted (
) or Deleted (![]() ). The Editing a group topic describes editing in more detail.
). The Editing a group topic describes editing in more detail.
If an administrator's approval is needed after a user creates a new group, the approval can be done by clicking the Approve (![]() ) icon. By clicking the Reject (
) icon. By clicking the Reject (![]() ) icon, groups can be switched back to the state they were in before they were approved. If you do this to an existing group, the group will not be displayed on the live site.
) icon, groups can be switched back to the state they were in before they were approved. If you do this to an existing group, the group will not be displayed on the live site.
All Kentico CMS documents can be set to be owned by a group. To do this select a document from the content tree, switch to Edit mode and go to Properties -> General -> Owned by group. Then click Change and choose a group from the drop-down list. This property is used to identify which group a document belongs to and is used by various group context sensitive web parts to display the correct content. It also influences the editing permissions of Group administrator widget zones. See Enabling users to create groups for more information.