|
|

Defining custom form layout |

|

|

|

|
|
Defining custom form layout |
|
|

|
|
|
|
Defining custom form layout |
|
|
|
|
|
Defining custom form layout |
|
|
|
|
|
|
||
If you're not satisfied with the standard table layout of the form, the forms module allows you to define custom form layout. This can be achieved on the Form tab of a form's editing interface in CMS Desk -> Tools -> Forms.
To modify the default layout of the sample Event registration form created in the Creating a new form topic, please take the following steps:
1. Go to CMS Desk -> Tools -> Forms and click the Edit (![]() ) icon next to the form.
) icon next to the form.
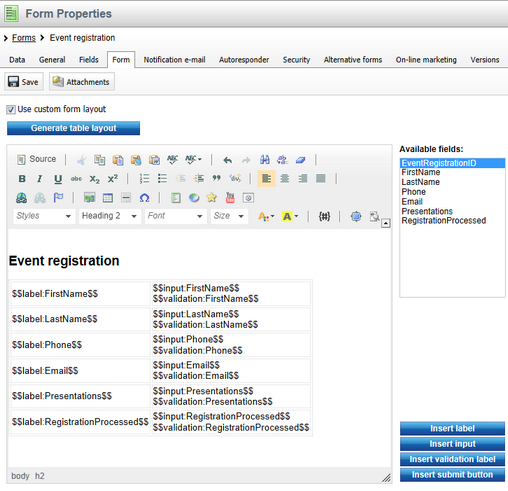
2. In its editing interface, go to the Form tab and check the Use custom form layout checkbox.
3. Click the Generate table layout button. This will generate a table containing all fields of the form, with appropriate labels, input controls and validation controls. Alternatively, you may use the Insert label, Insert input and Insert validation label buttons on the right to achieve the same result. This gives you the option to include just the fields that you want to appear in the form.
4. With the table generated, you may try altering the appearance of the form using actions on the WYSIWYG editor toolbar. For the purpose of this example, add a heading saying Event registration above the form, select it and apply the Heading 2 format through the WYSIWYG editor toolbar. You may also delete the first line of the table (EventRegistrationID), which does not need to be displayed on the public form. The result should look as in the screenshot below.
5. If you wish to include images in the layout, you can upload the files by clicking the ![]() Attachments button in the tab's header. The form's attachments can then be pasted into the layout.
Attachments button in the tab's header. The form's attachments can then be pasted into the layout.
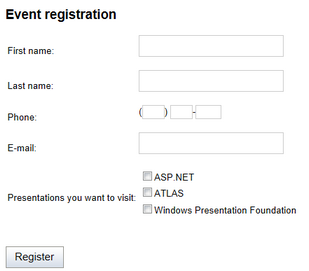
6. Click ![]() Save to save the new layout. Now if you add the form to the live site, it should look as in the following screenshot:
Save to save the new layout. Now if you add the form to the live site, it should look as in the following screenshot: