|
|

Web application installation |

|

|

|

|
|
Web application installation |
|
|

|
|
|
|
Web application installation |
|
|
|
|
|
Web application installation |
|
|
|
|
|
|
||
Now you should see the Kentico Web Installer. If it has not started automatically, you can always run it from Start menu -> All Programs -> Kentico CMS -> Kentico Web Installer.
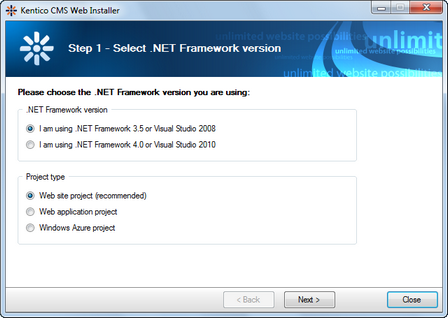
First, you need to choose the version of .NET Framework and Visual Studio and the project type that you wish to use. Click Next.
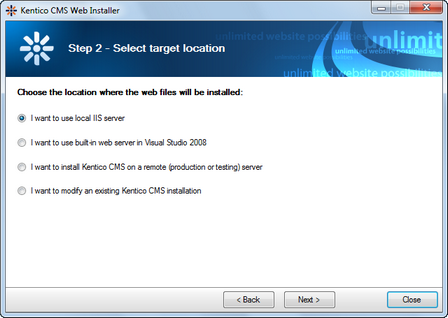
Now choose to use either IIS server or the Visual Studio built-in web server (if you do not have IIS installed). Click Next.
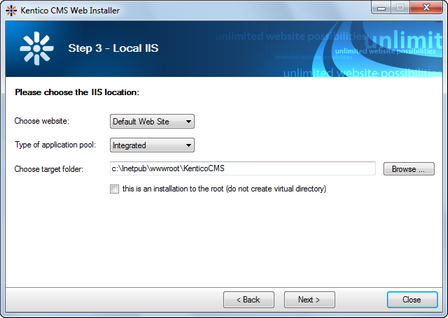
If you choose the IIS server, you can choose the website where the virtual directory will be created and the folder on your local disk where project files will be deployed. The installer will create a new virtual directory on your server and configure it for ASP.NET. Click Next.
Please note: if you are installing Kentico CMS into the root of your website (such as http://www.domain.com) and do not wish to create a virtual directory (such as http://www.domain.com/cms), please check the This is an installation to the root (do not create virtual directory) check-box.
Visual Studio installation
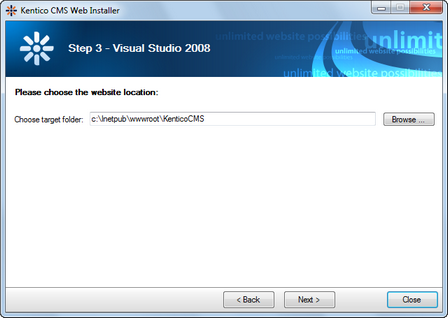
If you chose to use the built-in server in Visual Studio, you only need to specify the local disk where the project files will be deployed. Click Finish.
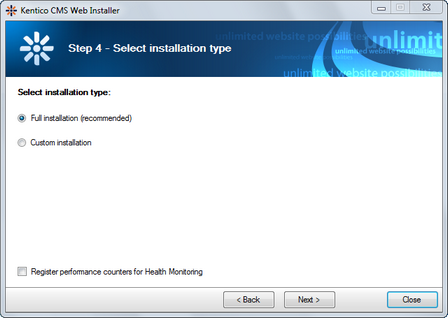
Type of installation
No matter if you chose the IIS or VS installation, the next step after specifying the target folder is the selection of the installation type. The following two types of installation are available:
•Full installation - this is the recommended option for the purposes of this tutorial; in this type of installation, all components of the CMS will be installed.
•Custom installation - in this type of installation, one extra step will be displayed, letting you choose which components you want to include in the installation.
Click Next to start the installation process.
After the setup copies all files, you will see a link that opens the web application in your browser or the web project in Visual Studio. Click the link.
Opening the website in Visual Studio
If you chose Visual Studio installation, the project is opened in Visual Studio:
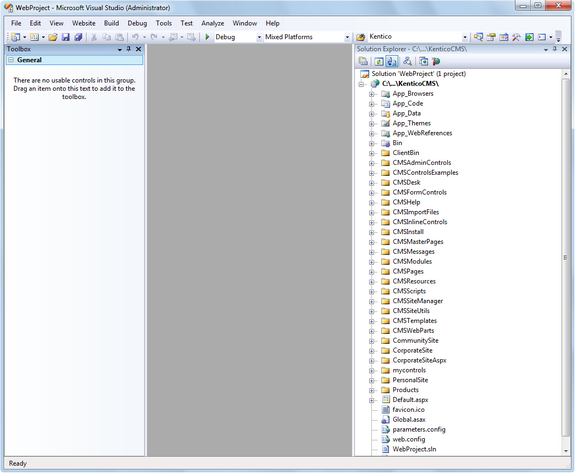
Choose Debug -> Start without debugging from the main menu. The site will be displayed in a new browser window using the built-in web server.
|
If you cannot open the website in Visual Studio
If the link for opening the project in Visual Studio doesn't work, you may need to start Visual Studio manually and choose File -> Open -> Web Site... and locate the project folder on your disk manually. |
