|
|

Custom Search Provider |

|

|

|

|
|
Custom Search Provider |
|
|

|
|
|
|
Custom Search Provider |
|
|
|
|
|
Custom Search Provider |
|
|
|
|
|
|
||
Kentico CMS allows you to write your own SQL search provider that can use a third-party search engine. You can also write a custom search provider when you need to modify or filter search results returned by the standard search engine. Customizations for this provider cannot be done in the App_Code folder. They must be added through a new assembly and registered via a specific web.config key as described below.
|
Please note
This provider only affects the SQL Search engine, the Smart Search engine will remain unchanged. To modify the smart search, create and use a custom search index as described in Modules -> Smart Search -> Managing indexes -> Defining custom index content. |
The following example explains how you can limit the standard search path to a subsection of your website:
1. Copy the CustomSearchProvider project from Kentico CMS installation (typically C:\Program Files\KenticoCMS\<version>\CodeSamples\CustomSearchProvider) to some development folder (not under the web project).
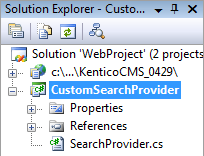
2. Open the CMS web project using the WebProject.sln file. Click File -> Add -> Existing Project and select the CustomSearchProvider.csproj file in the folder where you copied the CustomSearchProvider project. Your Solution Explorer window will look like this:
3. Unfold the References section of the CustomSearchProvider project and delete all invalid references.
4. Right-click the CustomSearchProvider project and choose Add Reference. Choose the Browse tab and locate the bin folder of your CMS web project on the disk. Choose to add a reference to the following libraries:
•CMS.ISearchEngine.dll
•CMS.SearchProviderSQL.dll
•CMS.DataEngine.dll
•CMS.SettingsProvider.dll
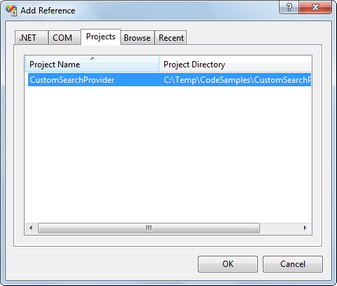
5. Unfold the bin folder in the CMS web project. Right-click the bin folder and choose Add Reference. Choose the Projects tab and click OK to add the CustomSearchProvider project reference:
6. Now you can modify the SearchProvider.cs class and place your code into the Search method. Modify the code of the method to look like this:
[C#]
public DataSet Search(string siteName, string searchNodePath, string cultureCode, string searchExpression, SearchModeEnum searchMode, bool searchChildNodes, string classNames, bool filterResultsByReadPermission, bool searchOnlyPublished, string whereCondition, string orderBy, bool combineWithDefaultCulture) {
//limits the searchNodePath to the /Products section of the website only searchNodePath = "/Products/%";
CMS.SearchProviderSQL.SearchProvider standardSearchProvider = new CMS.SearchProviderSQL.SearchProvider();
DataSet ds = standardSearchProvider.Search(siteName, searchNodePath, cultureCode, searchExpression, searchMode, searchChildNodes, classNames, filterResultsByReadPermission, searchOnlyPublished, whereCondition, orderBy, combineWithDefaultCulture);
return ds;
} |
7. Add the following value to the /configuration/appSettings section of your web.config file:
<add key="CMSSearchProviderAssembly" value="CMS.CustomSearchProvider" /> |
8. Click Build -> Rebuild solution. Go to the live site and try to search for some text using the SQL Search engine, for example on the Corporate Sample site at Examples -> Web Parts -> Full-Text Search -> SQL Search dialog with results. You will notice that the search now only returns results from the /Products section of the website.
|
Tip
This is only an example to show how the standard search engine can be modified. The search path can easily be changed by setting the Path property of individual search web parts or controls. |

