|
|

Creating a virtual directory |

|

|

|

|
|
Creating a virtual directory |
|
|

|
|
|
|
Creating a virtual directory |
|
|
|
|
|
Creating a virtual directory |
|
|
|
|
|
|
||
If you need to install Kentico CMS manually on a remote server or restore it from backup and, at the same time, you run Kentico CMS in a sub-folder (in contrast to running Kentico CMS in the root of the website), you need to create a new virtual directory for the folder where you have the web project files.
|
Application root
The root of the website or the virtual directory must be the same as the folder that contains the web.config file of Kentico CMS. This folder is called application root.
|
Follow these steps to create and configure a virtual directory on your web server:
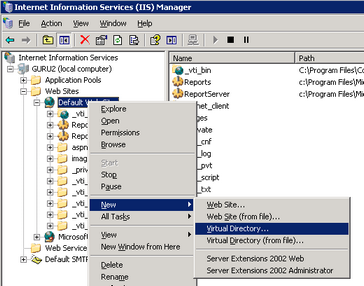
On Windows Server 2003, open Start -> Administrative Tools -> Internet Information Services (IIS) Manager. Right-click Computer -> websites -> chosen website and choose New -> Virtual Directory.
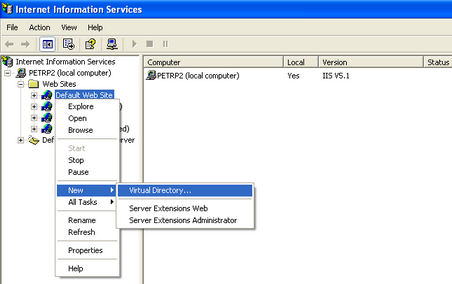
On Windows XP, open Start -> Control Panel -> Administrative Tools -> Internet Information Services.Right-click the Computer -> websites -> Default website item (or other website if you're running multiple websites on the same computer) and choose New -> Virtual Directory....
The rest is same for all operating systems:
1. The Virtual Directory Creation Wizard appears. Click Next on the first screen.
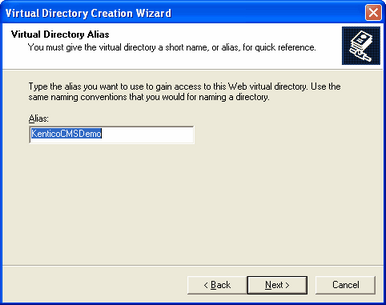
2. Enter the Virtual Directory Alias. If you want the website to run as http://localhost/KenticoCMSDemo, you need to enter alias KenticoCMSDemo. Click Next.
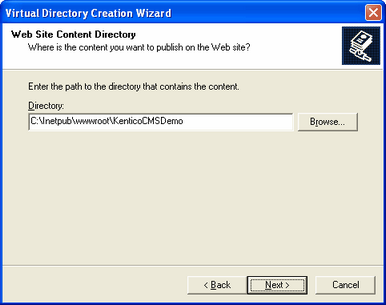
3. Now choose the disk folder on your machine where the Kentico CMS web project files are placed. Please note that you cannot use a remote (shared) disk. The web project files are NOT the files in the C:\Program Files folder - you need to create the web project using the Kentico Web Installer first - see chapter Web Installer for details. Enter the directory path and click Next.
4. Now you need to specify the access permissions for the new virtual directory. You need to choose at least Read and Run scripts and it's recommended that you do NOT allow any other options. Click Next and click Finish.

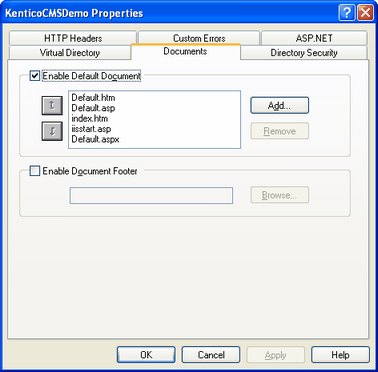
5. Right-click the newly created virtual directory and choose Properties. Choose the Documents tab and make sure the Enable Default Document box is checked and the list contains the Default.aspx file.
6. Choose the ASP.NET tab and make sure the ASP.NET version is 2.0.50727 (the last number may be different). If you cannot see the ASP.NET tab, you may not have ASP.NET 3.5 SP1 installed or registered correctly. IIS 6 may display the ASP.NET version as 2.0.50727 even if you have ASP.NET 3.5 SP1 or higher installed and registered.
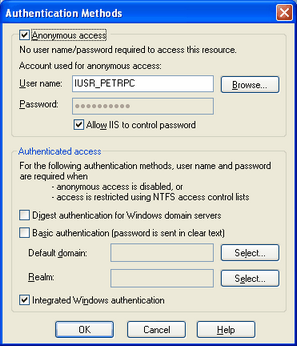
7. Choose the Directory Security tab, click Edit in the Anonymous access and authentication control section and make sure that both Anonymous access and Integrated Windows authentication are chosen.
8. Click OK on all dialogs to save the changes.
