|
|

Creating a static newsletter |

|

|

|

|
|
Creating a static newsletter |
|
|

|
|
|
|
Creating a static newsletter |
|
|
|
|
|
Creating a static newsletter |
|
|
|
|
|
|
||
In this topic, you will learn how to create a static (template-based) newsletter:
1. Go to CMS Desk -> Tools -> Newsletters and click ![]() New newsletter. Enter the following details:
New newsletter. Enter the following details:
•Newsletter display name: My newsletter (this is the name displayed to the users)
•Newsletter name: MyNewsletter (this is the code name used in web parts and code)
•Subscription confirmation: Subscription confirmation template
•Unsubscription confirmation: Unsubscription confirmation template
•Sender name: Enter your full name
•Sender e-mail: Enter your e-mail address
Choose Template based newsletter and use the Newsletter issue template. Click OK. The newsletter will be created and you will be redirected to its Configuration tab, where the following additional options can now be set:
•Base URL - here you can specify the base URL of your website, which is used to convert relative links to absolute URLs in newsletter issues. It may be necessary to set this property in order for the unsubscription links to work properly. It's also useful if you encounter any issues with links in newsletter e-mails, e.g. if you're using a different URL for your editing environment than for the live website. Example: https://www.example.com
•Unsubscription page URL - enter ~/SpecialPages/Unsubscribe.aspx. This page on the sample Corporate site contains a Newsletter unsubscription web part, which ensures the required functionality.
•Send draft e-mails to - the addresses specified here are pre‑entered by default when sending draft newsletter issues for testing purposes. Multiple addresses must be separated by semicolons. Draft e-mails are not included in tracking statistics (e-mail opening and link clicking).
•Send issues via e-mail queue - if enabled, newsletter issues will be sent to the SMTP server through the E-mail queue. This is recommended for newsletters with a large number of recipients. If disabled, the issues will be sent directly to the SMTP server.
•On-line marketing - the properties in this section are related to tracking of the newsletter's e-mails and keeping marketing statistics. Please see the On-line marketing topic for further details.
•Double opt-in - the properties in this section are related to double opt-in subscription. Please refer to the Double opt-in topic for more information.
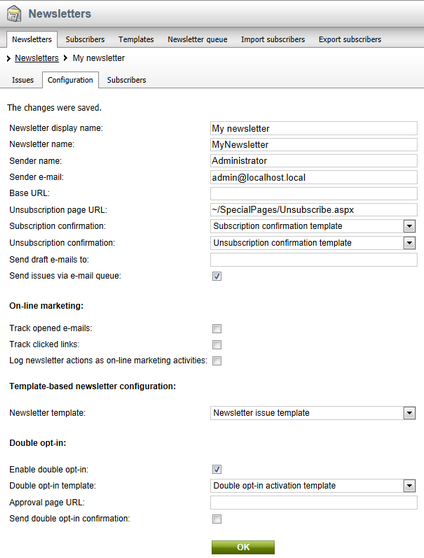
Click OK.
2. Now we will create a new subscriber. Go to the main Subscribers tab (in the top tab menu) and click ![]() New subscriber. Enter the following details:
New subscriber. Enter the following details:
•E-mail - subscriber's e-mail address.
•First name - subscriber's first name.
•Last name - subscriber's last name.
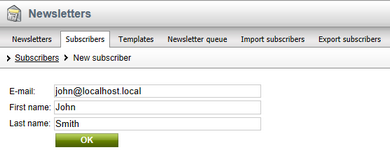
Click OK. The subscriber has been created. Now we will assign this subscriber to our previously created newsletter.
3. Go to the Subscriptions tab, click the ![]() Add newsletters link, check the box next to My newsletter and click OK.
Add newsletters link, check the box next to My newsletter and click OK.
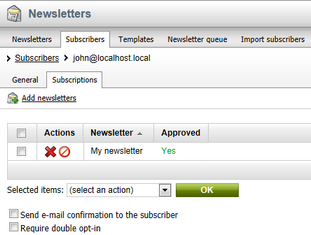
If you check the Send e-mail confirmation to the subscriber box before adding a newsletter to a subscriber, an e-mail informing about the subscription will be sent to them. If you check the Require double opt-in box before adding newsletters, subscriptions to newsletters that have double opt-in enabled will be inactive(rejected) until the user confirms them or the Approve (![]() ) action is manually selected in the list of subscriptions.
) action is manually selected in the list of subscriptions.
4. Your newsletter is configured. You can now create new issues as is described in the Authoring static newsletter issues topic.