|
|

Configuring multilingual and RTL UI |

|

|

|

|
|
Configuring multilingual and RTL UI |
|
|

|
|
|
|
Configuring multilingual and RTL UI |
|
|
|
|
|
Configuring multilingual and RTL UI |
|
|
|
|
|
|
||
Kentico CMS allows you to manage content in any language, including double-byte (eastern) languages, such as Chinese, and right-to-left languages (such as Hebrew or Arabic). All content is stored and published in UNICODE.
If you want the administration interface to be displayed in a different language or at least with different culture settings (e.g. calendar and numeric format), go to Site Manager -> Development -> UI cultures -> All cultures tab and add a new UI culture using the ![]() New UI Culture link.
New UI Culture link.
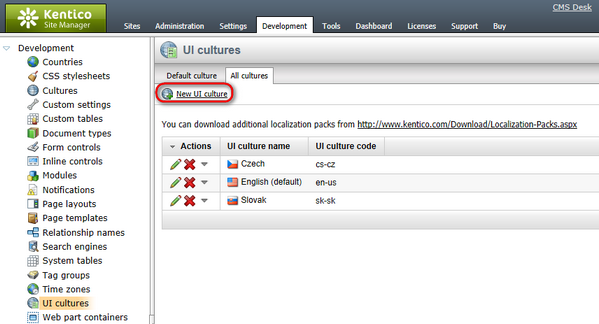
The following properties will have to be entered:
•UI culture name: Hebrew (example - you can use any other culture)
•UI culture code: he-IL (example - you can use any other culture code)
Click OK.
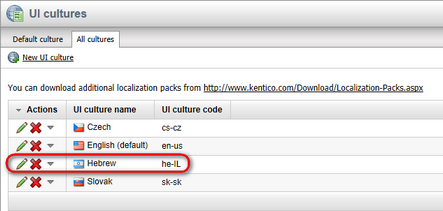
If you switch back to the All cultures tab, the culture you have just created will be shown in the list.
Then create a copy of the <web project>\CMSResources\cms.resx file in the same folder and name it cms.he-IL.resx (cms.<culture code>.resx in general). Now you can start translating the strings that are used to display text in the user interface. Localization packs that contain translated resource files are available for some languages and can be downloaded using the link on the All cultures tab.
Please note: when you make changes to a .resx file, you need to restart the web application using the Site Manager -> Administration -> System -> Restart application button so that the changes are updated in the user interface.
If you want to modify some text in the user interface (including web part dialogs), you can create a custom.resx file and store your strings in this file. The key used to identify the string must be the same as in the cms.resx file. This procedure allows you to modify the strings without worrying that your changes will be overwritten during an upgrade to a newer version.
If you need to customize strings in a non-English resource file, your custom file must use a name like custom.fr-fr.resx for French.
If you need to translate strings used on your website such as form labels, display names of objects or other static text into several languages, please take the following steps:
1. Create a custom default culture string in Site Manager -> Development -> UI cultures -> Default culture tab in the default culture language using the ![]() New string link.
New string link.
The following properties will have to be entered:
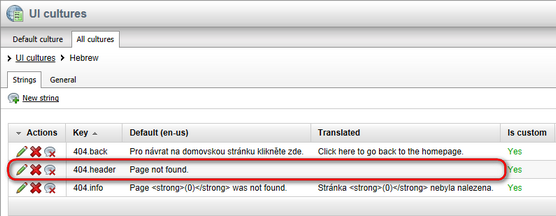
•Key: 404.header (example - you can use any other key name)
•Text: Page not found. (example - you can use any other text)
Please be sure to check the Custom string check box in this case, so that the string will automatically be exported with your website.
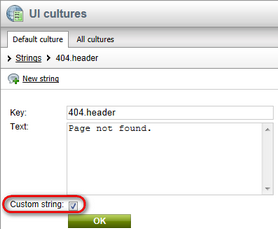
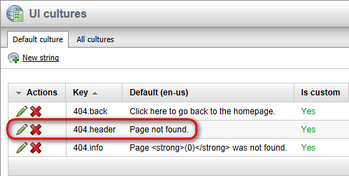
Click OK. A new default culture string will now be displayed in the list.
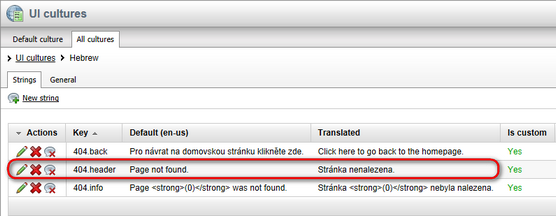
2. To translate the newly created custom string into the desired language, switch to the All cultures tab and choose to Edit (![]() ) the corresponding UI culture. A list of strings in the default language will be displayed.
) the corresponding UI culture. A list of strings in the default language will be displayed.
Choose to Edit (![]() ) the custom string created in step 1. and translate it into the desired language using the Text field of the string. Please do not forget to check the Custom string check box and click OK. When you to edit this particular UI culture again, the string will now be displayed with its translation.
) the custom string created in step 1. and translate it into the desired language using the Text field of the string. Please do not forget to check the Custom string check box and click OK. When you to edit this particular UI culture again, the string will now be displayed with its translation.
You can create a new string in both the default and currently edited UI culture at the same time by using the ![]() New string link on this tab.
New string link on this tab.
3. The resource string and its translation are now created and will be stored in the database. Please see the Localization expressions topic to see how you can insert localized strings into text fields throughout the interface of the CMS. If you need to retrieve the value of a resource string in your custom code, you can use the CMS.GlobalHelper.ResHelper.GetString method.
|
Priority of the resource strings
When looking for a localized strings, the system uses the following priority:
1.database (Site Manager -> Development -> UI Cultures) 2.custom.resx 3.cms.resx
If there are duplicate strings with the same key in all three sources, the system will use the one stored in the database.
To change the priorities, you can add the following key to your web.config:
When this key is added, the priorities are as follows:
1.custom.resx 2.cms.resx 3.database (Site Manager -> Development -> UI Cultures)
|
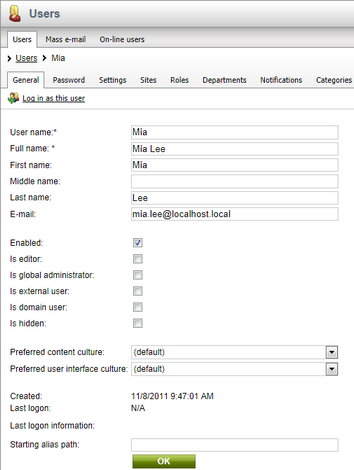
The user interface can be set to a specific culture for each user in the system. To do this, go to CMS Desk / Site Manager -> Administration -> Users, edit (![]() ) the given user and select the required value from the Preferred user interface culture drop‑down list on the General tab.
) the given user and select the required value from the Preferred user interface culture drop‑down list on the General tab.
Users may also select their own user interface culture by going to My Desk -> Account -> Details and setting the Preferred user interface culture.
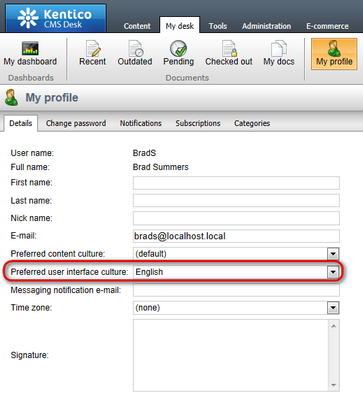
When the user signs out and then back in, the user interface will be displayed according to the new culture settings and with translated strings (once the translation is complete).
The culture of the user interface can also be selected for the current user by clicking the ![]() Change UI culture button located on the top right of the CMS Desk or Site Manager main header.
Change UI culture button located on the top right of the CMS Desk or Site Manager main header.
![]()
This selection also changes the Preferred user interface culture setting of the given user.
