|
|

Creating a new group |

|

|

|

|
|
Creating a new group |
|
|

|
|
|
|
Creating a new group |
|
|
|
|
|
Creating a new group |
|
|
|
|
|
|
||
New groups can be created two ways:
•Site users can create new groups on the live site using the Create a new group link in the Shortcuts menu. This is the most common way and most of the groups on most sites are created this way.
•Alternatively, if you want to pre-define a group manually from the administration interface, this can be done in CMS Desk -> Tools -> Groups.
In the following example, you will learn about both ways of creating groups:
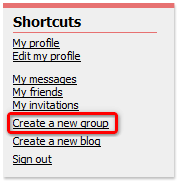
1. Go to the live site and sign in as David with blank password. Click the Create a new group link in the Shortcuts menu.
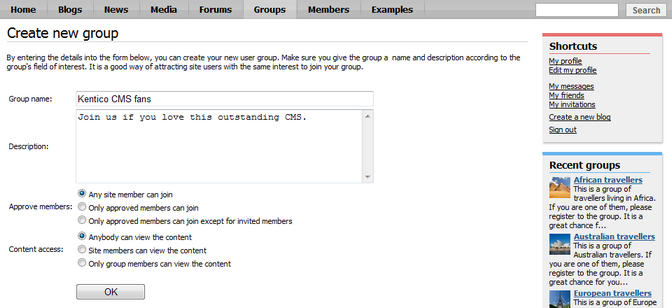
2. Enter the following details into the Create new group form:
•Group name - name of the group displayed on the live site and in the administration interface
•Description - text describing the group, displayed in the list of groups
•Approve members - determines if users can join the group with or without group admin's approval; the last options allows invited members to join without the approval
•Content access - determines who can view content of the group pages
Click OK. You will receive a message saying that your group has been created, but needs administrator's approval.
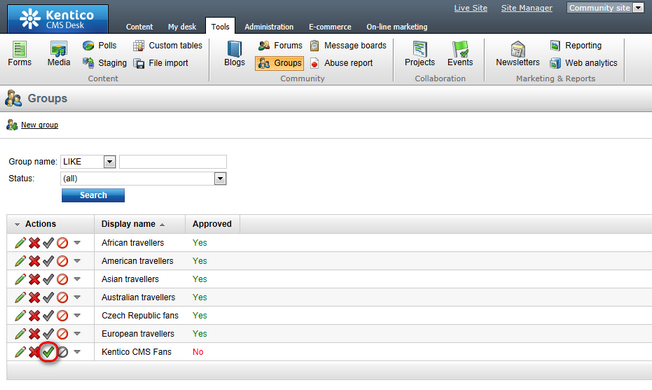
3. Let's switch to the administrator's perspective now. Sign in to CMS Desk (use login administrator with blank password) and go to Tool -> Groups. You should see the new group present in the list, with the Approved column saying No. Click the Approve (![]() ) icon. From now on, the group is approved and published on the live site.
) icon. From now on, the group is approved and published on the live site.
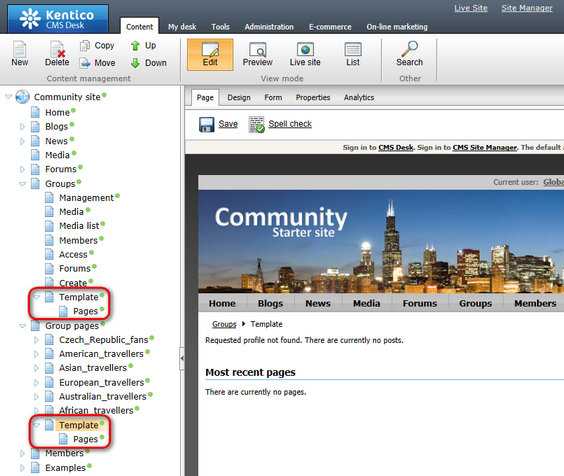
4. Now we will try the second way how groups can be created - pre-defining a group in the administration interface. Our group will be named ASP.NET Developers. At first, we will have to go to CMS Desk -> Content and create the group pages section. Select Groups -> Template from the content tree and copy the document under the Group pages node.
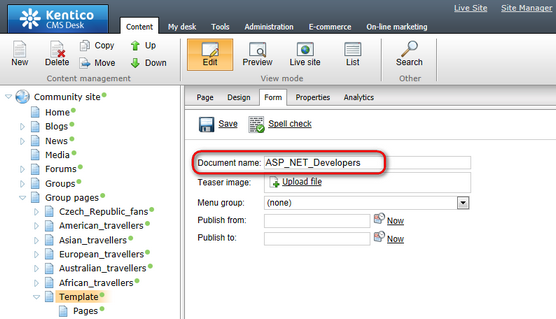
5. Select the new Template document that was copied under the Group pages node. Switch to the Form tab and change its name to ASP_NET_Developers. Click Save.
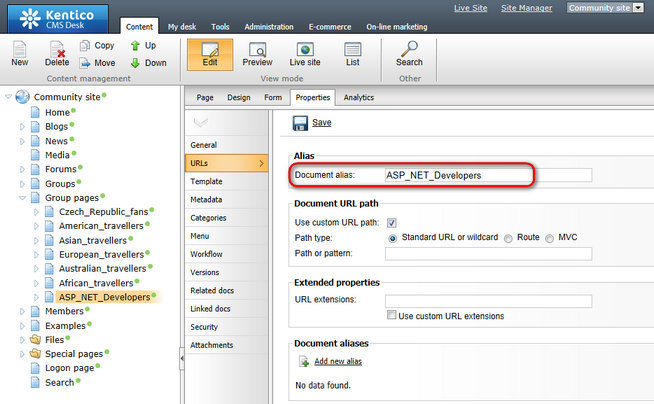
6. Switch to the Properties -> URLs tab and change the Document alias also to ASP_NET_Developers. Click Save.
7. As we have the group pages section prepared, we can proceed to creating the group itself. Go to Tools -> Groups and click the New group link at the top of the page.

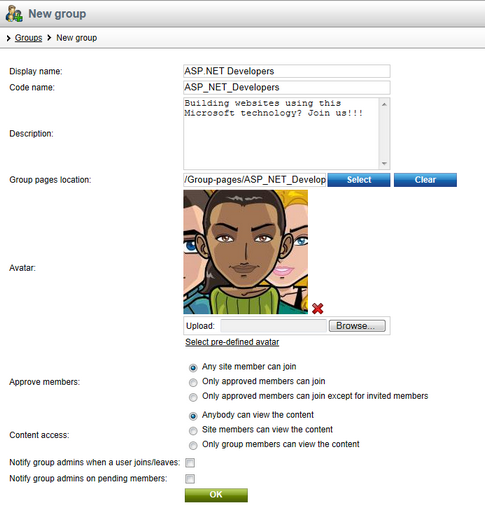
8. The New group form appears. Compared to the on-site form described in step 2, this one contains some additional fields. We won't describe all of them now, you can find detailed descriptions in the context help (accessible via the ![]() icon at the top right corner of the page). Enter the following details:
icon at the top right corner of the page). Enter the following details:
•Display name - ASP.NET Developers
•Code name - ASP_NET_Developers
•Description - Building websites using this Microsoft technology? Join us!!!
•Group pages location - /Group-pages/ASP_NET_Developers
•Avatar - click Select pre-defined avatar and pick one
•Approve members - Any site member can join
•Content access - Anybody can view the content
•Notify group admins when a user joins/leaves - leave unchecked
•Notify group admins on pending members - leave unchecked
Click OK.
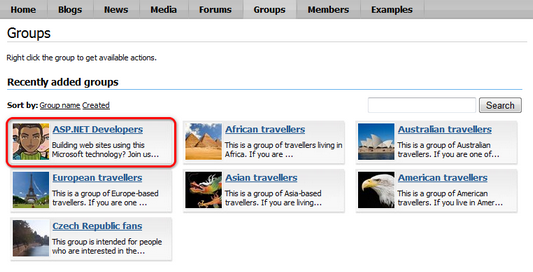
9. The group is now created. If you go to the live site now, you should see it listed in the Groups section, as depicted below. If you enter the group profile, all sections should be fully functional (but of course with no content).