|
Managing tasks |

|

|

|

|
|
Managing tasks |
|
|
|
|
In the Creating a new project topic, you have learned where and how projects can be accessed, created and configured. This topic focuses on the use of tasks. Please be aware that this example is from the point of view of a user with full access to the used project and all of the described actions may not be available for other users.
1. Access the portal and sign in as Brad Summers (user name BradS with a blank password). Navigate to the Departments section, select the IT department, open its Projects section and Edit (![]() ) the sample Network Upgrade project.
) the sample Network Upgrade project.
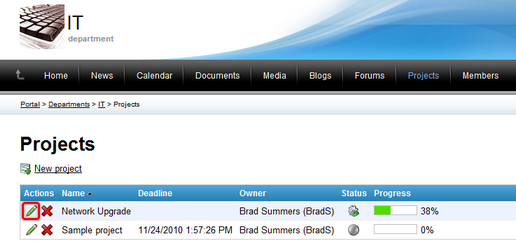
2. You will now see the selected project's editing interface, as described in the previous topic. This project however already has several tasks under it and you can see them displayed on the bottom part of the page.
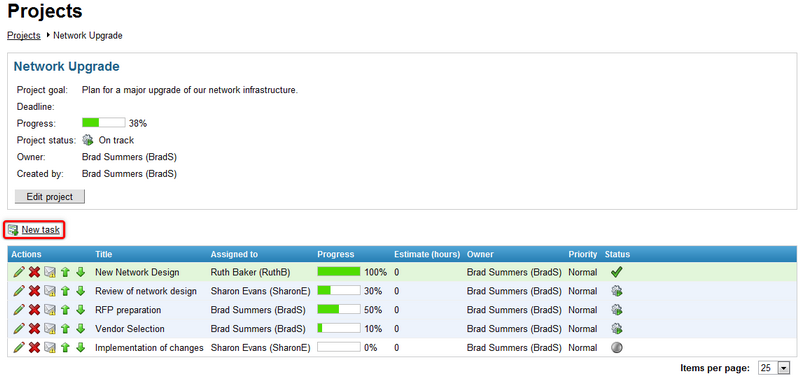
Continue by clicking the ![]() New task link.
New task link.
3. A dialog will appear where you can define the following properties of the new task:
| • | Title - name of the task. |
| • | Owner - allows the selection of the user who will be set as the task owner using the Select button. Tasks that belong under workgroup projects may only select from users who are members of the given workgroup. The owner is usually the user who checks that the task is being completed correctly. To help keep track, the owner of a task automatically receives a notification e‑mail whenever the task is modified. By default, the user who created the task is entered. |
| • | Progress - a percentage representing the amount of progress that has been made on the task. It must be entered manually for tasks. |
| • | Estimate - is used to set an approximate amount of hours that the completion of the task should take. |
| • | Deadline - specifies the date and time before which the task should be complete. Clicking the Now link enters the current time into the field. Alternatively, the Choose date/time ( |
| • | Status - allows one of the predefined task statuses to be selected. Statuses are used to indicate which life cycle step the task is currently in, e.g. when a task is completed, the Finished status should be set to mark it as such. Statuses may cause tasks to be displayed with a specific background color. |
| • | Priority - allows one of the predefined task priorities to be selected to set how urgent the task is. |
| • | Is private - if checked, the task will only be displayed to its owner, the user to whom it is assigned and to users who have permissions to manage the project that the task belongs under (if applicable). |
| • | Assigned to - allows the selection of the user who should complete this task using the Select button. Tasks that belong under workgroup projects may only select from users who are members of the given workgroup. A notification e‑mail is automatically sent to the specified user when the task is created or modified. |
| • | Description - text containing the goal of the task and any other relevant information. Please refer to the Other features -> WYSIWYG editor topic for information about using the available actions above the editing area to format the entered text. |
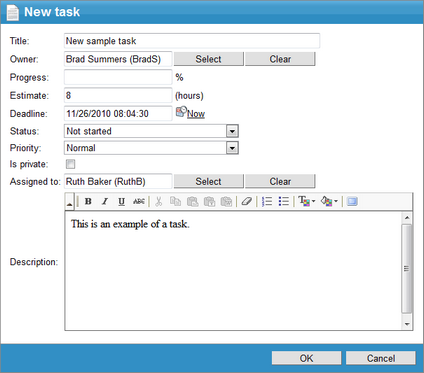
Click OK to confirm the creation of the task.
4. Each displayed task has several possible action buttons that can be applied to it.
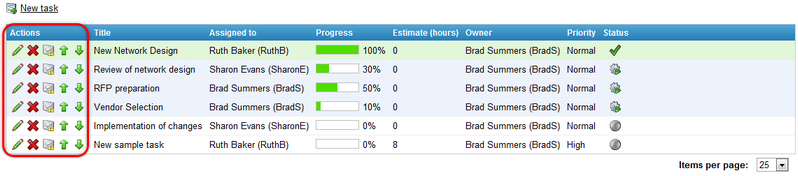
| • |  |
| • |
| • |  |
| • |
The information given in this topic applies to managing tasks not only directly under a project but also on the Projects and tasks section of the employee profile.
Page url: http://devnet.kentico.com/docs/5_5r2/intranetusersguide/index.html?managing_tasks.htm

