|
Creating custom media libraries |

|

|

|

|
|
Creating custom media libraries |
|
|
|
|
In the following example, you will learn how to create a new global media library and publish it on the site.
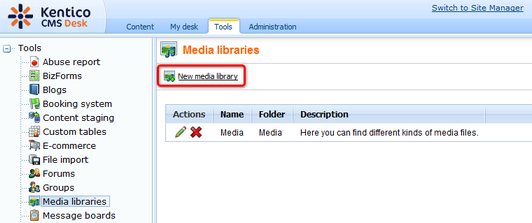
1. Go to CMS Desk -> Tools -> Media libraries and click the New media library link at the top of the page.
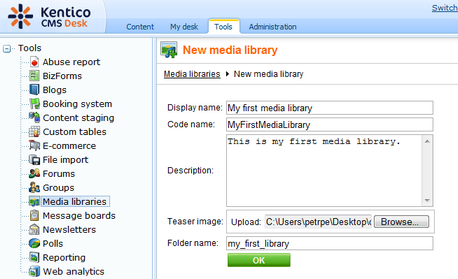
2. Enter the following details into the form:
| • | Display name - name of the library displayed on the live site and in the administration interface |
| • | Code name - name of the library used in website code |
| • | Description - text describing the media library, displayed in the list of media libraries on the live site |
| • | Teaser image - upload some image which will be used as a teaser in the list of media libraries |
| • | Folder name - name of the physical folder in the file system which will contain the library files; it is located under <web project>/<site name>/media/ |
Click OK.
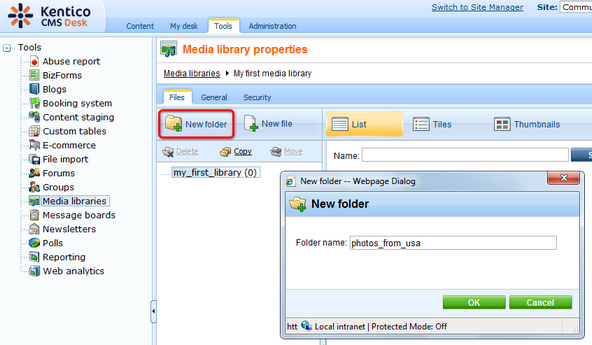
3. You will be redirected to the media library management interface, which is also accessible by clicking the Edit (![]() ) icon in CMS Desk -> Tools -> Media libraries.
) icon in CMS Desk -> Tools -> Media libraries.
First, we will define the folder structure. Select the root of the tree and click the New folder (![]() ) icon. Enter the name of the new folder and click OK. Repeat the procedure so that you have at least two different folders in the library.
) icon. Enter the name of the new folder and click OK. Repeat the procedure so that you have at least two different folders in the library.
Please note: due to ASP.NET architecture, site restart occurs whenever a folder is moved, renamed or deleted. To prevent this, it is a good practice to define the library structure when creating it and not to modify it when the site is already running.
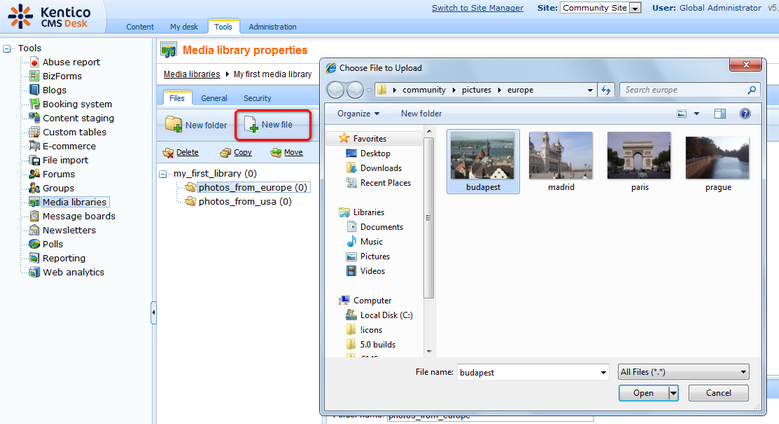
4. Now we can upload the files. Select one of the folders and click the New file (![]() ) icon at the top right corner.
) icon at the top right corner.
The Choose file dialog appears, letting you choose a file from your local disk. Select some image and click Open. Repeat the procedure so that you have several files in both folders.
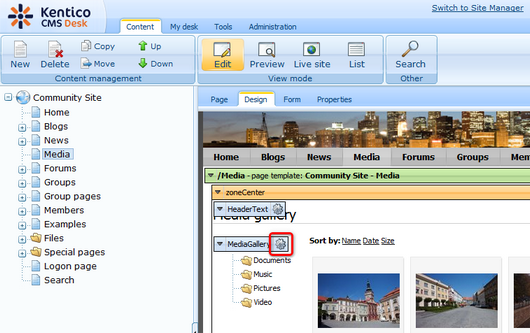
5. Our media library is now finished and we can publish it. Switch to CMS Desk -> Content -> Edit -> Design tab and choose the Media page from the content tree. Choose to Configure (![]() ) the MediaGallery web part.
) the MediaGallery web part.
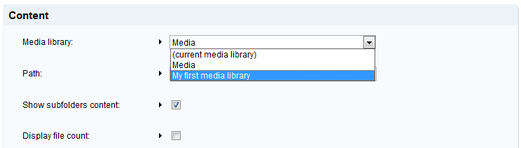
6. In the web part properties window, select your new media library in the Media library drop-down list and click OK.
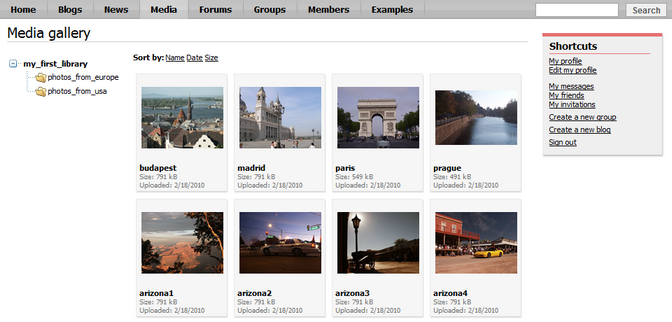
7. If you switch to the live site now, you should see that the original media library has been replaced by your new media library.
Further steps: You have created a new media library, defined its structure, uploaded some files and published it on the live site instead of the original sample media library. As obvious, you can publish only one global media library this way. This might be fine for many sites, but if you want to have more global media libraries published on the site, go to the next chapter where you can find more information on how to achieve this functionality.

