|
Creating the CSS stylesheet |

|

|

|

|
Before we start editing our new web site, we will prepare the CSS styles and images based on our web site template. Go to Site Manager -> Development -> CSS Stylesheets and click New CSS stylesheet. Enter the following values:
| • | Stylesheet display name: My site stylesheet |
| • | Stylesheet code name: MySite |
| • | Stylesheet text: copy and paste all text from the SampleWebTemplate\Styles\main.css file (you will find it in folder C:\Program Files\Kentico CMS\<version>\CodeSamples) |
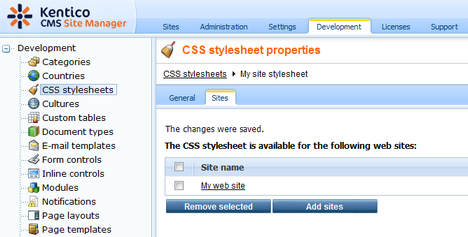
Click OK. Switch to the Sites tab, click Add sites and add the My web site into the list. It assigns the stylesheet to your web site.

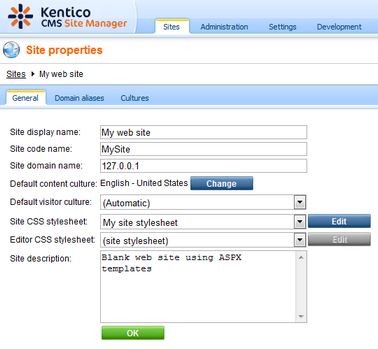
Go to Site Manager -> Sites and edit properties of My web site. Select My site stylesheet in the Site CSS stylesheet drop-down list and click OK. It ensures that the stylesheet is used on all pages of your new web site.

Now copy the folder SampleWebTemplate\app_themes\MySite to <web project>\app_themes. It will ensure that the images are exported as a part of the web site if you decide to move the web site in future. Please note that the folder under app_themes must have the same name as the code name of the CSS stylesheet - MySite.
|
CSS stylesheet URL and relative paths
We have adjusted the image paths in the CSS stylesheet so that they match the target folders in your new web site. In real life, you will need to adjust the paths manually. The URLs of images in the CSS stylesheets are always relative to the CSS stylesheet.
The URL of the CSS stylesheet is
<web project>/CMSPages/GetCSS.aspx?stylesheetname=MySite
which means, you need to link to files in the app_themes folder as
../app_themes/mysite/images/imagename.gif. |
Page url: http://devnet.kentico.com/docs/tutorial_aspx/index.html?creating_the_css_stylesheet_aspx.htm